


in4mo Task Reporter on Android
Here we show how the in4mo Task Reporter mobile application is used on an Android device.
Installing the app
The in4mo application is called ‘in4mo Task Reporter’, and is found in Google’s Play Store:

When you have opened Play Store, there’s a search field at the top of the screen. Press on this field to open the keyboard:

Type ‘in4mo’, or ‘in4mo Task Reporter’, to find the application. Press on the correct application (in4mo Task Reporter) to open the app’s page in Play Store.
Here you can read more about the application, including the system requirements for the app. To install the app, press ‘Install’:

When the app has been installed the install button will be replaced with an ‘Open’ button, which opens the app. When there are updates available to the app, there will be an ‘Update app’ button. You will also find the app together with other apps on the device.
Updating the app
There are different ways of updating apps on an Android device. First of all, you can choose whether you want apps to update automatically, or only manually. This is done from the settings in Play Store. To open the settings in Play Store, go to the home page in the store and then either swipe from the left side of the screen, or press the menu button on the left side of the search field at the top of the screen, then press ‘Settings’. Here you find a setting called ‘Auto-update apps’, which must be activated for apps to update automatically. It is also possible to enable or disable automatic updates for individual apps from the app’s page, where you press the menu button in the top right corner, and check if the ‘Enable auto-update’ checkbox is ticked or not.

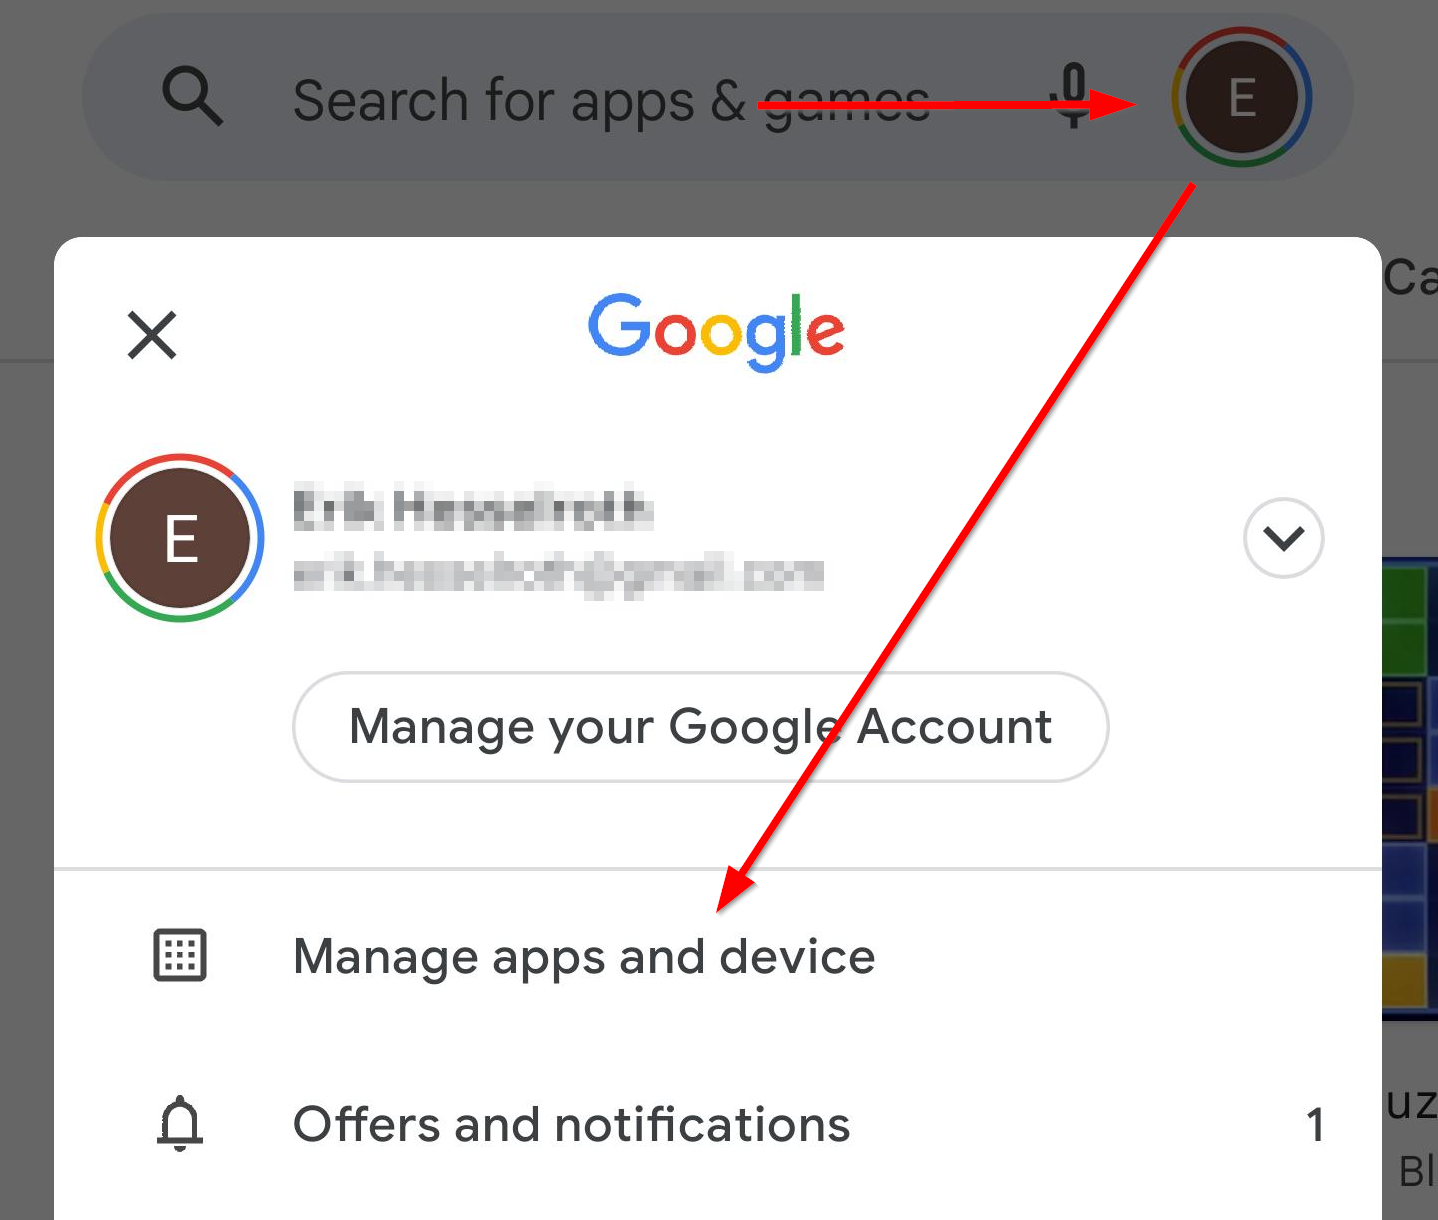
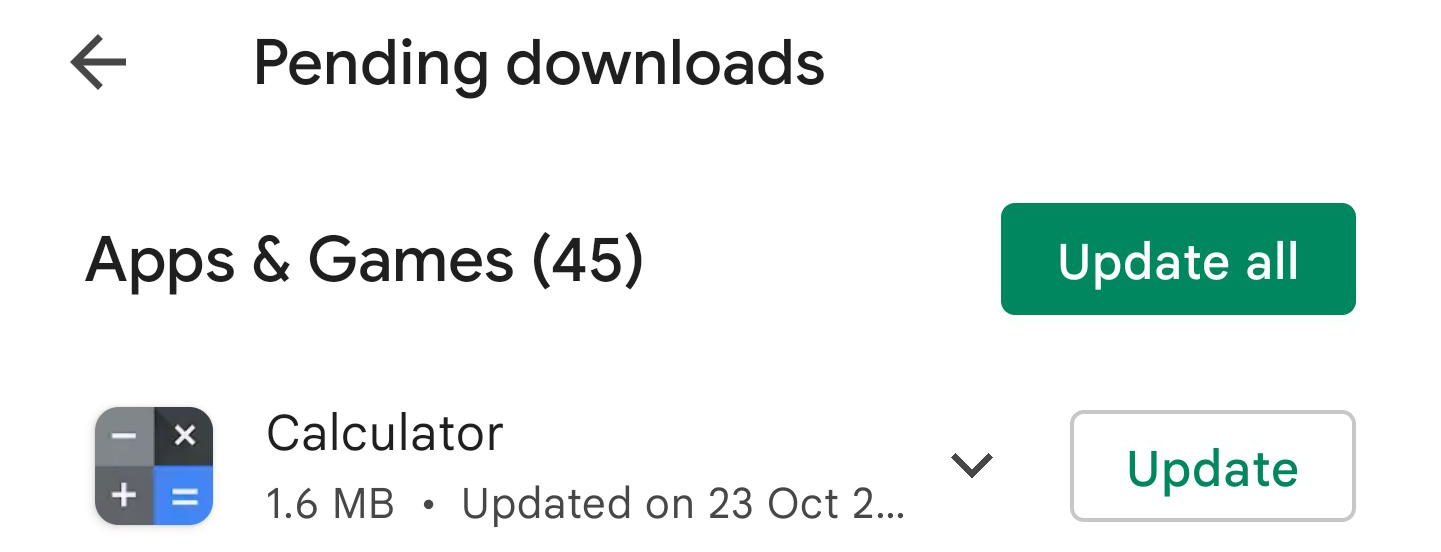
When there’s an update available for the app, you can manually update the app by pressing ‘Update’ on the app’s page. You can also check updates for all apps by pressing the account icon and then ‘Manage apps and device’. There you will find an own section for updates. You can then choose to update all apps by pressing ‘Update all’, or to update individual apps by pressing the ‘Update’ button in the same row as the app you wish to update.
Logging in to the app
The first time you open the app you will see the log in screen:
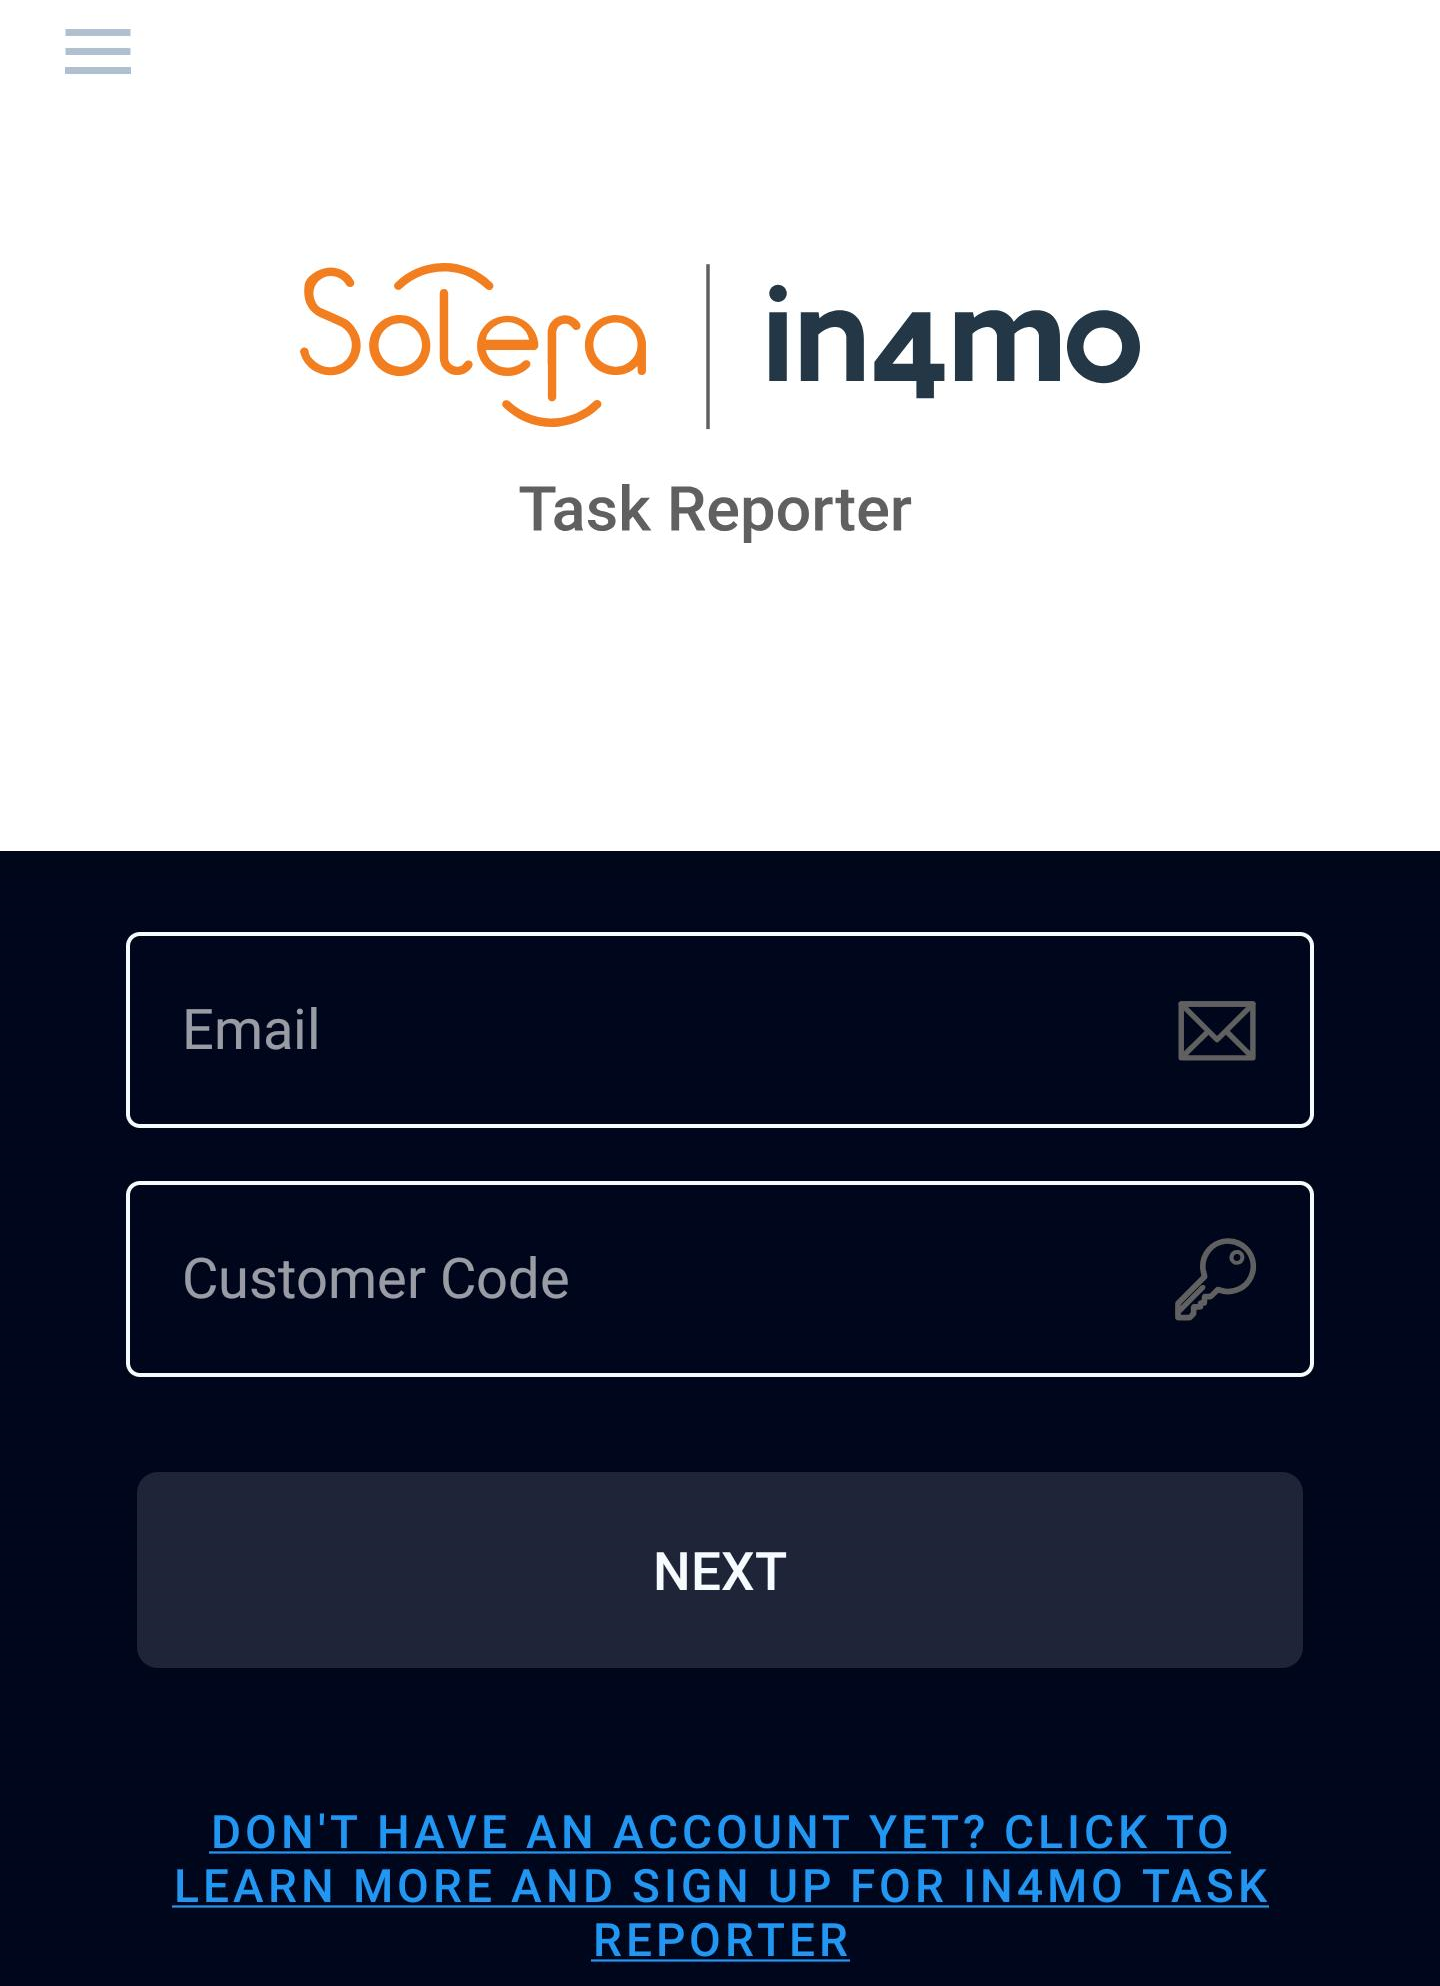
To log in, fill out your email address and the customer code to the portal you are logging in to, then press ‘NEXT’. You then fill out your email address, then ‘SIGN IN’.
Email: This is the email address you are registered in in4mo with, i.e. the email address your user account has been added with in the portal you are logging in to.
Customer code: In in4mo each portal has its own customer code, which is how the app knows which portal to log in to. Each insurance company has its own customer code, while customers of in4mo Contractor has their own customer code, which gives access to all cases. The customer code for the portal you are logging in to can be found in the web portal under ‘Support’.
Password: This is the password you use to log in to the system with, i.e. the same password you use when logging in to the web portal.

Adding more accounts to the app
It is possible to add several accounts to the app. One person might have several accounts in in4mo; one for each insurance company the user has access to.
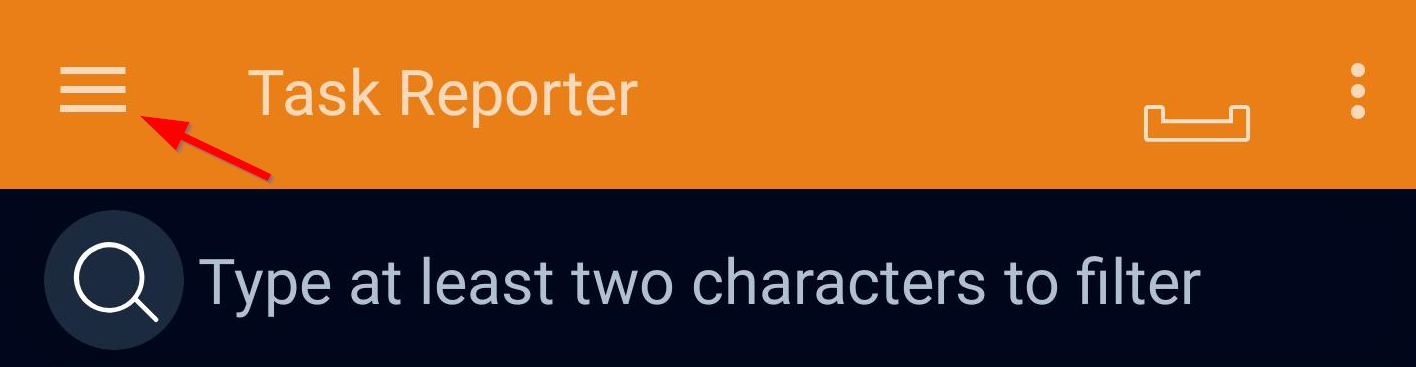
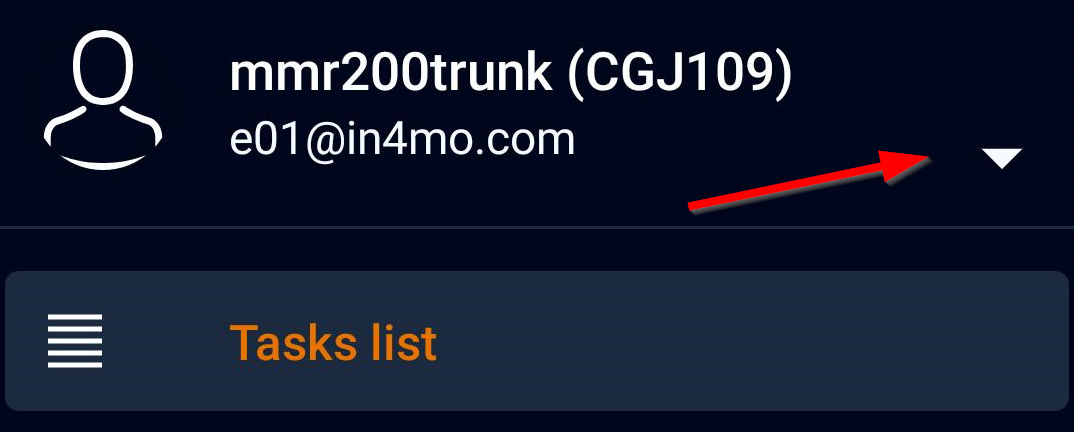
To add more accounts to the app, open the menu in the app by going to the task list (the page which displays your tasks/cases) and then either press the menu button in the top left corner, or swipe from the left side of the screen towards the middle.
In the menu, the active account is shown in the top left corner. Press on the account information, or on the small arrow to the right, to open the account view.
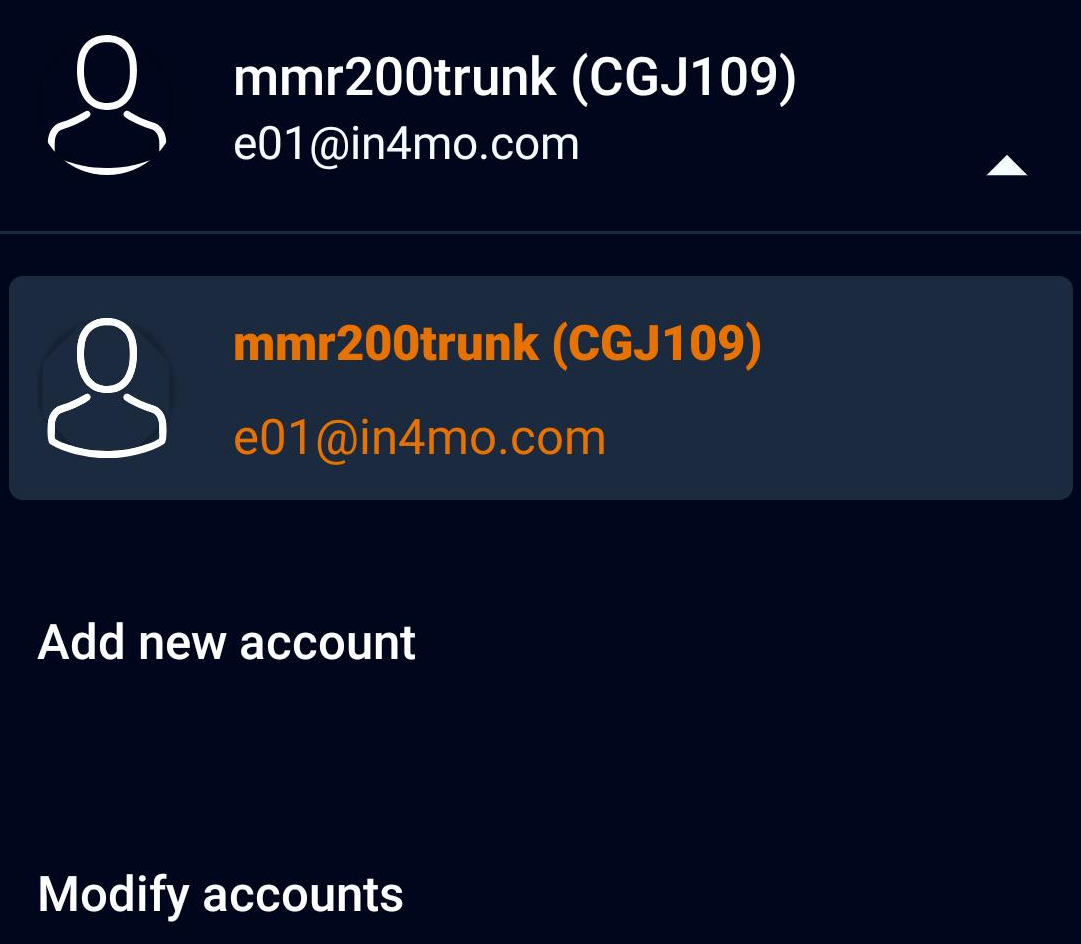
To add a new account, simply press ‘Add new account’, which will open the same login screen as when you first logged in to the app. Once again, fill out your login details, then press the sign in button.
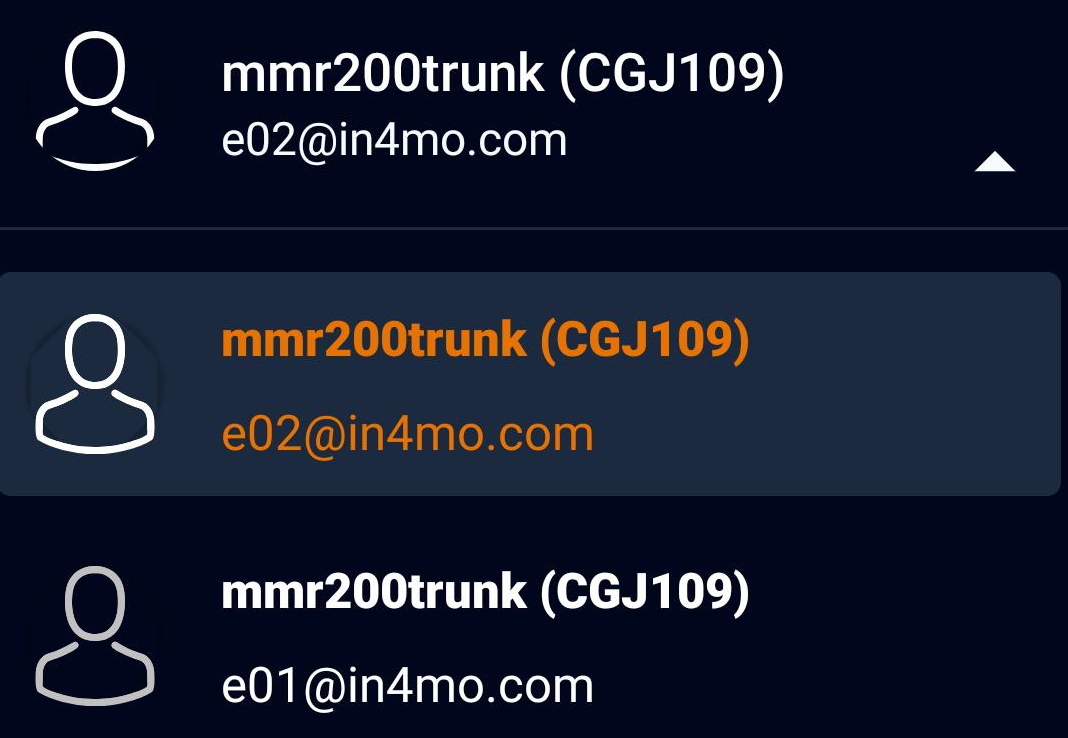
Switching accounts
When you have more than one account added to the app, one account will always be active (the active account will be displayed in the top left corner when you open the menu from the task list). The task list will show the tasks assigned to this account. To switch to another account, open the menu from the task list, and press on the active account in the top left corner to open the account view. You will now see all accounts added to the app. To change account, simply press on the account you want to open. The task list will then show the tasks of this account.
Removing accounts from the app
Sometimes it might be needed to remove an account from the app, for example if you no longer use a certain portal, or if there is an account from a co-worker which is no longer needed. To remove an account from the app, open the menu from the task list, and open the account view by pressing the current account in the top left corner. Then press ‘Modify accounts’.


A list of all added accounts will open. To remove an account, press the red cross on the right side of the account you wish to remove. A message will pop up asking you to confirm that the account will be removed. Press accept, and the account is permanently removed from the app.
Note that it is not possible to remove the active account. If the currently active account is to be removed, you must first switch to another account, and then you will be able to remove the account.
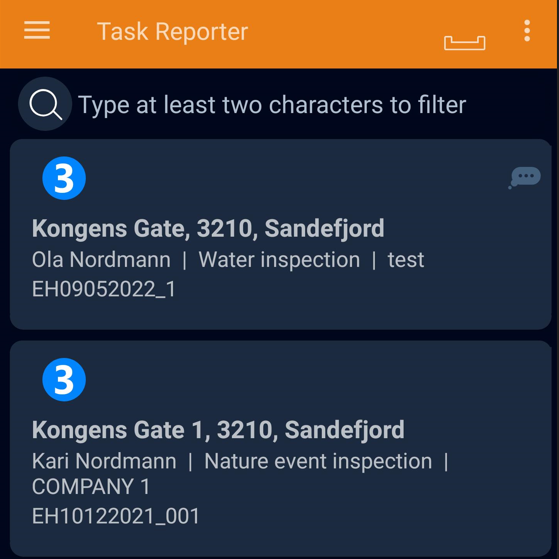
Task list
The hub of the app is the task list. This list displays active tasks assigned to this user. Inspection tasks remain in the task list also after being completed, whereas other tasks are automatically removed from the app when they are marked as completed. It is also possible to remove completed inspections from the app, which will be described later on.
Note that the list shows tasks assigned to the user, not cases, meaning that there can be more than one task from the same case showing on the list. (NOTE: Contractor customers can view this list as a case list or task list)
The task list is updated automatically at certain intervals (as defined in the app settings). It is also possible to update the task list manually by swiping downwards on the screen.
To open a task, simply press on the task you wish to open.
Below you will find a short description of the different elements found in the task list.

Search: The search function lets the user search for specific cases.

Unsent messages: Unsent messages in the app are shown as a number above this icon. Unsent messages are incoming and outgoing messages, in other words, information being sent between the app and the server. More information about unsent messages will follow further on.

Task menu button: This button lets the user remove completed inspection tasks from the app. Inspection tasks remain in the app also after they are completed (whereas other tasks are removed when completed) until the case is closed, as in some cases there might still be a need to access them later. If you have inspections that you no longer have any need for keeping in the app, it is possible to remove them, to save space on the device. Simply select which inspections you wish to remove (selected tasks are marked on the right-hand side. Select the task(s) you wish to remove, then press ‘OK’ to remove the selected task(s).

Unread chat message(s): Indicates that there are one or more unread chat messages in the task/case. When you open a task with this icon, you will automatically be directed to the chat room of that task/case.

Menu button: Opens the app menu, where you can switch between accounts, access app settings, send logs to server, download the latest verserion of the app, and see information about the app.
Task view
When you open a task, the view will be slightly different depending on whether you are using a tablet or a phone.
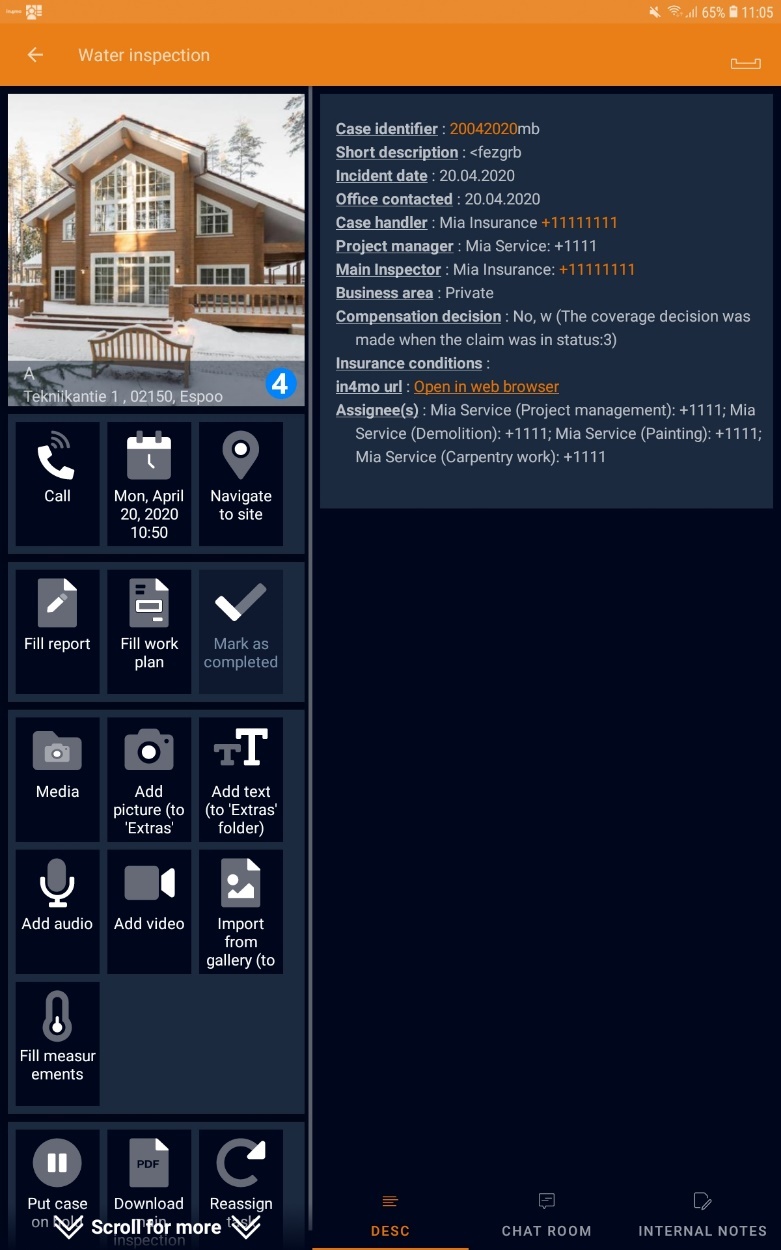
On a tablet you will see the available actions on the left side of the screen and case information on the right side. You can switch between case information and the chat room at the bottom right.

On a phone you will have the same action points, however you will only see the action list, case information or chat room, as opposed to a tablet where you can view two of these at a time.
Task view on a tablet Task view on a phone
Report view
For the most part the functionality is the same on both phone and tablet, however there are some differences. The most important difference is how you report, especially for inspection tasks. On a tablet you open a report view, where you can fill out the report:
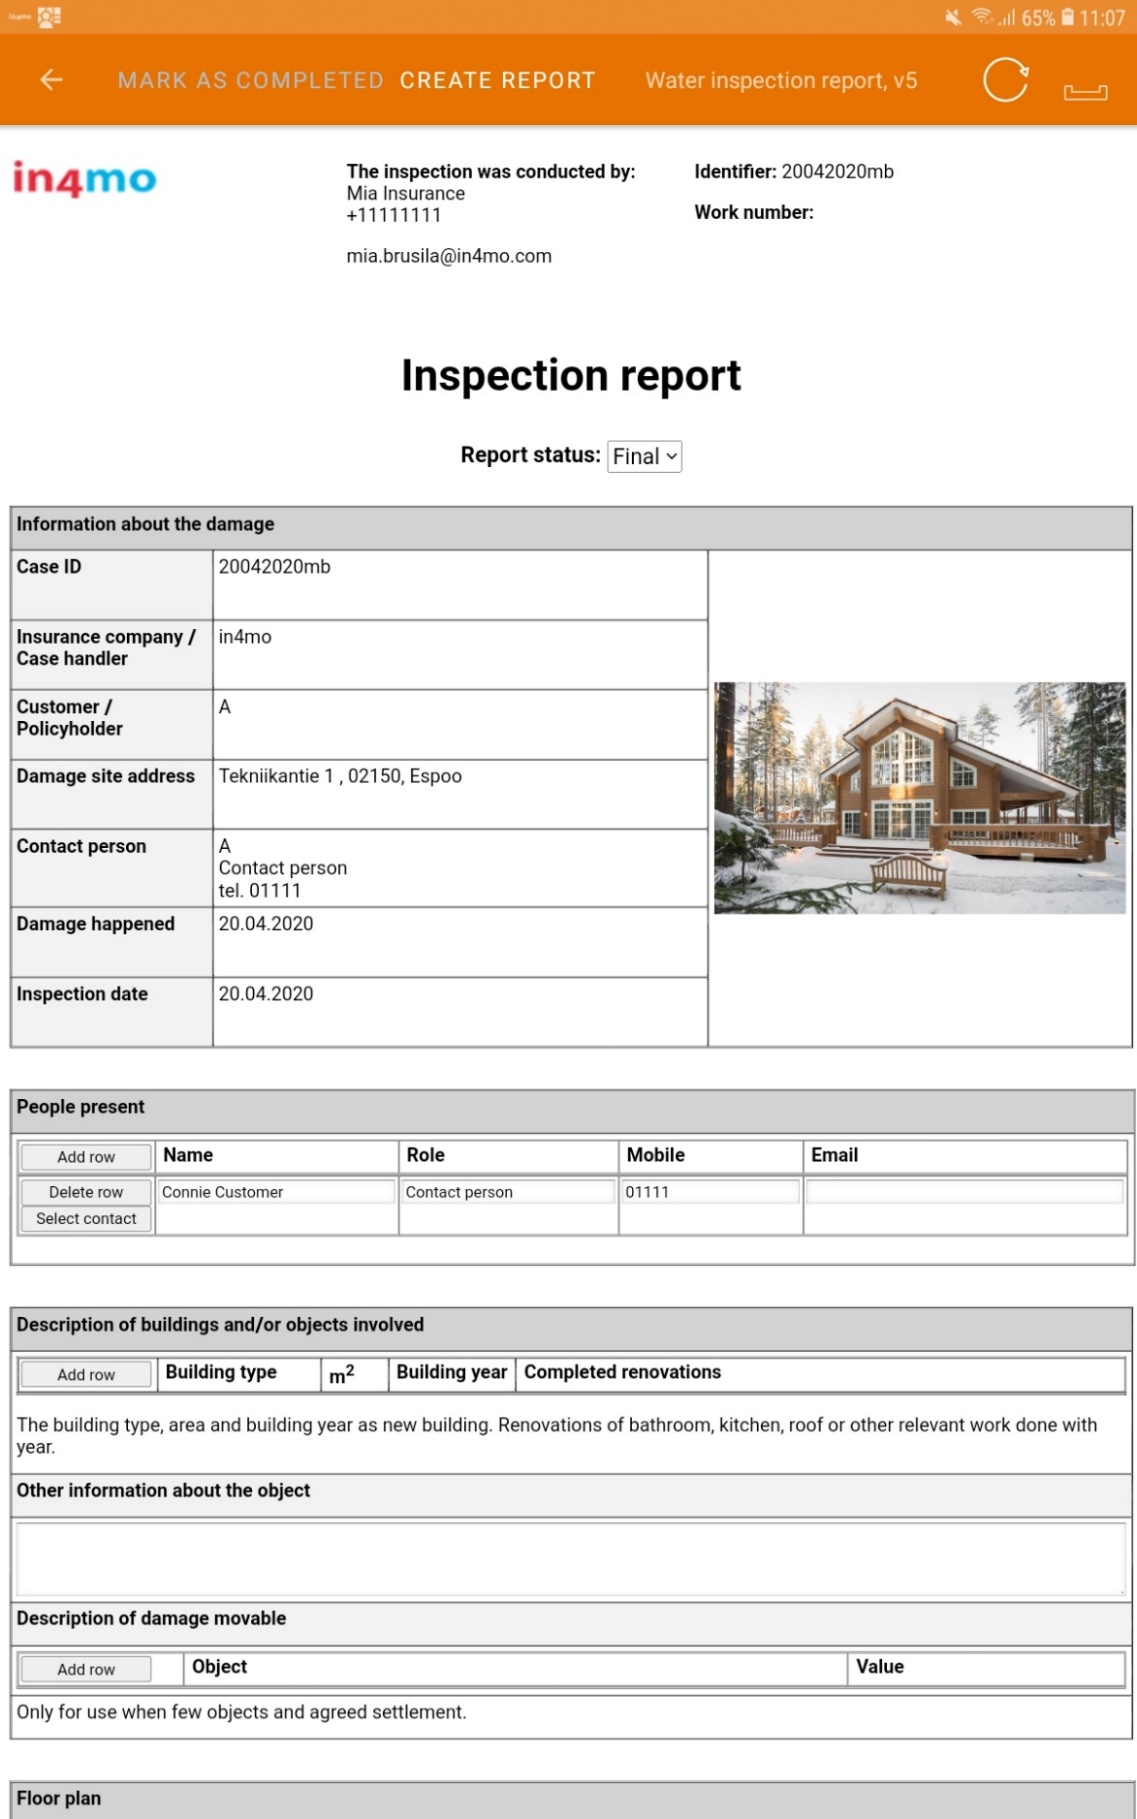
Report view on a tablet
On a phone however you cannot open this report view. Instead, you fill out the individual report items, then typically finish the report later from a computer.
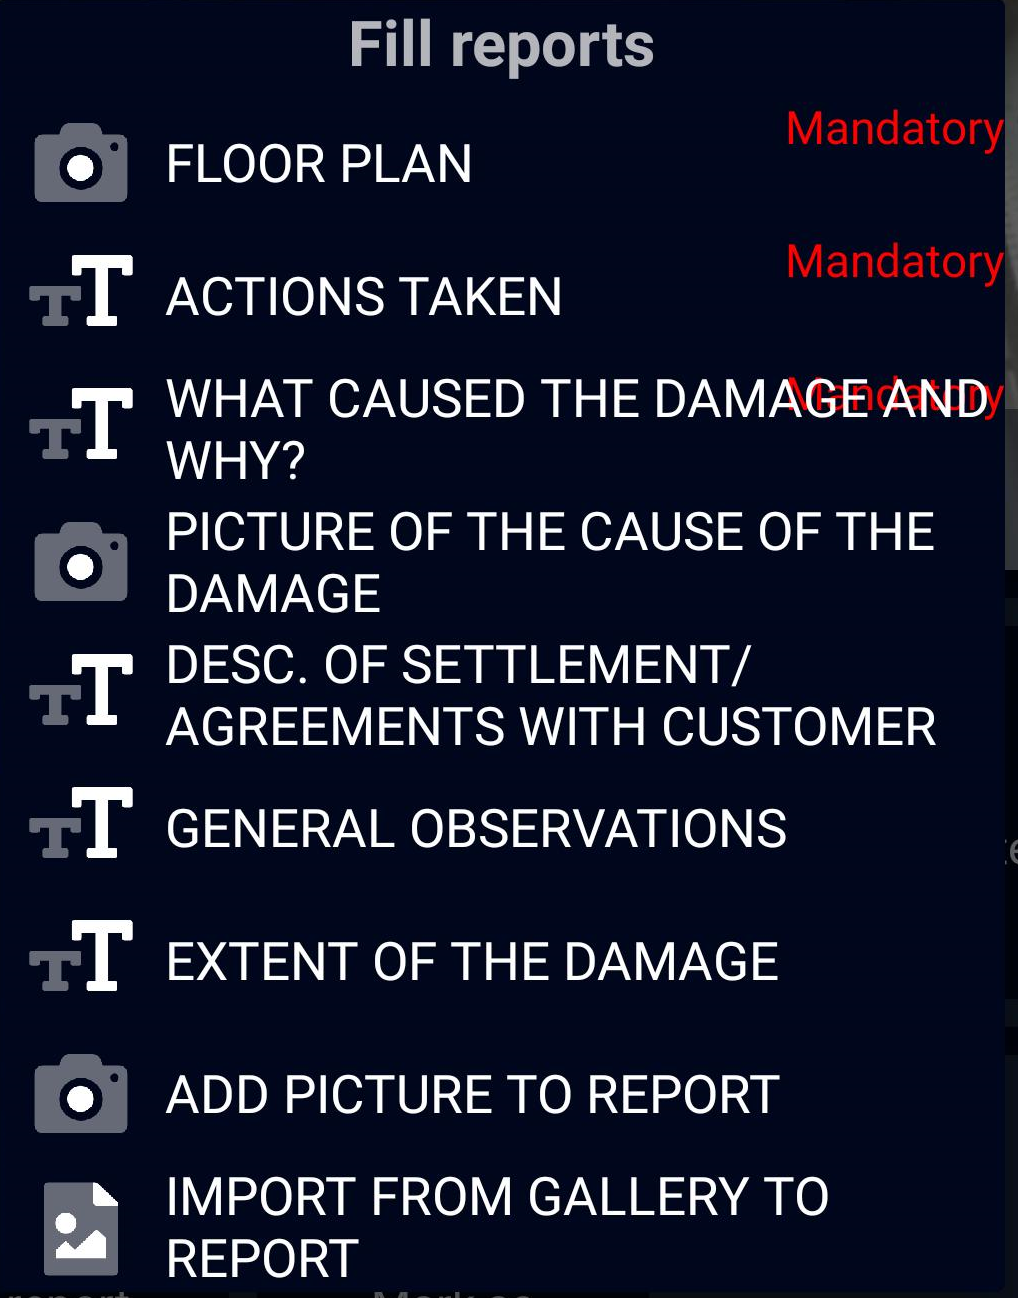
Report view on a phone
Another difference between reporting from a phone and a tablet is that the in4mo FloorPlanner tool, which is used for making floorplans, is only available on tablets, as is the possibility to create and edit work plans from the app.
The action list in a task
Underneath you will see a short description of the different actions that may be available in a task. There are many different possible actions in a task. There can be some variation in what actions are available for a task, depending on the task type.
When you press this button, you will see a list of contacts in a case, both contact person(s) and the case handler. Choose the person you wish to call to in order to call this person.
Here you see the agreed meeting time for the task, if already set. You can press this icon to set the time or change the time if already set.

This icon shows the address to the damage site. By pressing this icon, Google Maps will open with a route from your location to the damage site, which you can use when going there.
Press this icon to open the report view (tablet) or the list of report items (phone). You can then fill out the report/report items. If there’s more than one report available for the task, you can select which reports should be active for the particular task.
(Tablet only)
This icon is used in portals where iCC (in4mo Cost Control) is in use. Press this icon to open the work plan, where you can manage your work plan for the case/task.
This button is used to mark the task as completed. When pressing this button, the task will move from status 3 to 4. Depending on the task type, there may be certain items that have to be filled out before you can press this button.
This button lets you view all images from the task, both pictures taken in a report and other pictures. It is also possible to make changes to pictures.
Pressing this button opens the camera on the phone. When you’ve taken a picture, you can choose to add text to the picture, discard the picture and take a new one, or send the picture to the portal. If you want to close the camera without taking or sending a picture, press the back button on your device. Pictures taken from this function will be added to the ‘Extras’ tab in the case and won’t be included in the report, although it is possible to move pictures to Multimedia from the web portal later, after which they will be included in generated reports.
Pressing this icon will open a text field and the keyboard. You can then write what you want and send to the portal. Text written using this function will be added to the ‘Extras’ tab in the case and won’t be included in the report.
By pressing this icon, the app will start recording sound. You can stop the recording by pressing the stop symbol and add text to the recording if you wish. When the recording is done you can either send it to the portal, where it can be found under Multimedia, or you can discard the recording by going back. You also have the possibility to discard the recording and start a new one by pressing the red circle, or you can listen to the recording before you do anything else by pressing the play symbol.
By pressing this icon, the app will start recording a video. You can stop the recording by pressing the stop symbol and add text to the recording if you wish. When the recording is done you can either send it to the portal, where it can be found under Multimedia, or you can discard the recording by going back. You also have the possibility to discard the recording and start a new one by pressing the grey circle, or you can watch the video before you do anything else by pressing the play symbol.
This button opens the device’s camera roll, allowing you to import pictures taken through other means than in in4mo. These images will be added to the extras folder for the task, and can be moved to the multimedia folder if they are meant to be included in the report.
By pressing this icon, you get the opportunity to fill out measurements related to humidity.
Depending on the task type and status of the task, it may be possible to put the case on hold. When a case is on hold working times won’t be recorded.
If an inspection report has already been uploaded in the case, it is possible to download this report to read it.
By pressing this icon, you can reassign the task to another person in the company, i.e. set another person as the responsible person for the task.

This icon updates the information in the task, meaning that if information (such as report items or work items) has been added or updated elsewhere than on this particular device (for example from the web portal or phone, when otherwise reporting from the tablet), then this information can be synchronised before you continue reporting. This synchronisation may also happen automatically when you open the report view or work plan.
App settings
There are many different settings in the app. To open the settings, go to the menu in the app by going to the task list, where you either press the menu button in the top left corner, or by swiping from the left side of the screen towards the middle. From the menu that opens on the left side of the screen, press ‘Settings’ to open the settings.


The different settings are found under different categories. Below is a short description of each setting.
Interface settings
Language Settings: Here you can choose the language of the app. By default, ‘Same as on device’ will be selected, meaning the same language as you have on the phone/tablet itself. By pressing this setting, you can choose a specific language.
Outbox: Here you can see a list of all the unsent messages in the app. If there are no unsent messages, the outbox will be empty.
Download report items: When you press this button all report templates will be downloaded, in order to make sure that all templates are up to date on your device. If you experience any problems with report templates or mandatory fields in the reports, you can try to press this item and see if this resolves the issue.
Picture taking settings: Here you can choose whether you want to use in4mo’s camera application, or the device’s standard camera application. We advise that you choose in4mo’s camera application, but if you ever experience problems with the camera, you could try to change camera settings here, and see if that solves the issue.
Video capturing settings: Here you can choose whether you want to use in4mo’s camera application, or the device’s standard camera application. We advise that you choose in4mo’s camera application, but if you ever experience problems with the camera, you could try to change camera setting here, and see if that solves the issue.
Server settings
These settings cannot be changed, but you can find information about the server used. Normally this is not of interest to users, however it could be useful should there be problems with a Wi-Fi firewall blocking in4mo.
General settings
Update interval settings: Here you can choose how often the app should update automatically or switch off automatic updates.
Location finding enabled: Here you can disable sending of the device’s location when taking the site visit picture.
Autostart on reboot: Determines whether the app starts automatically when the device is switched on.
Calendar integration enabled: Determines whether the app is allowed to add events to a calendar on the device.
Please select a calendar to use for new events: Here you can choose which calendar events should be added to.
Report usage and errors: Here you can opt-out from sending analytic events to in4mo servers.
Notify me when receiving new chat: Here you can choose whether you want a notification when you receive a new chat message or not.
Notify me about new cases: Here you can choose whether you want a notification when you receive a new case or not.
Hardware/software rendering of report: Here you can choose whether to use hardware or software rendering of report. Should only be changed if told so by in4mo support, in case of problems with showing information in report.
Default mode for showing workplan: Determines whether you want the work plan to use a room-based or a task-based structure by default. You can change the structure also when you have the work plan open in a case.
Problems with the app
You may at some point experience some problem with the app. Below some of the typical problems encountered in the app are described, and what you can do if you encounter any of these problems. A general advice regardless of the issue is to first check that the app is updated to the latest version, and if it isn’t, try to update it and see if that resolves the issue.
If you do not find what you are looking for in the list below, or the tips below did not solve the issue, contact your local in4mo support team.
Problems logging in
- If you have problems logging in, you are most likely trying to log in using the wrong username (email) or password, or the wrong customer code. You can control your username and password by trying to log in to the web portal. If you don’t remember your password, you can go to the log in screen of the web portal and click the “Forgot your password?” button to reset your password. When you have created a new password, you can try to log in to the app again. The customer codes you find under the support pages in the web portals.
- It is also possible that the problems are caused by having no internet connection, or by a firewall blocking in4mo. If your internet connection is working fine outside the app, you can try to switch off the Wi-Fi, so that the device is connected only to a mobile network and try again. If you were able to log in this way, it may be that your firewall is blocking in4mo.
Task(s) missing from the task list
If you have received a new task but cannot find it in the task list in the app, there can be different reasons for this.
- One of the most common reasons for this problem is that the task has been assigned to your company, but you have not been selected as responsible for the task. Open the case in the web portal and check that you are set as the responsible for the task. If you have more than one account in a portal, check also which of your accounts is set as the responsible.
- Another common reason for missing tasks is that the compensation decision has not yet been made in the case. Inspection and first aid tasks appear immediately in the app when assigned, whereas other tasks only appear after a (positive) compensation decision has been made in the case. You can check the status of the case by opening the case in the web portal.
- If you have more than one accounts on the app, check that you have the correct account open.
- Sometimes a task is on the task list, but difficult to find (due to a long task list). If you have a long task list and can’t find a certain task, try searching for the task using the search field.
- Try to update the task list manually by swiping downwards on the screen. When you do this, you should see the number of unsent messages rise in the top right corner, then after a moment decrease until it shows no number. When the unsent messages are gone, the task list is updated.
Report items are not sent from the device to the web portal, or the status for the task does not match in different places
This problem is usually caused by messages not going through, which could be caused by different things. Every action you do in a task (e.g. call customer, take picture from damage site, status update, add pictures or text in the report) creates a message, which is indicated in the top right corner of the app. When filling out an inspection report in particular, there will typically be a lot of messages created, which will normally be sent to the portal quickly, however, sometimes they are not sent from the app, and this can be seen in the top right corner when the number of unsent messages gets bigger and bigger.
When you have unsent messages, and especially when you have many, it is important that you do not delete the app, as messages are saved in the app until they have been sent to the server. In other words, all unsent messages will also be deleted if you delete the app and they cannot be restored. If you are not able to resolve the problem using the tips below, contact your local in4mo support team.
- Check that the internet connection is working on your device. If you are connected to a Wi-Fi network, it is also possible that the firewall is blocking in4mo. This can be tested by disabling Wi-Fi, and being connected only to a mobile network (if the device has a sim card), and then see if the number of unsent messages starts going down. If this solves the problem, in4mo must be whitelisted in your firewall. If you are only connected to a mobile network, you could try logging in to a Wi-Fi network and see if the number of unsent messages starts to decrease.
- There could be an unsent message blocking other messages. Messages are sent in chronological order from when they are generated, and if one message for one reason or another doesn’t get sent from the app, it will block any message created after it. It is possible to remove individual unsent messages. Messages that are deleted are deleted permanently and cannot be restored. It is therefore advised to never do this without first contacting in4mo’s support, who will investigate the issue and give further instructions.
I don’t receive notifications about new messages or tasks
- There are two different places where you should check the notification settings. Under the settings in the in4mo Task Reporter app there are separate settings for whether or not to receive notifications for chats and for new cases. Check that these are activated.Next, go to the device settings. Here you should look for a list of apps with app permissions etc. Exactly where you find this can vary between different devices. When you find this section of the settings, look for Task Reporter, and press on it. You will see that there app has its own settings for notifications. Press ‘Notifications:
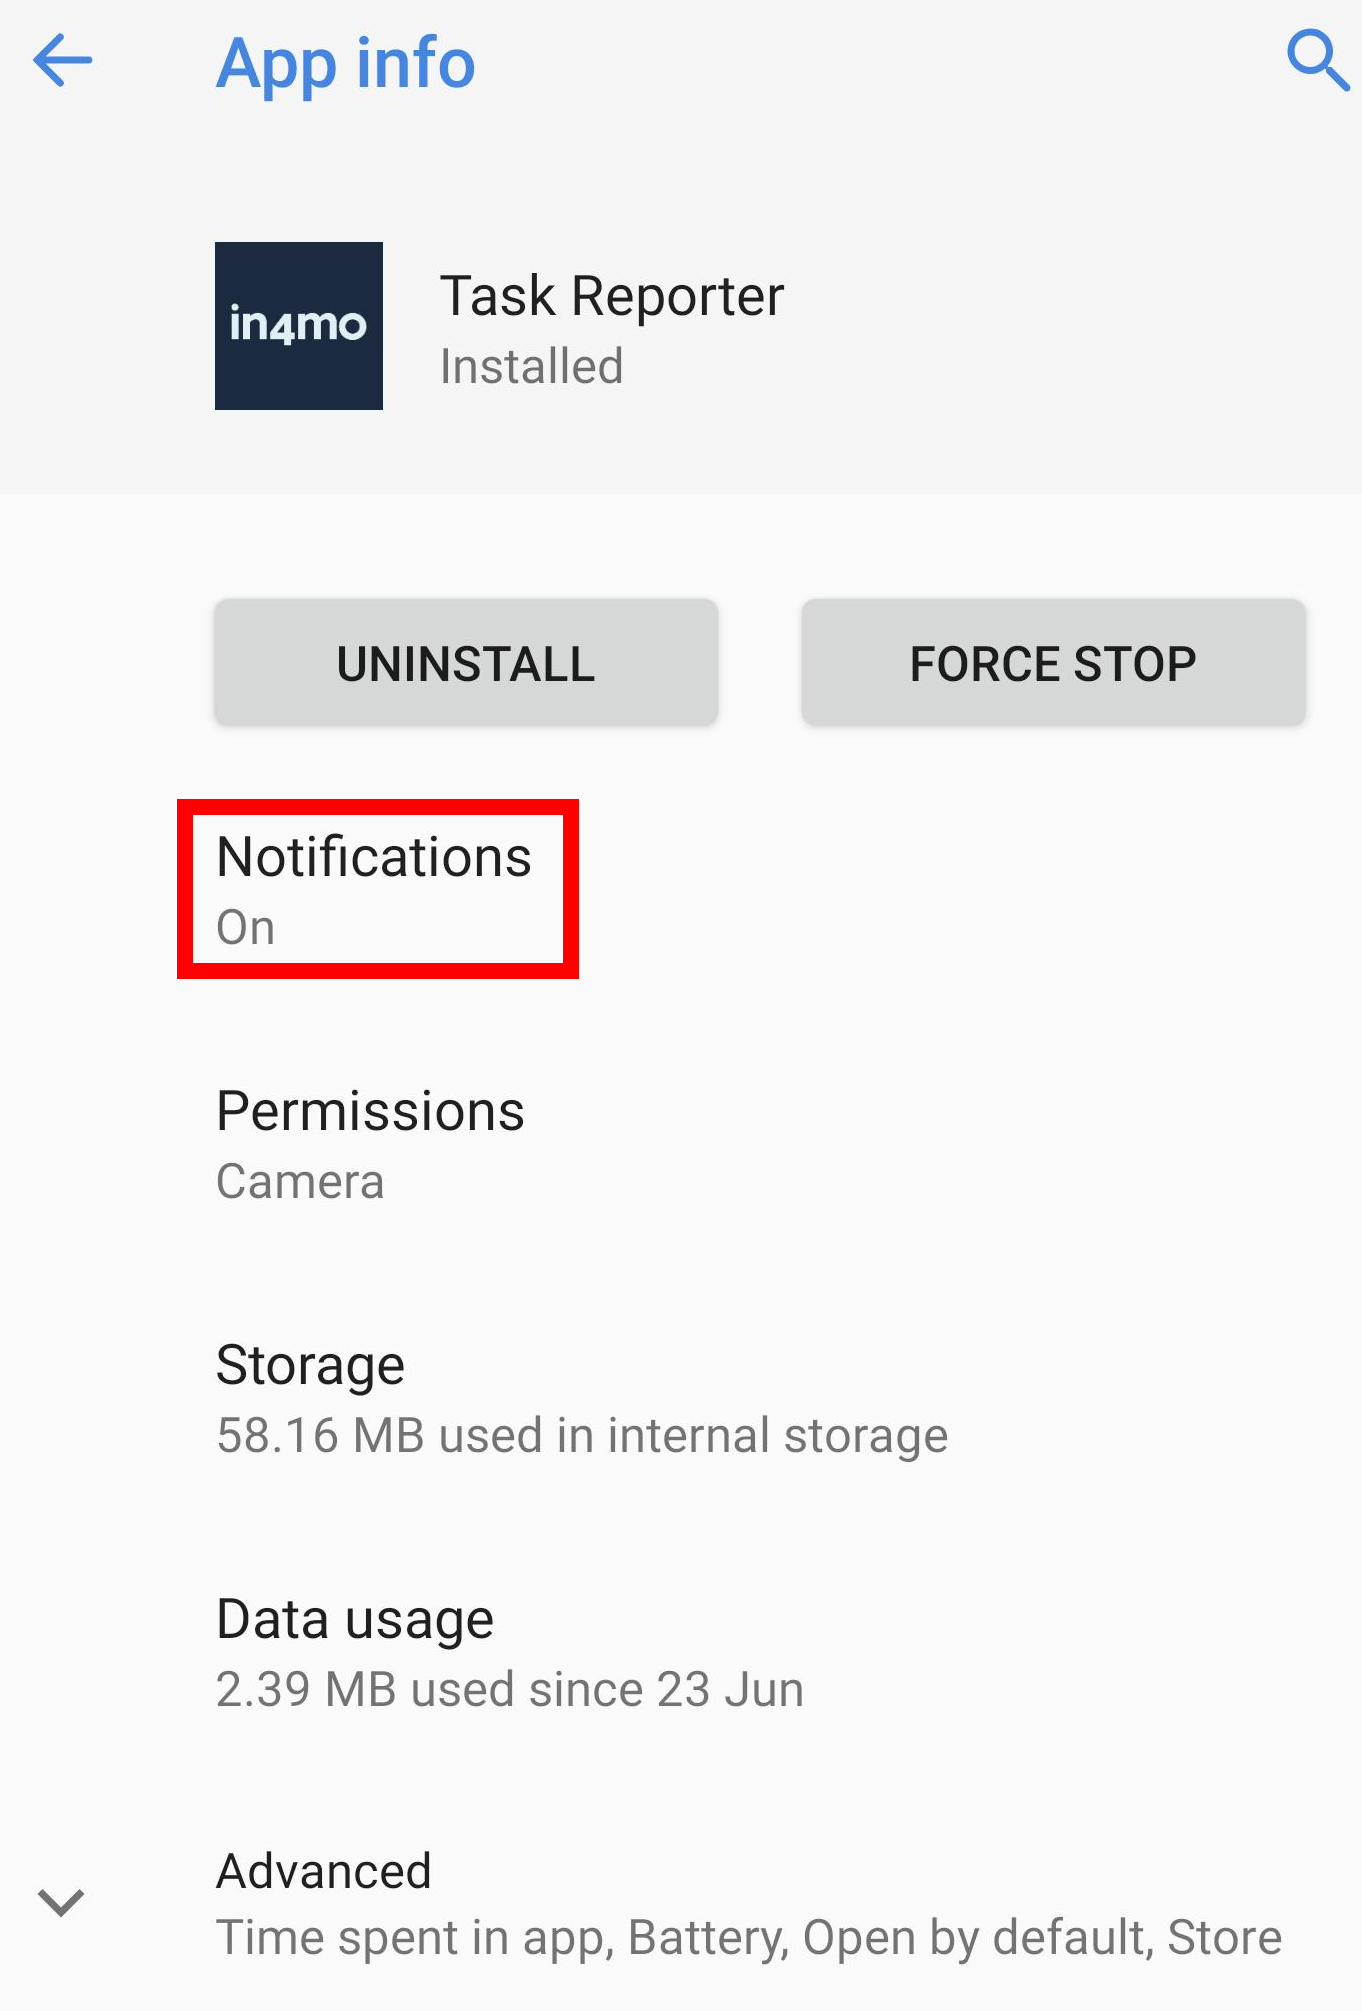
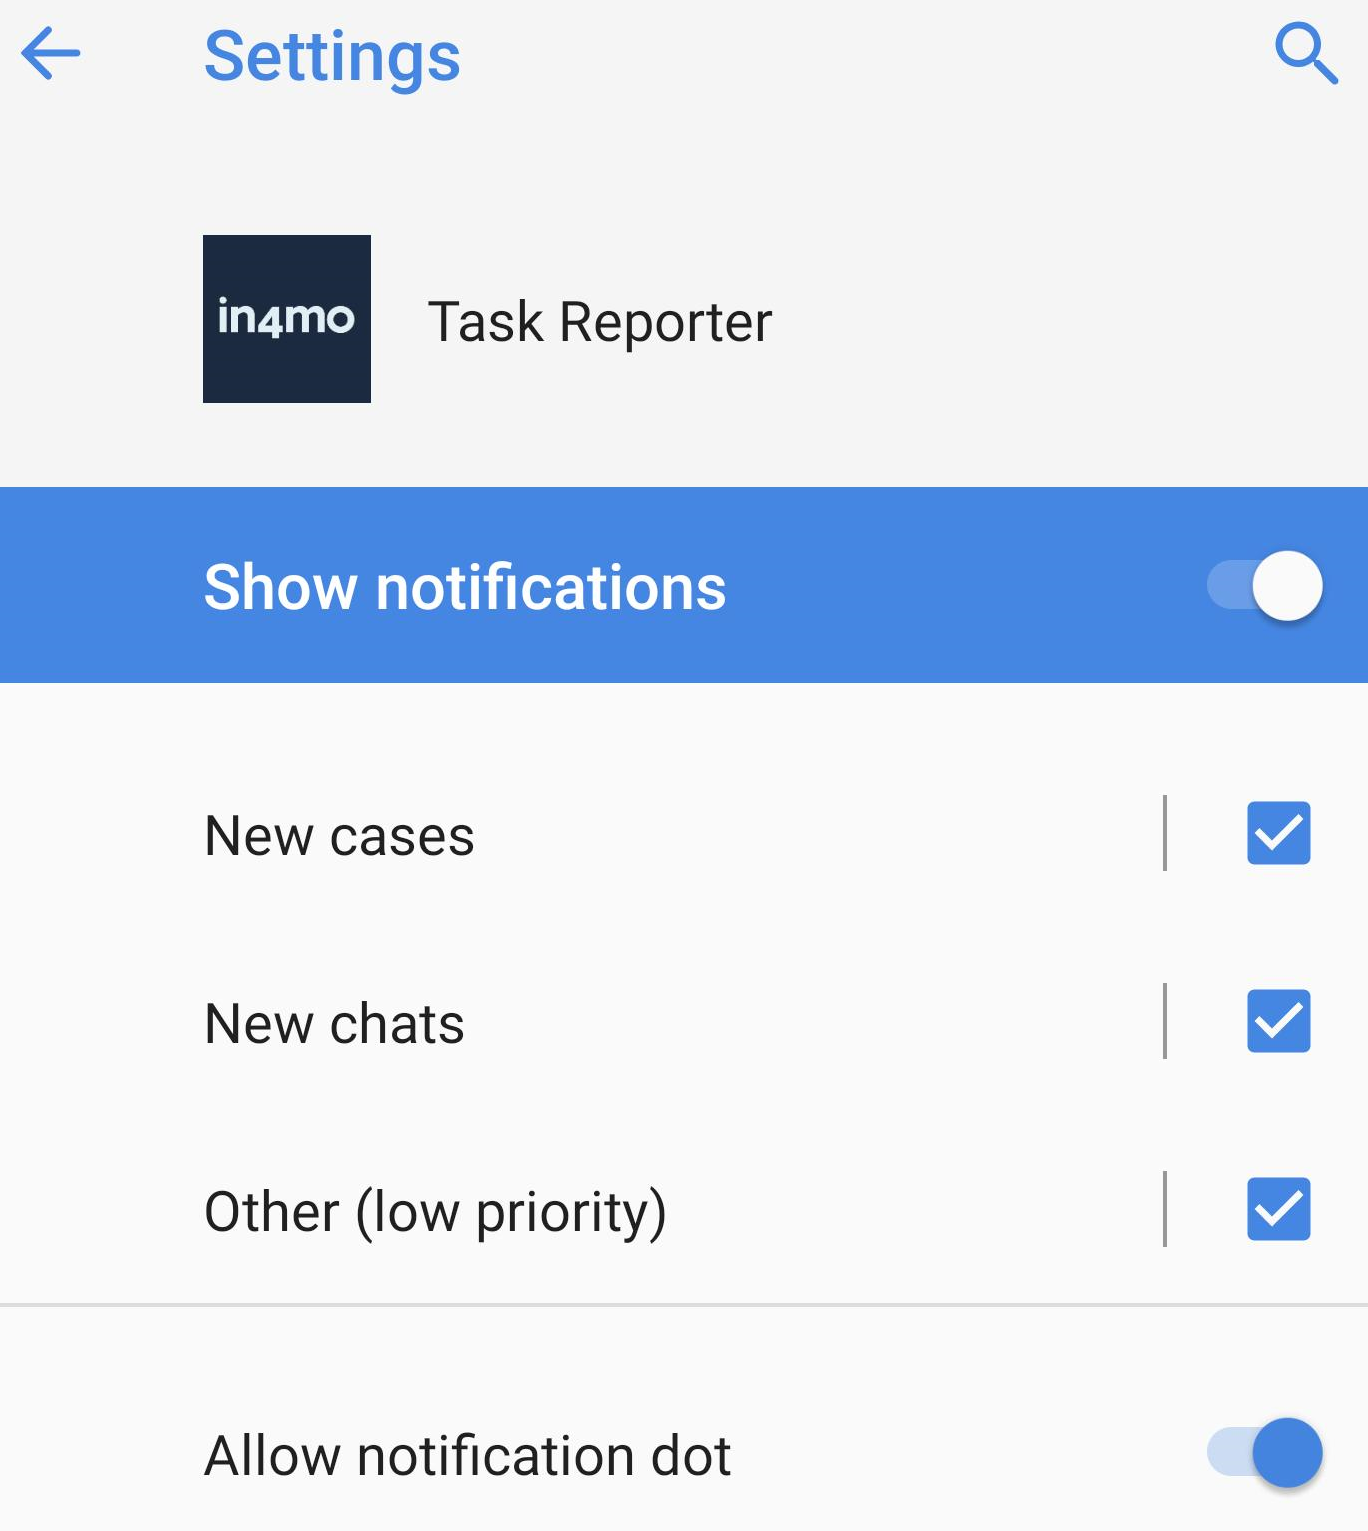
Here you can give or take away permissions for the app to show notifications and choose how to show the notifications. The most important setting here is the first one to allow notifications, which must be activated.
- In some cases, it might be that you are not supposed to get a chat notification, even though a new message has been written in the chat of a case you are involved in. As it is possible to select who should receive a notification when sending a message, it might be that some people involved in the case won’t receive a notification about a new message if they have not been selected as a recipient for the chat.
- It is possible to manually subscribe to all chats in a case, which is done from the web portal in the case’s chat room. When subscribed to the case chat of a case, you will receive a notification about all new messages in the case, even if you have not been selected as a recipient for the message.