


Craftsman
Are you the one doing the work? Learn the most important things you need to utilize the in4mo solution the best both in the Task Reporter app and the web.
Adding of a budget to task(s)
If the work does not include calculation and adding of budgets, this section is not relevant for you.
Here we explain how to add budget(s) to task(s) in cases. If iCC (in4mo Cost Calculation) is activated in the portal, there are separate instructions available for that.
All other tasks (except inspection, first aid and project management tasks) can require a budget to be accepted by the insurance company, before the task(s) become visible and the reporting can be started from the mobile application.
If a task does not require a budget, it will switch to status B++ directly after the schedule for the task has been set and a responsible person has been assigned for the task.
The company assigned for the task is also responsible for adding of the budget, which means, that budgets can only be added to own assigned task(s).
Budget can only be added when the task is in status![]()
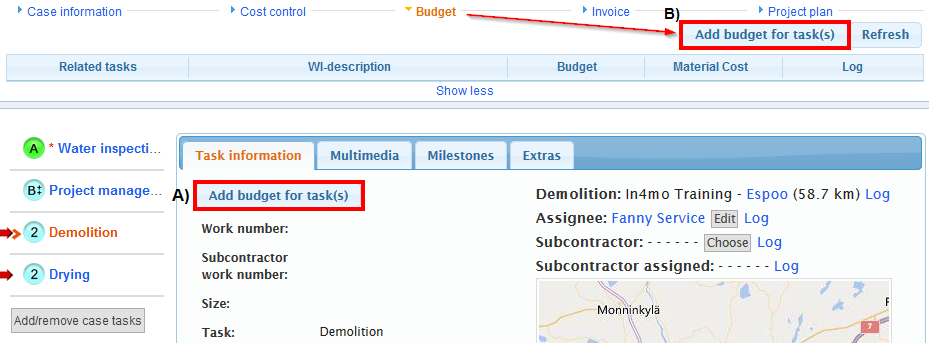
To add a budget for a task, there are two different options to do so:
- By going to Task information tab of a task and choose Add budget to task(s)
OR
- By clicking the Budget tab and choose Add budget for task(s)
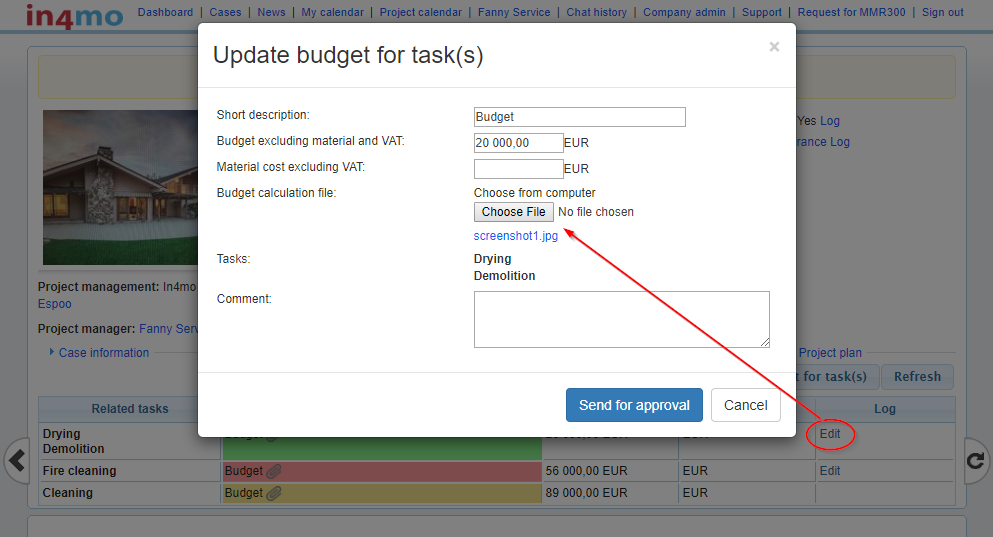
In the pop-up window that opens, a short description for the budget, the total amount excluding material and VAT and a budget calculation file from your PC, needs to be added so that it is possible to proceed. NOTE! Without a budget calculation file, a budget cannot be sent for approval.

The task(s) that are related to the budget need to be selected. A comment can also be added for the budgets if desired, but it is not mandatory.
When all the information has been filled out, the next step is to click Send for approval. The task(s) which a budget has been sent in for approval, switches to status  .
.
Updating budget(s)
If the budget needs to be modified, it can be done by first clicking on the Budget tab on the sub headers, and then Edit on the right of the task under the Log
column.
NOTE! A budget and the calculation file can only be modified when the budget is either rejected or approved.
When a budget is approved, the status of the task switches to status ![]() and the WI (Work Item) description field turns to green from yellow.
and the WI (Work Item) description field turns to green from yellow.
When the status of the task is B++ the reporting from the mobile application can start, depending of course if the compensation decision is positive for the case.
When a budget is rejected, the status of the task switches back to status 2. The description field is then red. The information can then be modified by clicking Edit.

When a budget is updated in an ongoing task (the task is in status 3), the status of the task switches to ![]() . This means that the work can continue, but only the original budget is approved, until the insurance company approves the updated budget. If the insurance company rejects the updated budget, task will switch back to status 3 and the work can still be continued normally.
. This means that the work can continue, but only the original budget is approved, until the insurance company approves the updated budget. If the insurance company rejects the updated budget, task will switch back to status 3 and the work can still be continued normally.
NOTE! A task cannot be marked as completed in the mobile application until the budget is approved and the status is back in 3.
When a task has reached status 4, it is not possible to modify the budget. This applies, if the task is not reopened to status 3 first, by either the case handler or the project manager in the case, depending on what agreements there are for this in the insurance company.
Reporting with the mobile application using a smartphone
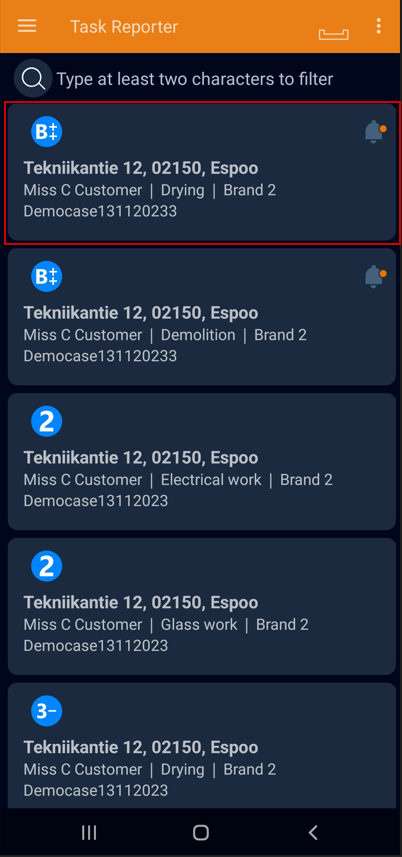
When the sent budget has been approved by the insurance company for the craftsman task, the assigned employee will see the task in the mobile application task list with status ![]() . A task is only shown in the mobile application when the status is in
. A task is only shown in the mobile application when the status is in ![]()
![]()
![]() or
or ![]()
The reporting for craftsman task(s) can only be started when the status is in ![]() for the task(s) and when the Main Inspection task in the case has a positive compensation decision and is in status
for the task(s) and when the Main Inspection task in the case has a positive compensation decision and is in status ![]()
It is important to make sure that the correct task is chosen from the task list, so that the information which is being filled in, ends up in the correct case in the web portal.

There can be important information about the case, which is written in the chat room. To check those messages, it can be done by selecting CHAT ROOM at the bottom in the task.
A new message can be written in the text field and then by clicking the blue bell icon, is to select a recipient, who will receive a notification of the chat message. When text is written in the text field, the grey arrow to the right will be orange. By clicking this arrow, the message will be sent.
NOTE: An empty message cannot be sent and a message need at least one recipient, before the message can be sent.
Task information and description
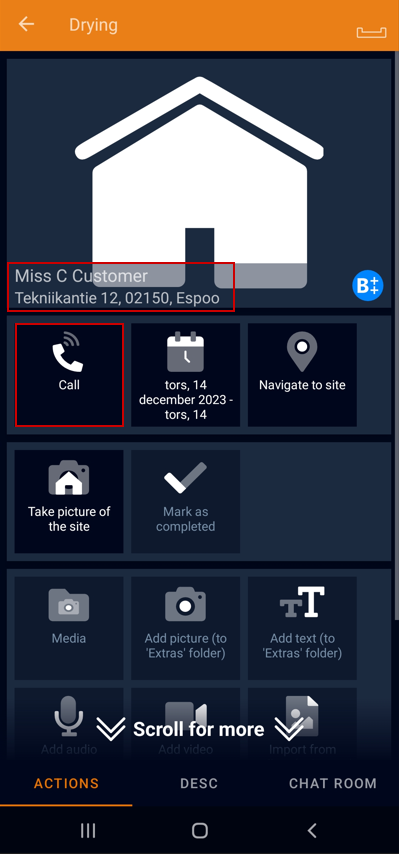
In the task’s ACTIONS tab, all the actions can be seen which can be taken for the task, in addition to the site address and the customer/contact person’s name. Phone number for the case handler and contact person(s), can be found by clicking the phone icon Call to the top left.
By navigating to the DESC tab, more information about the case can be viewed and the task itself. The assigned project manager of the case can also have added some information here on how the task should be reported/completed.
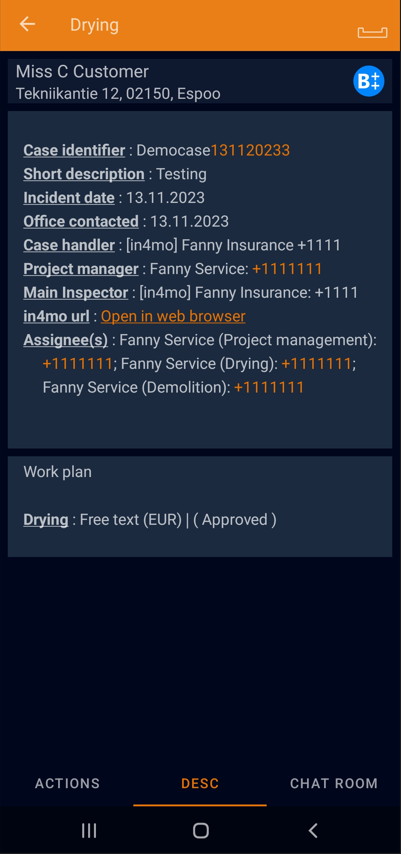
If the scheduled start/end time needs to be changed for the task, it can be done by clicking on the calendar icon next to the phone icon. A calendar opens in a pop-up window, where new times can be selected. Important to remember is, that when the scheduled start/end times is changed for the task, a reason for the change needs to be specified.
If the status of the task is in status ![]() , it means that start and end times needs to be scheduled for the task.
, it means that start and end times needs to be scheduled for the task.
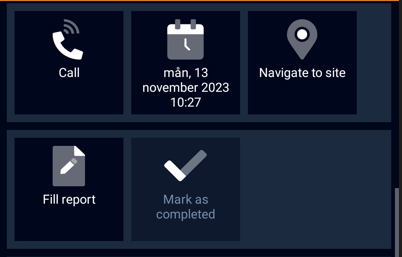
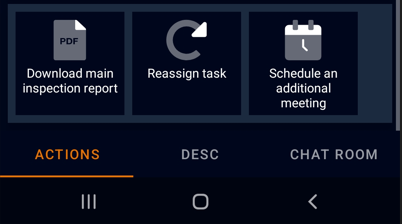
A task can also be reassigned to another colleague by clicking the icon at the bottom Reassign task.
Actions tab
The ACTIONS tab is the default view in the mobile application of the smartphone, when opening a task.
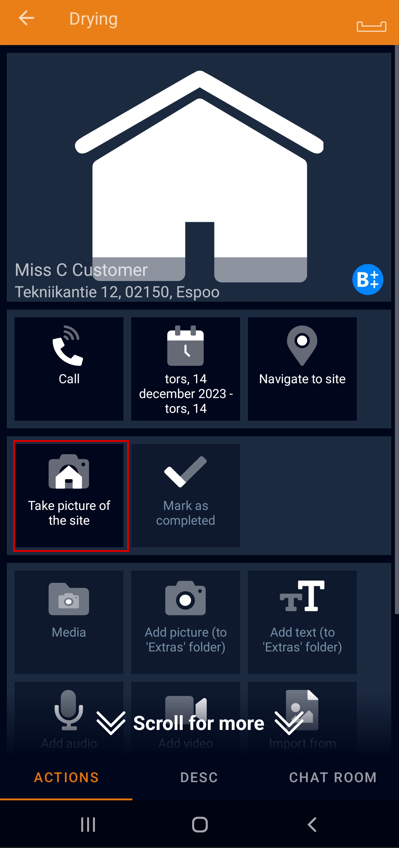
When starting to report in a task, first step is to take a picture of the site. The first picture should be taken before the work begins, as a proof of what it looked like, when arriving at the site. By clicking on the icon Take picture of the site, the picture can be taken.
When the first picture has been taken, the status of the task will switch to status ![]()
It is important to make sure that the quality of the report items is good, to provide the best possible information to others involved in the case.
When the first picture has been taken at the site, the other reporting functions/action buttons will become available. The additional pictures that are taken and sent to the case, will not be visible on the mobile application but only in the web portal.

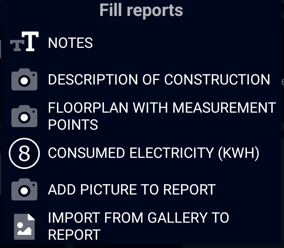
If the task has a report, the Fill report icon is visible. It shows a few options such as notes and the possibility to add texts and pictures to the task report. The report is more extensive on a tablet (more information here), so tablets are recommended for tasks with reports.
When the reporting of the task is done, the final step is to click the icon Mark as completed, which will make the status for the task switches to ![]()
NOTE: The task should not be marked as completed before it has been made sure, that the reporting of the task is really finished. When the task has been marked as completed, it will disappear from the task list and cannot be returned, unless the project manager of the case, reopens the task back to status 3.
Reporting with the mobile application using a tablet
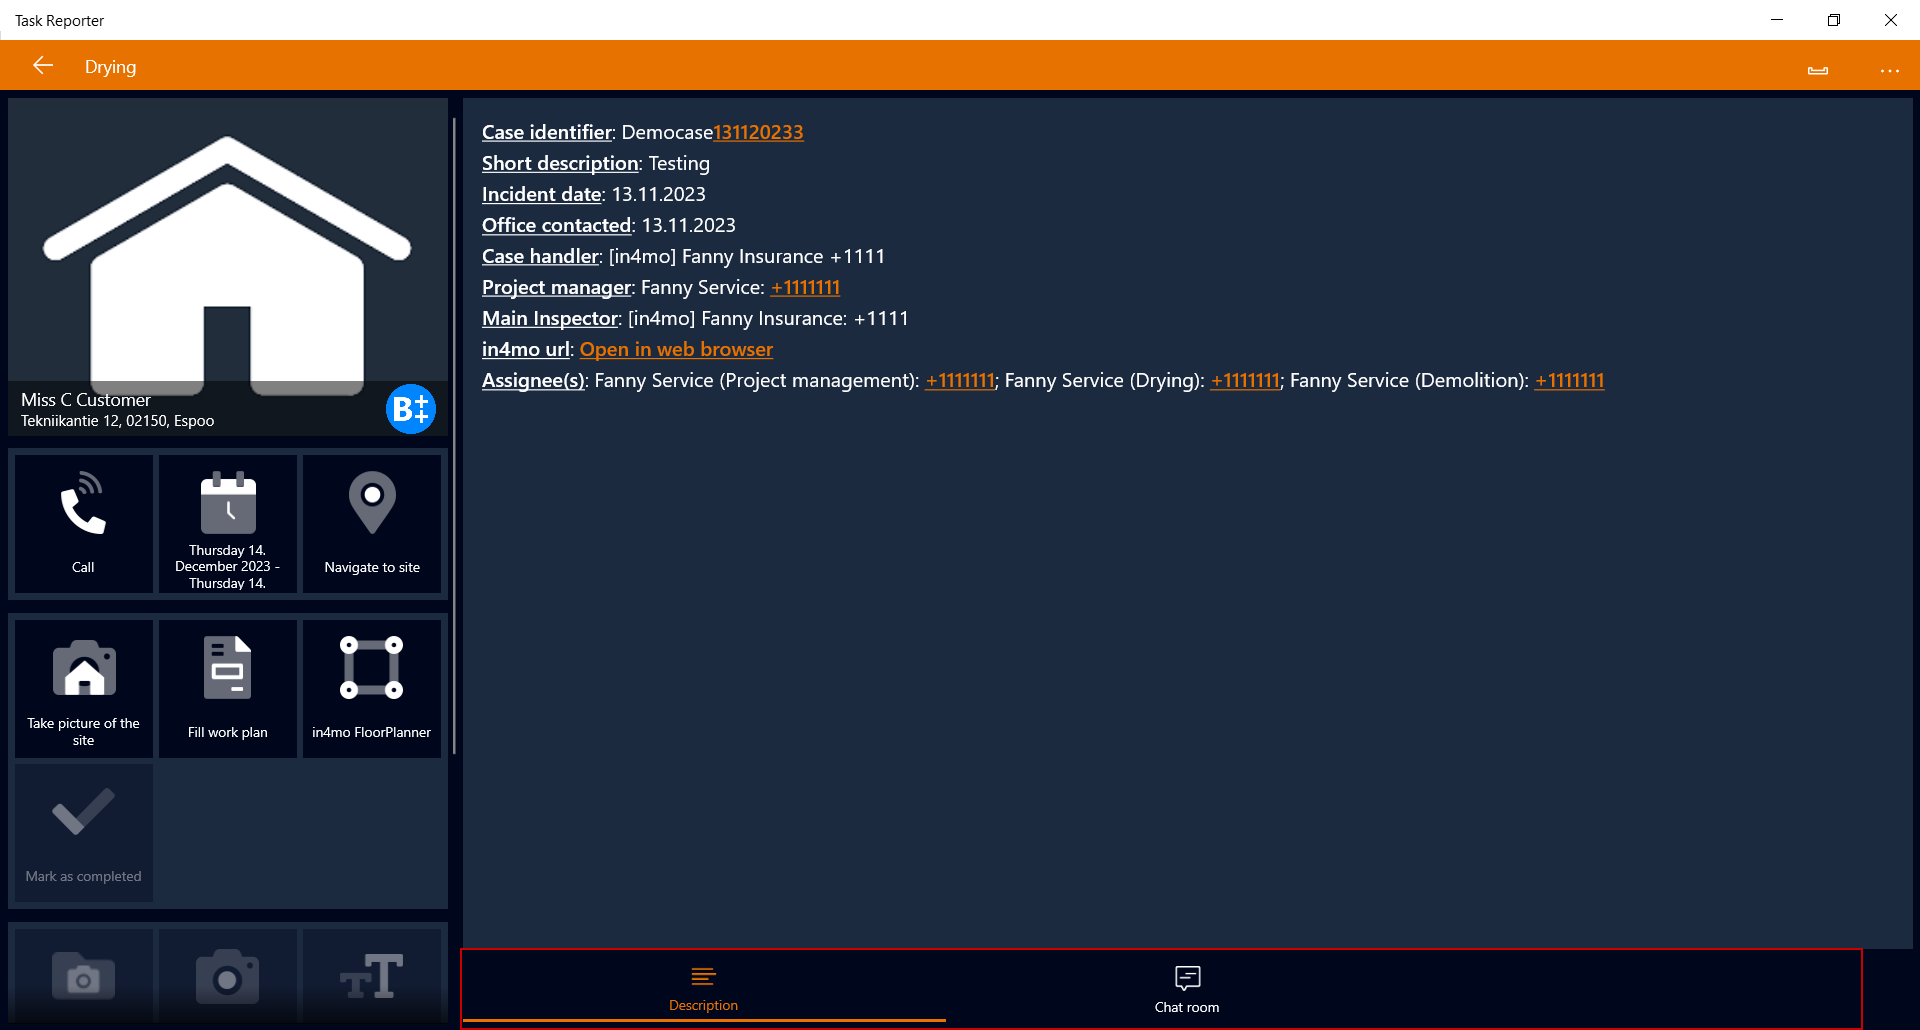
Reporting a craftsman task with the tablet, differs a little when using a smartphone. The default view when opening a task on a tablet is the Description tab, where information about the case and the task can be viewed, whilst reporting the task.
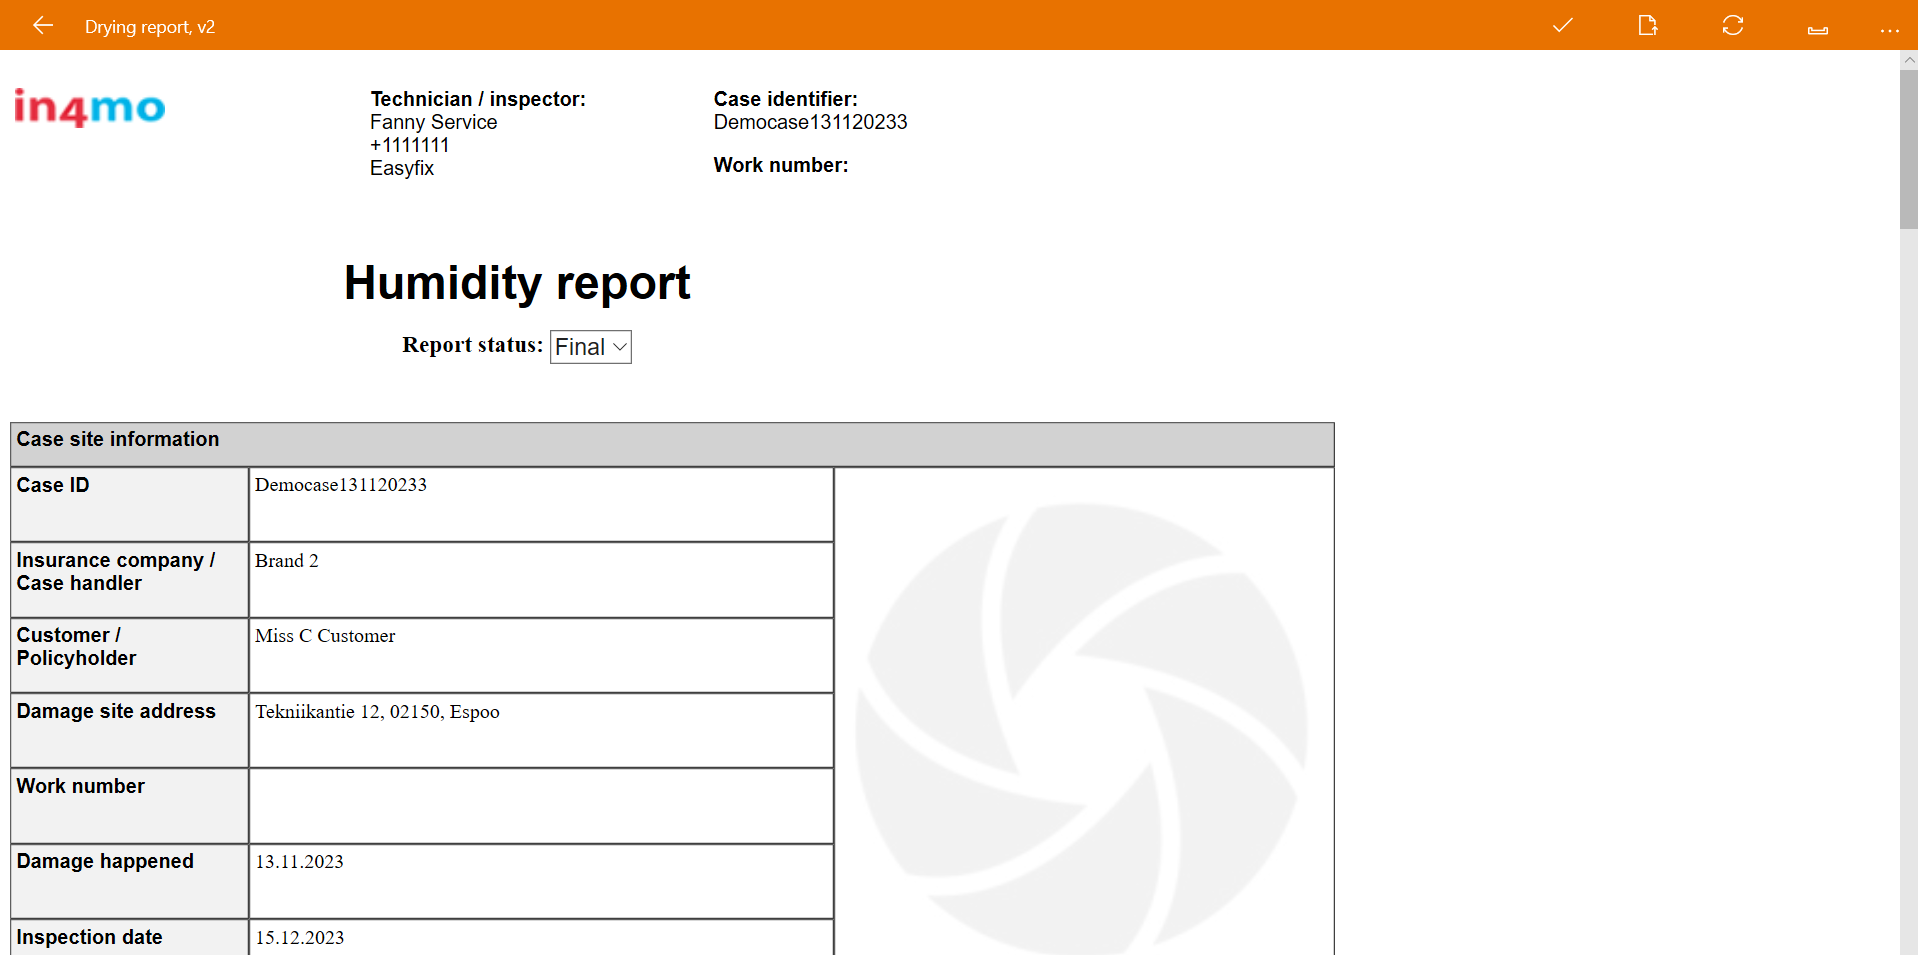
There is no separate ACTIONS view, to navigate to like on the smartphone, for to report in the task(s). If the task(s) incl. a report to fill in, a separate button shown here, will be available in the app and by clicking on that button, it opens the report in a report view on the tablet.
Previously, it has only been possible to fill in the work plan using the tablet version of the mobile app or in the web portal. The mobile app version 14.3 which will be released in 2024, allows users to fill in the work plan using a smartphone as well. This applies, if the company has activated and using iCC (in4mo Cost Calculation) to add calculations and budgets for task(s). More information about how to use iCC can be read here and here.
Information about the task(s) in the web portal
All the reported items, that have been sent from the mobile application are available in the web portal.
By choosing the task from the list to the left, information and more details of the task can be viewed.
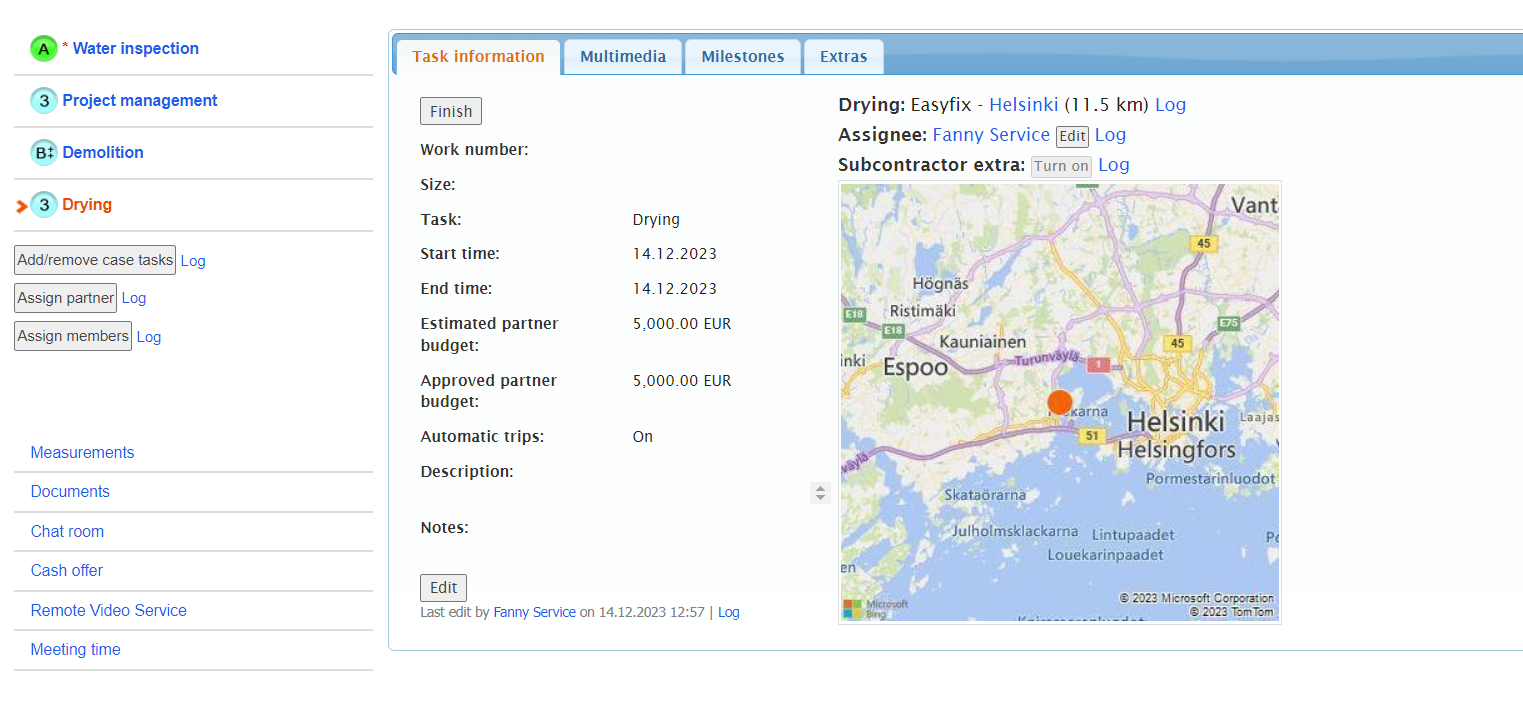
Under the tab Task Information, basic information about the task can be viewed, which is practically the same information as shown in the DESC tab in the mobile application.
The reported items can be viewed under the Multimedia tab, where the pictures can be enlarged by clicking on them. If text(s) needs to be added to the pictures, it can be done by clicking on Edit on the right side of the picture. This opens a text field to the right of the picture, where text can be filled in.

There is the possibility to upload pictures on the web. By scrolling down the Multimedia tab to the end and by clicking the Choose File button, it opens a pop-up window, where an item can be selected from the computer files.
Milestones
tab helps to follow up the progress of a task and it shows also what the statuses of the task represent.
The items sent to the Extras folder are viewable under that tab.