Customer Page
In in4mo it is possible to give customers access to an own customer page, where they can see information about their case as well as giving a communication channel. The page is highly configurable in terms of what information is shown on the page, and the feature is available both to Building Claims and Contractor customers. Here you will learn more about how the page works and is set up.
Overview
It is possible to give customers access to their cases in in4mo, through an own page called the customer page. This customer page is highly customisable, both in layout (so that it can match your company’s profile), in what kinds of contents should be visible there, and in who should have access to the page and when. Here we explain how the customer page works. Some of the functionality may slightly differ, depending on whether you’re using an insurance portal or a Contractor portal.
Setting up the customer page
The customer page is set up under Company admin > Customer page configuration. Only users with authority level 6 have access to this section of the admin pages.
Customising the look of the customer page
At first you customise the colour scheme of the customer page, by setting the page to the desired colours, e.g. to the colour scheme your company uses in its documentation and/or webpage. You set the colours by clicking the colour buttons for each row and choosing the correct colour. If you do not wish to use the default company logo (as defined under Company > Overview) in the customer page, uncheck the box ‘Use company default’ and select another logo.
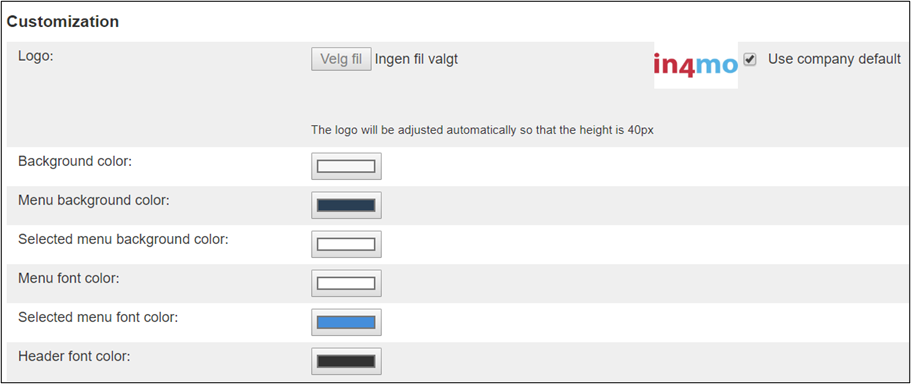
Once you have set the right colours and logo, press ‘Preview the page’ on the right-hand side of the page to see how the page will look. Make any adjustments necessary, then it’s time to move on to the configurations of the contents of the customer page.
Configuration
You have a lot of options available as to what you wish to show on the customer page and what not. Below you will see an explanation of the different options.
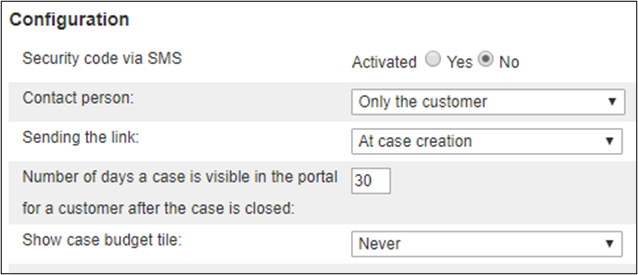
Security code via SMS: If this function is activated the customer will receive an SMS which contains a security code needed to access the customer page. For this, the phone number of the customer needs to be known and entered in the case’s contacts.
Contact person: Here you can choose who should get access to the customer page; the customer/policy holder, the contact person, both, or all contacts listed in the case.
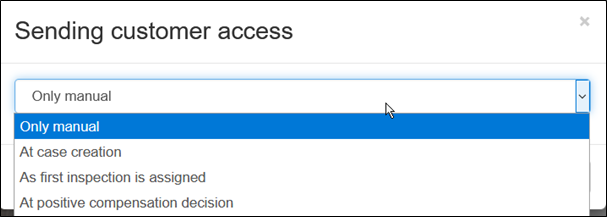
Sending the link: Here you can choose when the contact person(s) will receive a link to the customer page; at case creation, when an inspector has been assigned, upon a positive compensation decision, or only manually (meaning that someone manually has to give access to the customer page from the case).
Number of days a case is visible in the portal for a customer after the case is closed: Here you choose for how long the customer page is available after the case has been closed in the portal.
Show case budget tile: Here you can choose when the customer gets access to see the case budget tab; at case creation, when an inspector has been assigned, upon a positive compensation decision, or never. The latter option means that the customer can’t see the case budget tile.
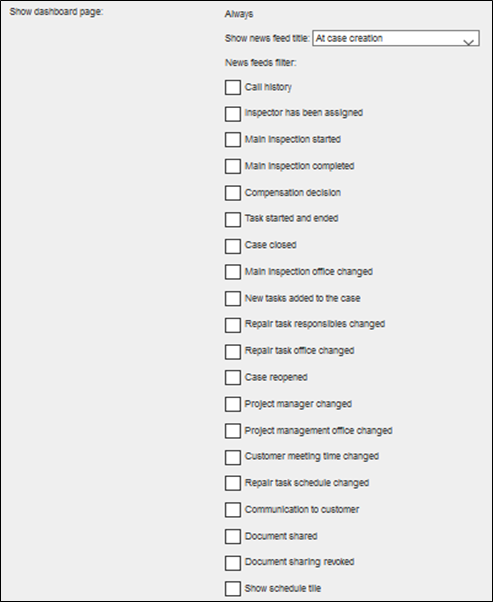
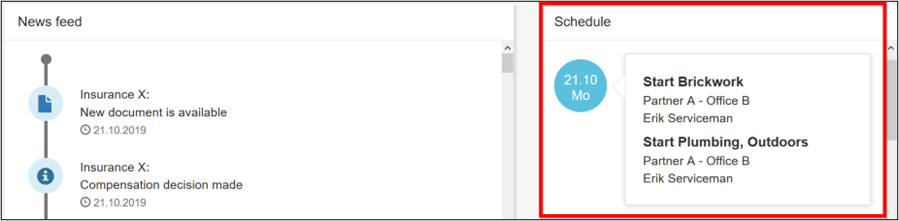
Show news feed tile: Here you can choose if and when the newsfeed tile should be visible for the customer; at case creation, when an inspector has been assigned, upon a positive compensation decision, or never. In order to get some content to the news feed, select the options you wish under News feed filter:
Call history – Log of all calls called through the app. The system will distinguish if the call was successful (recipient was reached) or unsuccessful, the length of the call, the number called and name of the caller.
Inspector has been assigned – Entry in the news feed with the name of the inspector.
Main inspection started – Entry in the news feed that the main inspection was started.
Main inspection completed – Entry in the news feed that the main inspection was completed.
Compensation decision – Entry in the news feed which states that a compensation decision has been made in the case. It is not specified what the decision is.
Task started and ended – There will be an entry in the newsfeed for when any task other than the main inspection has been started or ended.
Case closed – Entry that case got closed. The comments will not be visible.
Main inspection office changed – Entry of that main inspection was assigned to office X.
New tasks added to the case – An entry in the news feed of that new tasks were added.
Repair task responsibles changed – Entry when the responsible for a repair task is set or changed.
Repair task office changed – Entry when the office is set or changed for any task other than the main inspection.
Case reopened – An entry comes in the newsfeed with the text “Insurance X: Reopened the case” and the date. The reason why the case has been reopened will not be visible.
Project manager changed – Entry when the project manager is assigned or changed.
Project management office changed – Entry that project management was assigned to office X.
Customer meeting time changed – An entry comes when the meeting time is changed, also when it is set for the first time.
Repair task schedule changed – Shows an entry whenever the schedule for a task has been changed. Also shows an entry when the schedule is set for the task for the first time.
Communication to customer – Shows an entry when the customer has received a new message in the Communication tab.
Document shared – Shows an entry when a document has been shared with the customer, and is available in the Documents tab.
Document sharing revoked – Shows an entry when a previously shared document has been unshared, meaning the customer can no longer see the document in the Documents tab.
Show schedule tile – If this box is activated the customer can see an own section in the dashboard showing the case schedule, i.e. the meeting time for upcoming case tasks as well as who is assigned partner and responsible person for the tasks.
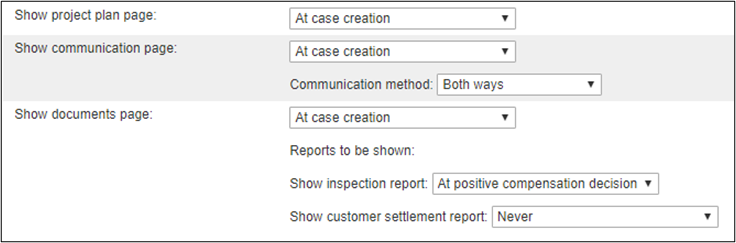
Show project plan page – adds a tab to the customer page where the customer can look at the project plan. It is possible to define when the project plan page will be made available; at case creation, when an inspector has been assigned, upon a positive compensation decision, or never.
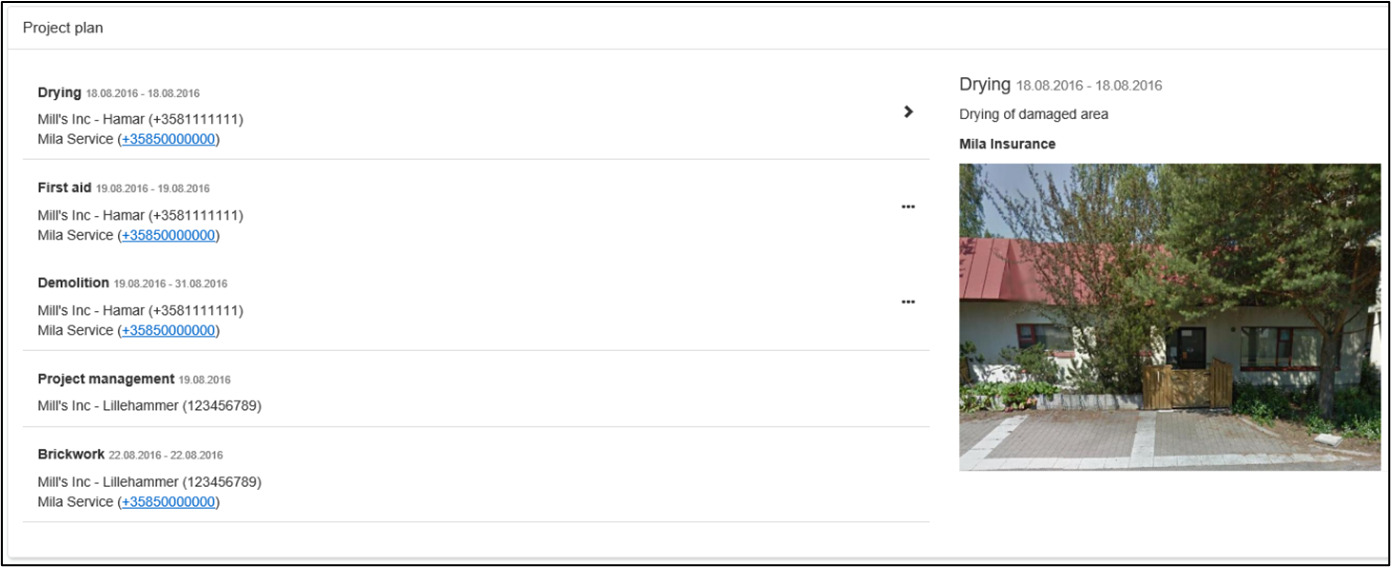
By clicking a task, the customer can see the description of the task. If there are three black dots next to the task name, it means something has been added to the case’s multimedia. Multimedia from inspections is not shown in the project plan.
Show communication page – adds a tab to the customer page named Communication. It is possible to define when the communication page will be made available; at case creation, when an inspector has been assigned, upon a positive compensation decision, or never. It is also possible to define whether the communication page can only be used for communication one way (only to the customer, or only from the customer), or if communication goes both ways.
This page will be described in more detail later.
Show documents page – Gives the customer access to the documents tab, on which he or she can see documents from the case. It is possible to define when the documents page will be made available; at case creation, when an inspector has been assigned, upon a positive compensation decision, or never. It is also possible to define whether the inspection report and/or customer settlement report should be shared automatically, and when. It is also possible to share documents from the case manually, which will be explained later.
Contact information
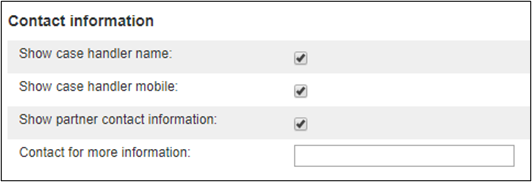
Show case handler name – If activated, the name of the case handler is displayed in the case information on the customer page.
Show case handler mobile – If activated, the case handler’s phone number will be displayed in the case information on the customer page (requires that the case handler’s name is displayed).
Show partner contact information – If activated, the customer can see the contact information (phone number) of an assigned partner (office and assigned person for the task).
Contact for more information – Here the company can provide information about whom to contact if something goes wrong with the security code sent through SMS, if this function is activated.
When the configurations have been set, do not forget to save them by pressing ‘Save changes’.
![]()
Sharing documents with the customer manually
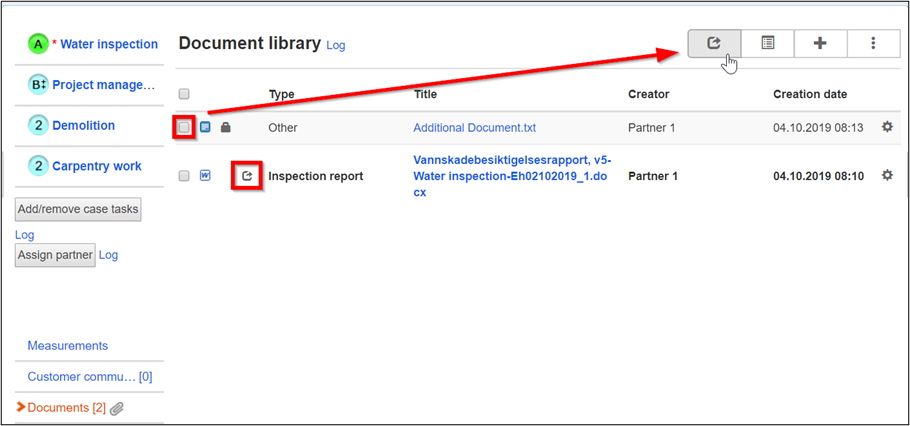
It is possible to share documents from the document library manually with the customer. The inspection report and customer settlement report can be configured to be shared automatically, whereas other documents must be shared manually. This is done from the document library in the case, where you tick the box to the left of the document(s) you wish to share with the customer, then you click the ![]() icon to the top right. You will then be asked to confirm that you wish to share the marked document(s). Confirm, and the document(s) will be added to the customer page immediately.
icon to the top right. You will then be asked to confirm that you wish to share the marked document(s). Confirm, and the document(s) will be added to the customer page immediately.
The same ![]() icon is displayed next to the documents that have been shared with the customer, meaning that any document marked with this icon is available to view on the customer page.
icon is displayed next to the documents that have been shared with the customer, meaning that any document marked with this icon is available to view on the customer page.
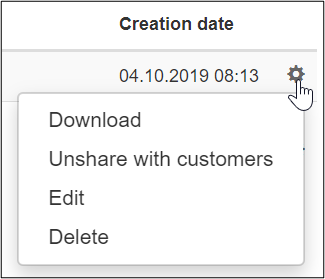
It is also possible to remove shared documents from the customer page. This is done by clicking the cogwheel to the right of the document you wish to remove, then clicking ‘Unshare with customers’. As was the case when adding a document to the customer page, you will be prompted to confirm that you wish to remove the document from the customer page. Confirm, and the document will no longer be available on the customer page.
Customer communication
As mentioned earlier, it is possible to give customers access to a communication tab on the customer page, from where, depending on the settings, the customers can communicate with you, you with the customers, or both ways.
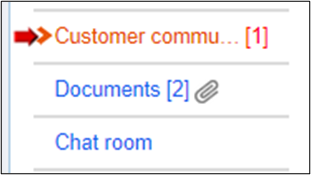
Whenever a customer has sent a message or uploaded a document, this will be marked in the dashboard, as well as in the case, where there is a red arrow next to ‘Customer communication’, as well as a yellow box on top of the case explaining what kind of action is required.
A notification is also sent to the case handler when the customer sends a message or adds a file.


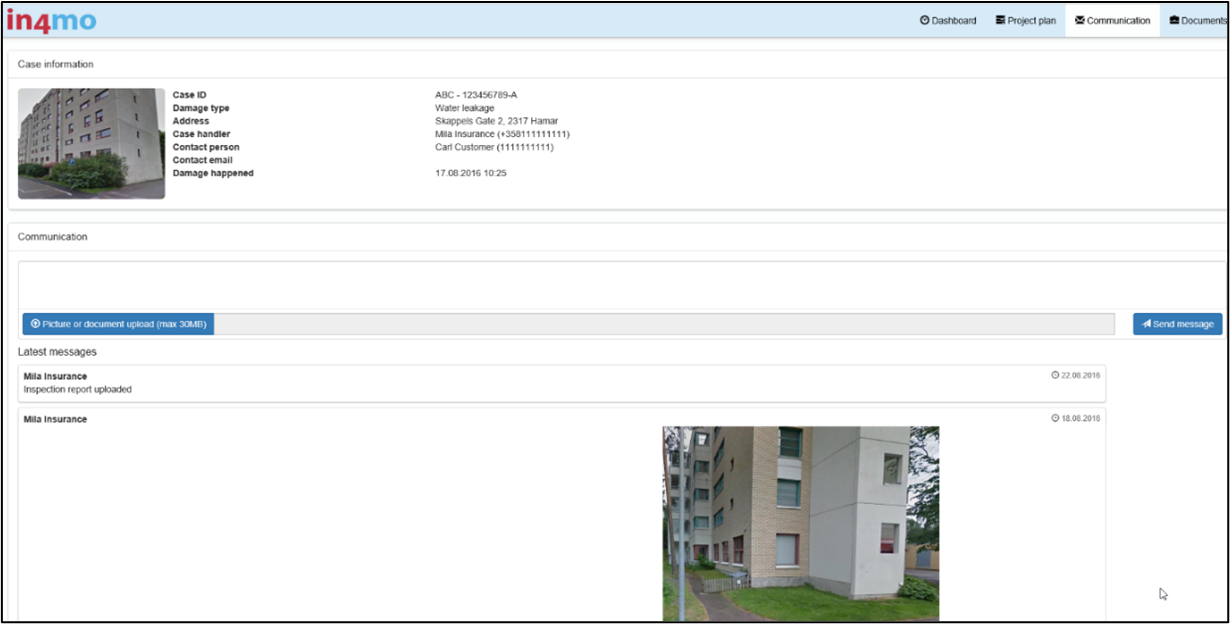
To open the customer communication in a case, click on ‘Customer communication’ on the left side of the case. You will see a window as seen on the picture below:
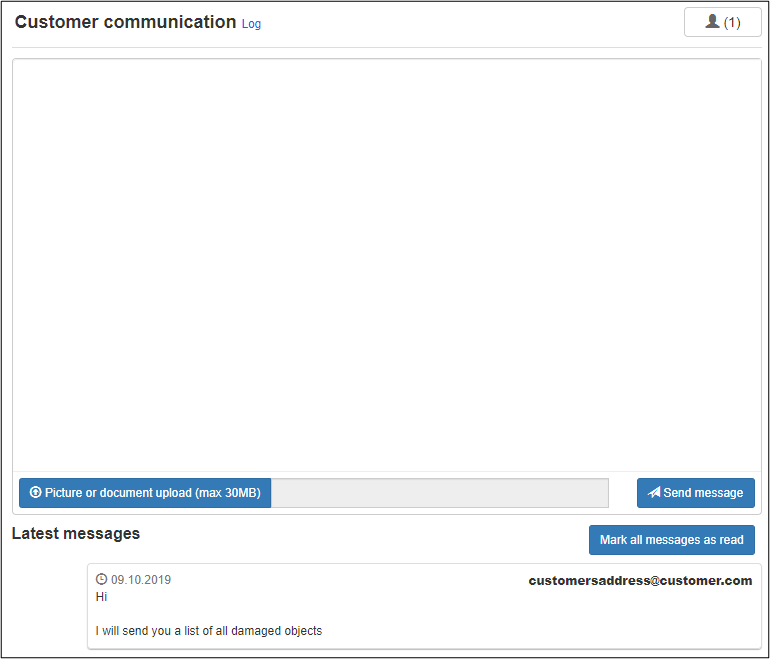
The ![]() on the top right shows how many people have gotten access to the customer page, and by clicking this button you can grant or remove access to the customer page. This is where access to the page is shared manually if you in the configurations chose to only share the link manually.
on the top right shows how many people have gotten access to the customer page, and by clicking this button you can grant or remove access to the customer page. This is where access to the page is shared manually if you in the configurations chose to only share the link manually.
The white box is a message field where you can write messages to be added to the customer page. It is also possible to upload pictures or documents. All messages, including documents, are shown below, with the newest message first, and the email address of the person who sent each message is displayed. For messages you send to the customer, the name of the person sending the message is shown. Above the messages you will find the button ‘Mark all messages as read’. Clicking this button marks the messages as read, which will remove the blinking red arrow and the case from the dashboard under the field for new customer uploads.
Changing general settings for individual cases
No matter what the general customer page sharing settings are for the portal, the settings can be changed for individual cases. This is done in the case, by pressing ‘Sending customer access’.
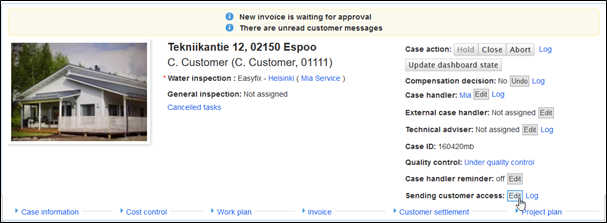
After this you choose which settings to apply for the specific case, and then press ‘Save’.