


in4mo Basics
To get the most from the in4mo service you need to know the basics. Here we explain all from case list and dashboard to statuses and the process steps.
Introduction to in4mo’s services
in4mo’s tool consists of two parts: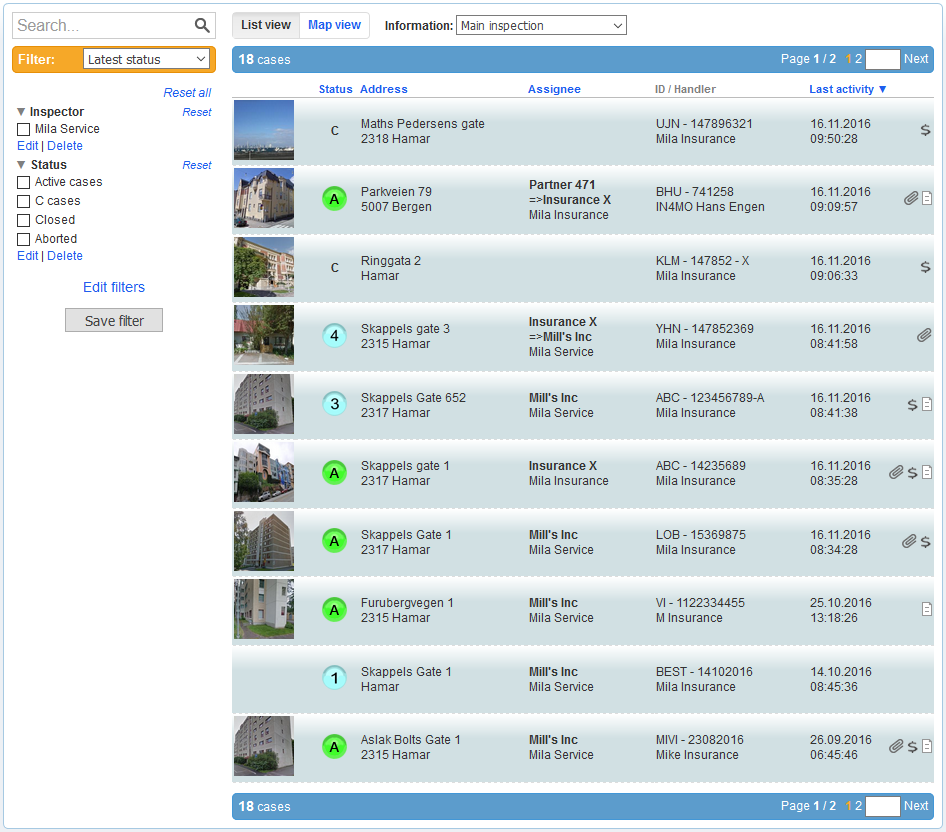
The web portal shows all the information about your cases, inclusive reporting items from the damage site (pictures, text-messages, measurements, etc.). Here you can allocate and edit tasks as well as create and upload inspection reports.
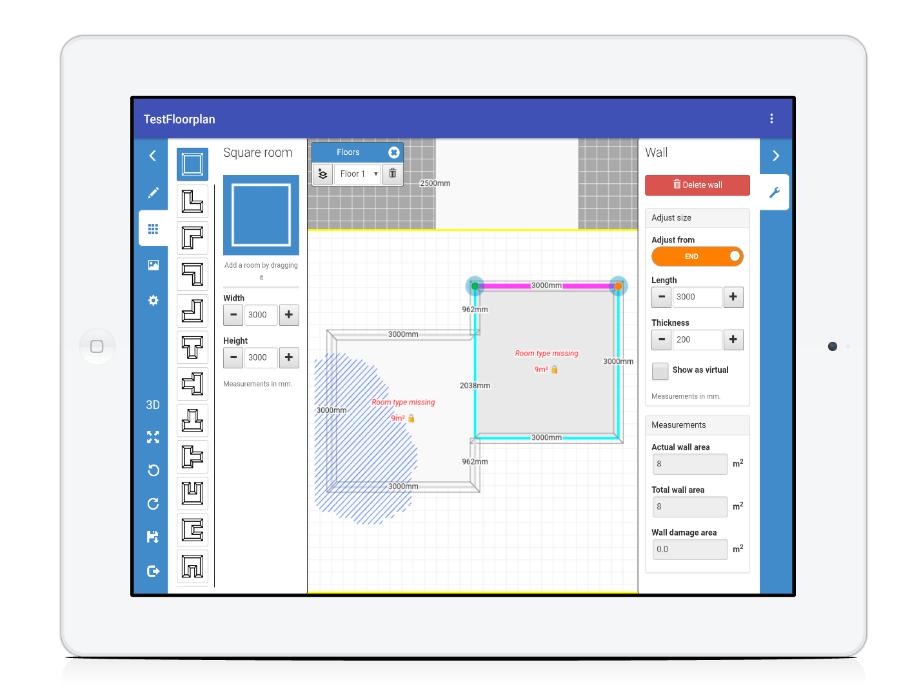
The mobile application, installed in a smart telephone or a tablet, is used for reporting from damage sites (e.g. to take pictures and fill out inspection reports).

Workflow phases
The following flow chart explains the different phases of the in4mo solution.

Web portal
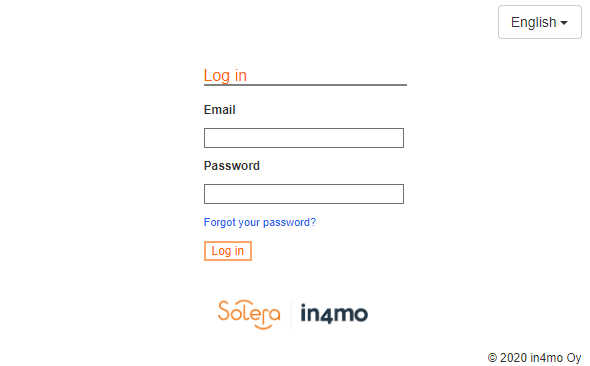
You get started by logging in to the web portal with your email address and password.
If you have forgotten your password, click on the blue Forgot your password? link.
Even if your account has been locked, you can use this button to change your password with a link which you will receive by mail, this will unlock the account.
Case list view
The case list on the first page shows you all the cases assigned to you and your company depending on your authority level and your role.
Click on Map view to see the cases in a map view.
Basic information is visible for every case on the case list. To open a particular case, click on the case in question.
Dashboard view
The dashboard provides an overview of all the needed actions to be taken by your company. What you can see in the dashboard varies based on your role and authority level. [Before you read further, please view this video for a more comprehensive introduction.]


1 Here you can see the total amount of cases, where an action is required from your company. The actions might not be expected from you personally.
2 There are filters, which you can use to get more details about your own tasks, or all tasks assigned to your company, if you have authority level 2 or higher.
Note! Tables 3 and 4 are affected by the filter chosen here.
3 The table shows how many completed inspections are waiting for compensation decision and how many budgets are waiting for approval.
The first field Cases without any allocated tasks will always be empty for you.
The last field Cases without ongoing tasks shows all the cases where all the tasks are completed.
Note! The numbers in this table (3) show the amount of cases, not tasks. Thus, one case might contain several unapproved budgets. When you press a number, the relevant cases will be shown below the dashboard table.
4 This table shows all the tasks in which actions are required. Note! This table shows numbers of tasks and one task can appear in more than one field.

- The rows show the task types, categorized in 5 tasks. Click on Show all task types to see all task types.
- The columns show the statuses C, 0, 0+, 1, 2 and 4 and indicate delays in the work process. Put your mouse over a column title to get an explanation:
- Budget approval informs that a budget was sent for approval in a task, but it has not yet been approved or rejected. The task can either be in status B or 3-.
- Delay in agreed meeting time indicates if the task is on time or not. For inspections, this column is based on the defined case times of the insurance company. For other tasks, the number will be green until the end of the business day on the day preceding the date set as the start date. The day the task has been set to start the number will be in the yellow box until the end of the business day after which it turns to red.
- Delay on estimated completion time when a task is ongoing in status 3. For inspections, this is calculated from the agreed meeting time using the defined case time. For other tasks, it will be green until the end of the business the day before the estimated end time. At the end of the business day preceding the estimated end date, the number will move to yellow and be yellow until the end of the business day of scheduled end date after which it will turn to red if the task has not been finished or the end date moved to a date in the future.
The office hours and the target times for inspection tasks are defined by the insurance company and can therefore be different in each company.
 Tasks in green are on time. Tasks in green are on time. |
|
action should be taken immediately. |
|
Icons in the web portal and mobile application
Status icons are used in handing of cases and they show in which phase a particular task is at the moment.
Note! Remember not to mark a task as ready when the status of the task in question is 3-.
There are also other important icons that are used both in the web portal and in the mobile application.
Main Inspection:
| C | Task created |
| Task assigned to office | |
| Task viewed | |
| Employee assigned | |
| Inspection time set | |
| Task ready to start. | |
| On site (starting inspection) | |
| Inspection completed | |
| Positive compensation decision | |
| Negative compensation decision |
Process tasks:
| C | Task created |
| Task assigned to office | |
| Task viewed | |
| Employee assigned | |
| Task time set | |
| Budget sent for approval | |
| Parts of the task budget (some work items) have been approved | |
| The insurance company has approved the budget | |
| On site (starting task) | |
| New budget sent for approval | |
| Task completed | |
| Task confirmed as ready. Make ready for invoice. |
Other important icons:
 |
Case on hold | |
 |
Extra info needed | |
 |
Inspection report available | |
 |
Cost calculation available | |
 |
Work plan added | |
 |
Invoice added | |
| New chat message (in app) | ||
Filters
The filter function is there to help you organize and handle your case list. You find the filters in the case page view.
Choose Edit filter to modify your filter settings.
For example, if you want to see all the inspection cases in status 3 and 4 on your case list, press Status in the menu on the left and choose 3 (inspection) and 4 (inspection) from the list.
3 (inspection) and 4 (inspection) are now moved to the selected options list on the right.
Other filters can be edited the same way.
Click on Save when you are ready.

The alternatives you chose are now visible on the filter menu on the left.
If you wish to edit the filter(s) you have or add new ones, press Edit filters or Edit under a specific filter group.

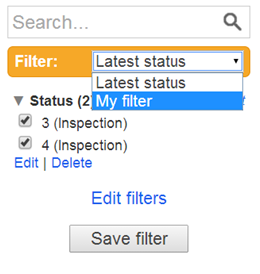
You can save the filter settings you chose by clicking Save filter. Give a name to your new filter and press Save.
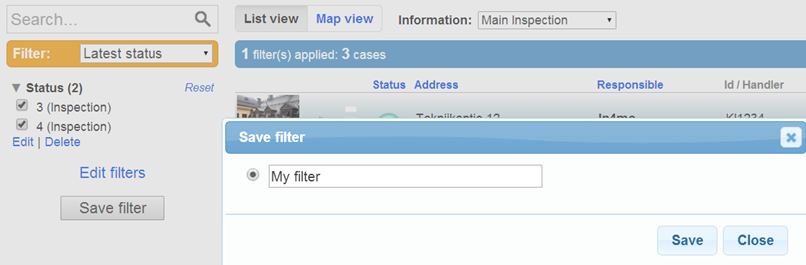
You find your saved filters in the drop-down in the yellow filter box.

NOTE: If some case(s) are missing, check that you are not filtering something out. Reset all filters if needed.
With the search function you can directly search a case with case ID, address and project number.

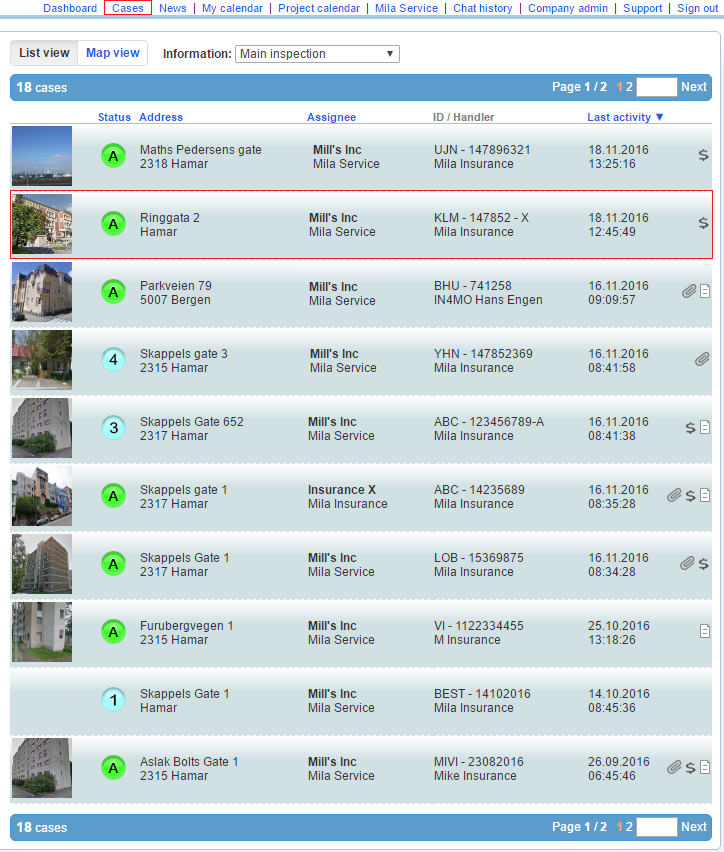
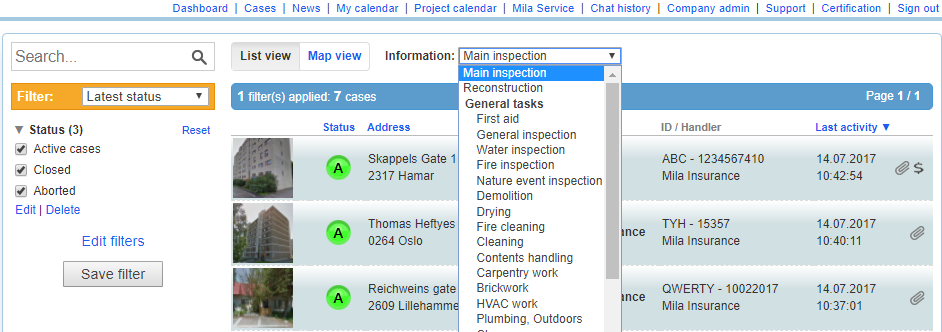
Information on the case page
By choosing a specific task on the drop-down list next to Information you can see the responsible person for this particular task and in which status the task is. If the case has a red blinking arrow by it, it means some action is required in the case.
Case information
Open a case in the case list to see the details of a specific case. The damage site address, customer’s name and contact person’s name in parenthesis are visible on the top of the case page. If the case had a blinking red arrow indicated needed actions, those actions will be described in a pale yellow area at the top of the case view. The tasks those actions refer to, will have blinking arrows in front of them.
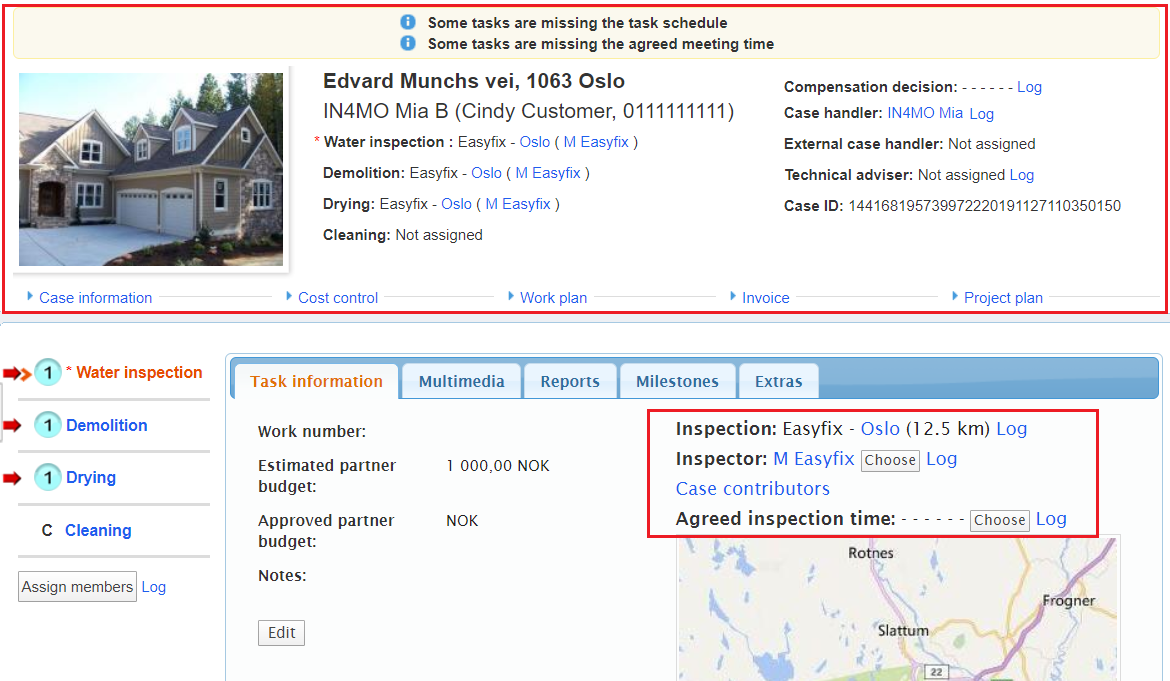
- Next to every task you see which partner company and responsible person have been allocated to the particular task.
- Information from the insurance company is visible on the right side: compensation decision, case handler, case ID.
- The responsible contractor for the task is visible on the task information page on the right.
- The planned start and end times for tasks are available in the task information page. For the main inspection the meeting time is visible above the map.
- Press the map under the inspection time to zoom in/out on a map to see the damage site location.
- The picture of the damage site building, that the inspector has taken, is visible in the upper
- left corner. Before the inspection is started, e.g. status 3, there will be a default image instead of the façade.
- Under the building picture you find the office and the responsible project manager for this case.
Case information with the basic information about the case in question. Authorized members can edit case information by pressing Edit under the information.

Please contact the insurance company in question if you need to edit case information and cannot do it.
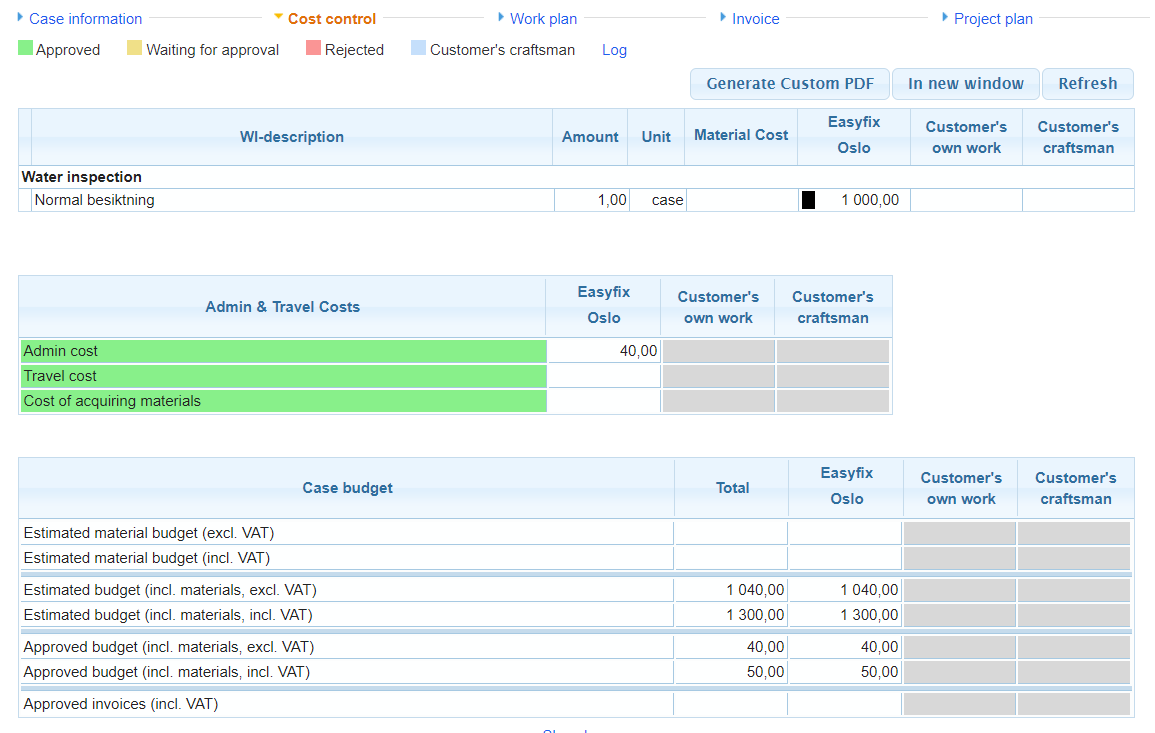
Cost control, which you only will see if you have the rights, shows an overview of the case-costs of your company, in cases where iCC (in4mo Cost Calculation) is used. Here costs can be sent for approval, and the approval status can be checked.
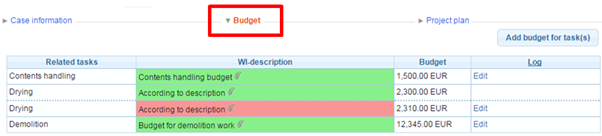
If iCC is not in use, there will be a Budget tab, which you only will see if you have the rights, where you can add budgets to tasks and edit budgets that have been allocated to your company.
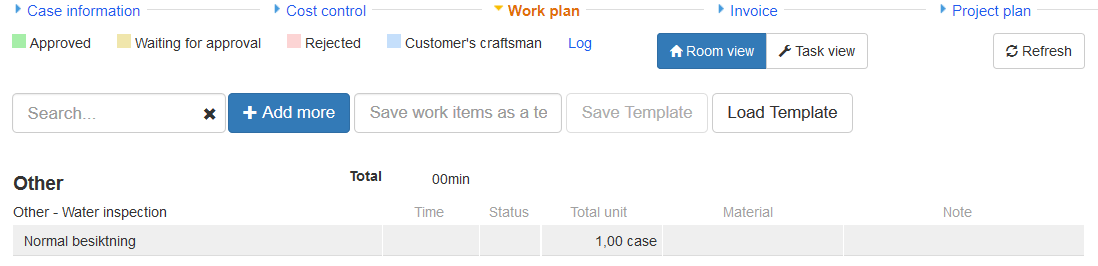
If iCC is in use, the costs for the tasks are added to the case on the Workplan tab (which again is visible only if you have the rights).
The Invoice tab (also visible only if you have the rights) will be described in more detail later on.
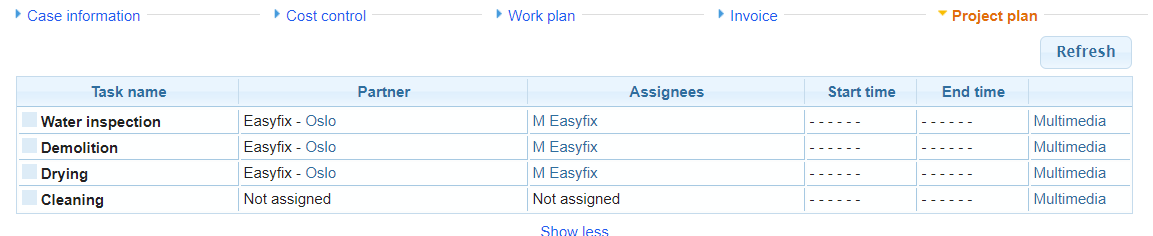
Click on Project plan in order to see details about the project plan for the case. Press Multimedia if you want to see the reported items sent from the damage site for each task.
Information about tasks in a case

All the tasks in the case are visible in the menu on the left. Information about a specific task is visible under Task information for each task.
To modify task information press Edit under the description text (A).
To allocate the task to responsible press Edit above the map to the right or Assign members on the left under the list of tasks. (B) [Please view this video to get an introduction to the feature.]
If you will use a subcontractor, press Choose and select a company. The chosen company will select a responsible person internally.
NOTE: Assigning tasks requires as a minimum authority level 3!

The reported items that have been sent from the damage site are under Multimedia:
- Pictures
- Videos & Audio messages
- Text messages
In certain cases you may see the tab Reports, which allows you to fill the report in the portal.
Milestones show timestamps of the work phases.
In Extras you find extra report items from the damage site.
If iCC is in use and the task is an iCC task, the task-specific work plan can be filled in Work plan.
Other functions on the case page
Press Measurements to see the moisture measurements that have been reported from the damage site.
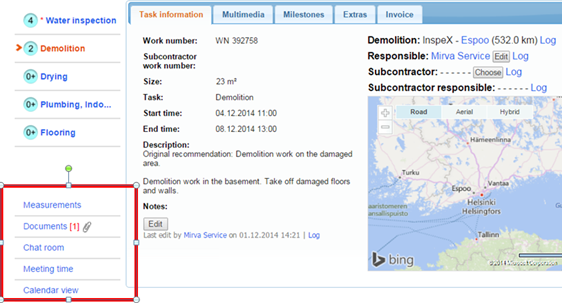
Reports such as the inspection report can be uploaded and viewed under the Documents tab. The paper clip sign shows that a report is uploaded. Figure in parenthesis tells how many documents are uploaded in total. The number of documents visible to you depends on your authority level.
Press  to create, open, modify and save the report on your PC.
Choose when you wish to upload a document, e.g. the report, from your PC.
Open a document by clicking on the title.

In the Chat room you can communicate with other participants in the case in question. Everyone (except the customer) can see the chat messages, so it is not a private chat.
By pressing the bell sign above the text field, you can choose who will get a notification about your chat message. You must choose at least one receiver before sending the message.
If you want to follow the chat in a case, click Subscribe to case chat. Then you will get chat notifications when new chat is sent in the specific case.
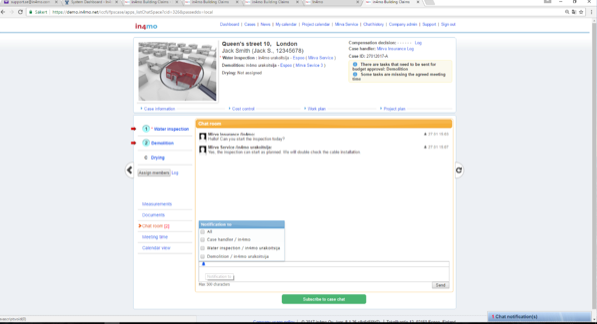
The notification will pop up in the lower right corner.
You can also unsubscribe from the chat later. Remember to not unsubscribe in cases where you have a responsibility and should receive the chat notifications.
On your personal profile page (see section Other functions) you can define settings for chat notifications and disable the notification sound.
Click on Meeting time if you want to add other meeting events in the case.
Add and send invoices for approval
Only those members in your company, who have the permission to see the budget, can see and attach invoices for your company offices. Make sure that ‘Can see budget’ is activated for those members who need to see budgets and add invoices.
When you wish to add invoice(s) to task(s) go to the Invoice tab and press Add on the right side.
Fill out the needed information and press Add.

All invoices will be saved both under the Invoice tab and in the Documents library. An invoice icon will also be visible on the case list.
All invoices will be sent for approval to the case handler, who can accept or reject the invoice. Once the invoice is approved, it can still be rejected afterwards.
 It is also possible for insurance company members to attach invoices on the behalf of your company. In this case you will be able to see the invoices regarding your company’s tasks.
Other functions
We’ve already gone through the Dashboard and Cases view. On the first page you also have access to other functions in in4mo, which will be presented below.

News
You can see old news posted in in4mo. When a news post is added, it will also pop up on the first page.
Personal profile page
Click on your own name in order to edit your personal information:
- Availability settings
- Availability settings for periods
- Add a picture of yourself
- Change your password
- Mark when you want to get mail notifications:
- E-mail notification preferences (notifications for inspections and task completions)
- Settings for chat notifications

Chat history
All chat messages in your cases sorted based on time of the last message.
Company admin
Only visible to the company’s admin members. Here admin members can maintain e.g. company settings.
Support
Information and instructions if you wish to get some support with the In4mo-tool.
Certification
Using in4mo for insurances companies requires suitable certification. Here you can see upcoming certification assessments or other courses.to which users with authority level 3 or higher can sign up themselves or others.
Application on tablet and mobile
Download the in4mo Task Reporter application:
- For iPhone/iPad you can get the application from the AppStore
- On a device with Android operating system, you can get the application from Google Play store
After you have installed and opened the application via your device’s application store, the login page will appear.
Fill in the same username and the same password as you have in the web portal.
Every insurance company has a different customer code so make sure you have the correct one when logging in to the application. You can find the customer code under Support in the respective insurance company portals or from the in4mo administrator at your office if your company is using in4mo Contractor.
Press Sign in when you have entered needed information.
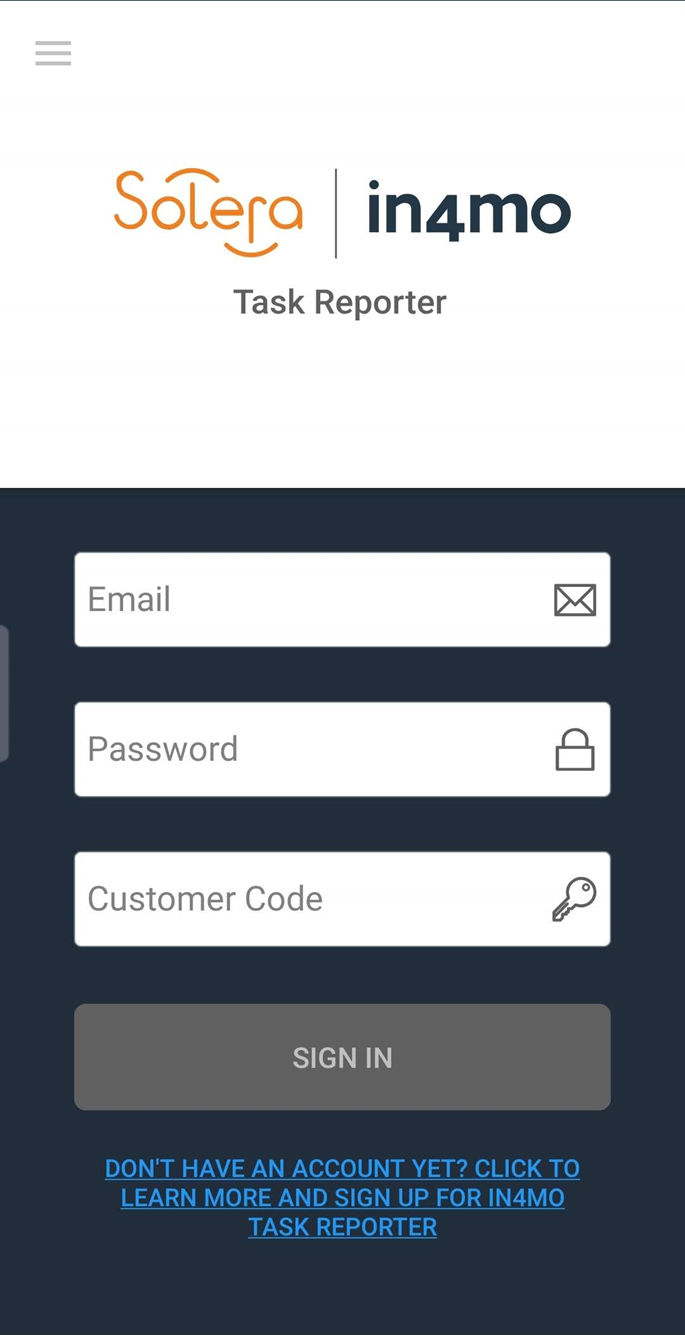
NOTE: You don’t need to login every time you use the application, you stay logged in with the same login information.
When you need to add a new account or change account, press the options menu on the upper left hand side corner.
After you have logged in to the application on your device, you will see your personal task list with only those tasks allocated to you.
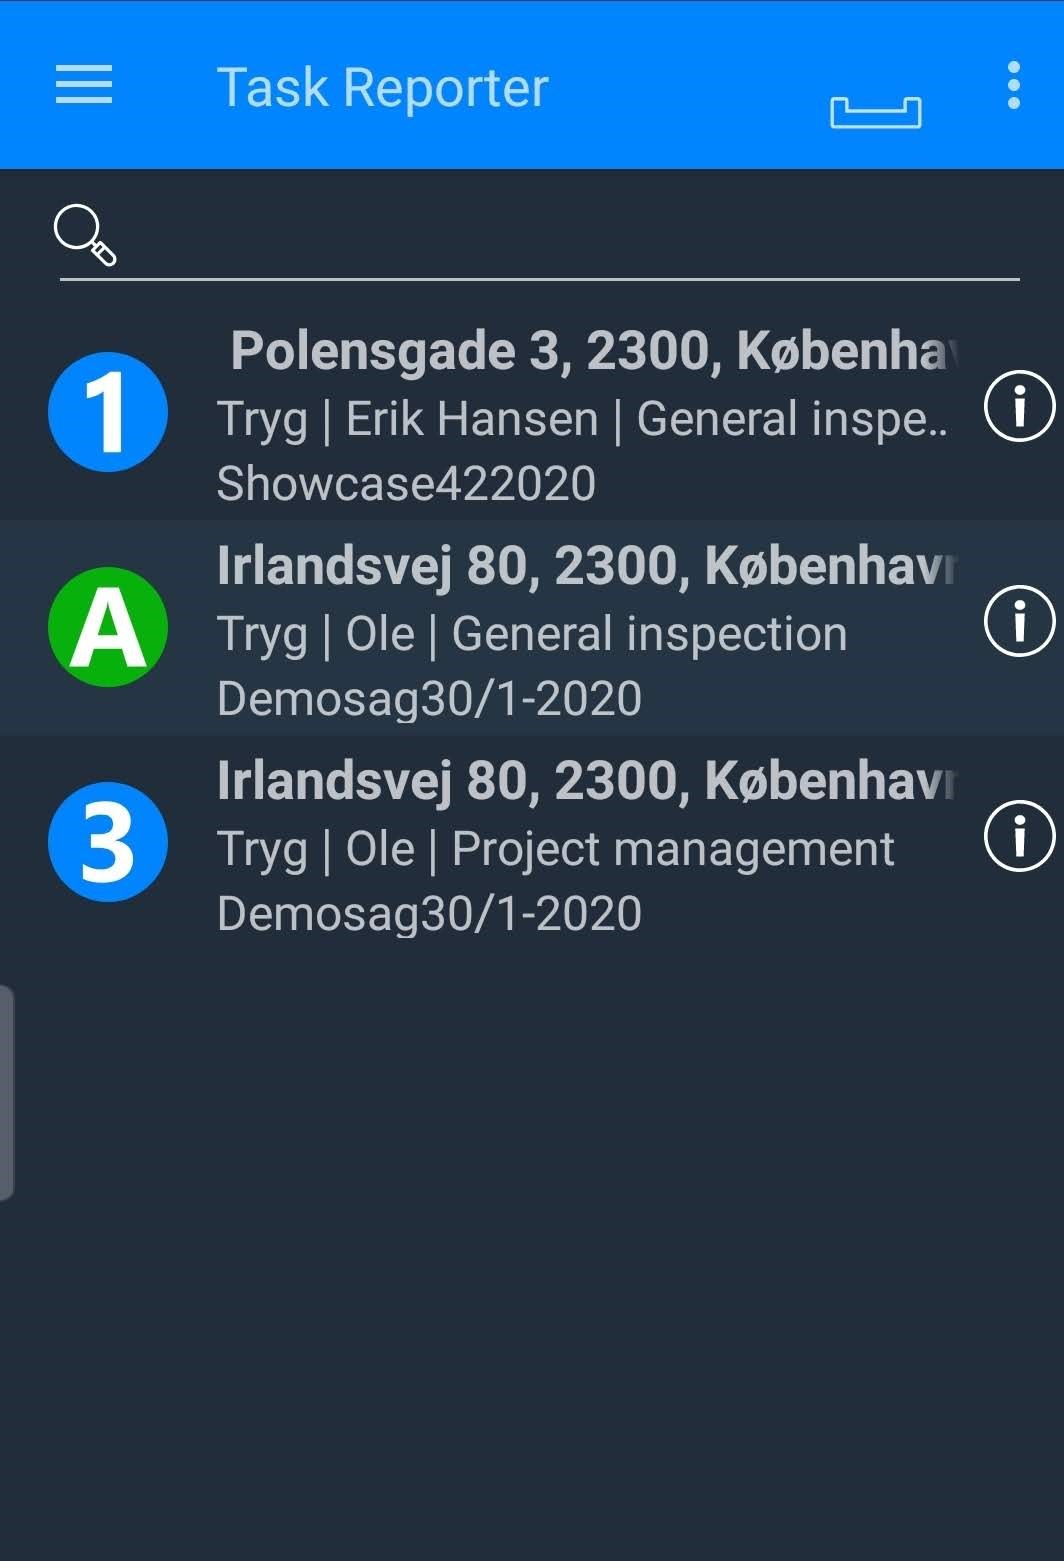

If the list is empty, no tasks have been allocated to you yet.
Open the correct task to begin or continue the reporting.
The status of the task is also visible on the task list. The most repair tasks require a budget which is accepted by the insurance company. If the task requires a budget, the reporting cannot be started before the budget is accepted and the task in status B++.
NOTE! Make sure you open the correct task in order to get the multimedia items sent to correct case in the portal.
In each task you will have the following tabs:
ACTIONS: Damage site address and start- and end times for task, call contact persons, report (inspection tasks only), add multimedia to the task, reassign task.
DESC: Customer’s description about the damage or your personal work order and other information.
CHAT ROOM: Possibility to receive and send chat messages in the application as well
For more information on how to use the application, please see the separate Craftsman- / Inspector- / Project Manager instructions.