


in4mo Report Builder
Here we explain how to use in4mo Report Builder, the tool that enables creation of custom report templates that can be tailored for your specific needs.
Overview
These instructions describe the functionality of the in4mo Report Builder tool. The report builder enables creation of custom report templates that can be tailored for the specific needs of the company. in4mo Contractor Pro customers can use these report templates for any task in both insurance- and own cases. Reports created by Contractor Pro with the tool will only be visible in the in4mo Contractor portal, meaning that the insurance company will not have access to the report template in their portal if they are used in insurance cases. It is, however, possible to share the generated report in each case if wanted. Reports created by insurance companies can be used by those assigned to the tasks the reports are connected to.
If a report template that already is in use is updated with new fields the changes will only be available for new tasks assigned after the changes were made.
Structure of the report template
The report template consists of a range of different building blocks that can be combined to match the needs for the specific report. This way different reports can be created and later linked to specific tasks. It can anything from an inspection report for a specific damage to a safety checklist, or even a template for making an offer to a customer. Only your creativity will set the boundaries.
The basic building blocks of the report template are containers and elements. The container is basically a section of the report that will be separated from each other. Each container can include one or more elements.
Containers
There are three types of containers:
- Container with site visit picture. This container is by default showing up as the initial container in a new report. It will always show the site visit picture on the right side of the container. The site visit picture is normally the first image taken to start the task. In addition to the site visit picture other elements can be added to the container, for example to give basic information about the case or project. It is possible to delete this container, but it cannot be added again.
- Additional container. It is possible to add as many containers as wanted to the report template. These containers can include one or more elements that can be freely defined.
- Attachments container. This is a default container that will be added at the end of the report template and gives the possibility to add as many pictures or floorplans as wanted. It is also possible to give a comment about the added items. The header of this container can’t be changed.
It is possible to give the container a title that will be the header of that section in the final report.
Elements
There are several elements that can be used in the report template. They are briefly described below, while a more thorough description on how to utilize them will come later on.
Text
The Text element will give the user the possibility to write a short text in the report. The element has a label field for defining the title or what should be written in the field.
Text Area
The Text Area is a bigger free text field for reporting longer texts. As with the Text element a title in the label field is required.
Number
The Number element works like the Text element but only numbers can be used when reporting. It has a label and an input area. In the mobile application the keyboard will switch to numerical by default when reporting in the field.
Dropdown
The Dropdown element gives the possibility to create a dropdown menu in the report template. The dropdown requires at least two values and when reporting one of them can be selected. In the final report document, only the selected option will be visible. As for the other elements a title must be given as well.
Checkbox Group
The Checkbox Group enables the user to define several options from a given list of values. The element requires at least two values. When reporting the user can select one or more options by ticking the box. In the final report document all options will be listed and the selected ones are clearly marked. As for the other elements a title must be given to this one as well.
Radiobutton Group
The Radiobutton Group is very similar to the Checkbox Group but in this element only one value can be selected when reporting. The element requires at least two values. When reporting, the user can select one option by marking it, if another option is chosen in the report template the previous choice will be unmarked. In the final report document all options will be listed and the selected one is clearly marked. As for the other elements a title must be given to this one as well.
Static Text
The Static Text element is a text field that will always be present in the report, and it is not possible to edit this text. This can be used for explanations about specific fields that should be visible in the final report template, specific terms or similar. This element doesn’t have a title.
Token
The Token element is used to insert specific case information into the report automatically. The element can be used anywhere in the report template but is mainly used in the case information part of the report. The following information can be defined with the Token element:
- Case ID
- Customer (Name of the customer registered in the case)
- Damage site address
- Work number
- Damage happened
- Contact person (The contact persons in the case with phone number, email address and role)
- Inspection date (Date task was started)
- Customer description
- Project manager (First and last name of the responsible person for the project management task in the case)
- Property unit number
- Fax number
- Responsible for task
- Customer address
- Technician / inspector
- Inspector name
- Inspector company
- Inspector office, name
- Inspector office, street
- Inspector office, zip code
- Inspector office, city
- Start time
- Inspector phone number
- Inspector e-mail
- Damaged property city
Box
With the Box element you can organize other elements within a container. This is a nice way of organizing elements that don’t require the full width of the page. The boxes have fixed width that depends on the number of boxes added, and the element supports two to four boxes. Every box can include an element of the following types: Text, Text Area, Number, Dropdown, Checkbox Group, Radio button Group, Picture frame, Static Text, Token, Floor Planner Frame or Signature. The elements added in a box work in the same way as they otherwise do.
Picture
The Picture element will give the possibility to add an image either by using the device camera, importing from the device gallery, or by adding from the document library or PC hard drive if reporting in the web. A title for the picture element is needed to describe what type of picture is expected. When reporting in the mobile application it is also possible to edit the picture by drawing on it to visualize something important in the picture.
Sub Header
The Sub Header element allows you to split a Container horizontally and add a new header within the same container.
Floor Planner
This element adds the possibility to use the in4mo Floor Planner tool in the mobile application to add a detailed floorplan to the report. When reporting in the web portal it is possible to use a picture from multimedia in the task, the document folder of the case or from the PC.
Table
The Table element inserts a dynamic table into the report template. The table can have up to 8 columns and each column can contain the following elements Text, Text Area, Number, Dropdown, Checkbox Group, Radio button Group, Picture Frame and Floor Planner Frame. A header is needed for all columns added to the table and the columns will have fixed width depending on the number of columns added. In the report template one row will be available for reporting and more rows can easily be added if needed. Each time a new row is added to the table in the report on tablet or web, the same elements defined for the first row will be copied to the next row.
Signature
When the signature element is added to the template, it is possible to add a signature when filling out the report. When selecting the signature field in the report, the reporter can draw their signature, which is then added to the report. Note that the signature field can only be filled out in the Task Reporter app, not from the web portal.
Creating a custom report template
The in4mo Report Builder tool is an integrated part of in4mo and is available for insurance company users and Contractor Pro users with authority level 6.
The in4mo Report Builder is found by going to Company Admin -> Report Templates and then clicking + Add custom report template.

When this is done the in4mo Report Builder will open in a new window or browser tab. If the window does not appear, check that your browser is allowing pop-ups for in4mo pages.
in4mo Report Builder view
When creating a new report template or an existing template is edited, a separate window/tab opens. All mandatory fields are marked in red to make it easy to see where information is missing and what needs to be filled out.
Title (1) – The top part of the window is for defining the name of the report. This will be the title of the report template as well as the final report document.
Report group (2) – It is possible to create many different types of reports and group them, and in order to group custom report templates a group name needs to be defined.
Description (3) – It is not necessary to write a report description, but it can be useful to know the purpose of the report. The description is only visible in the report template list and not in the report itself.

Visibility
When creating a report template in in4mo Report Builder the default visibility for the document generated can be defined. Please note that we are talking about the visibility of the actual report document created from the in4mo Task Reporter application or the in4mo web portal, and not the report template. This is relevant if the report template is used in insurance cases, and you want to make sure that the right people will have access to the document right away.
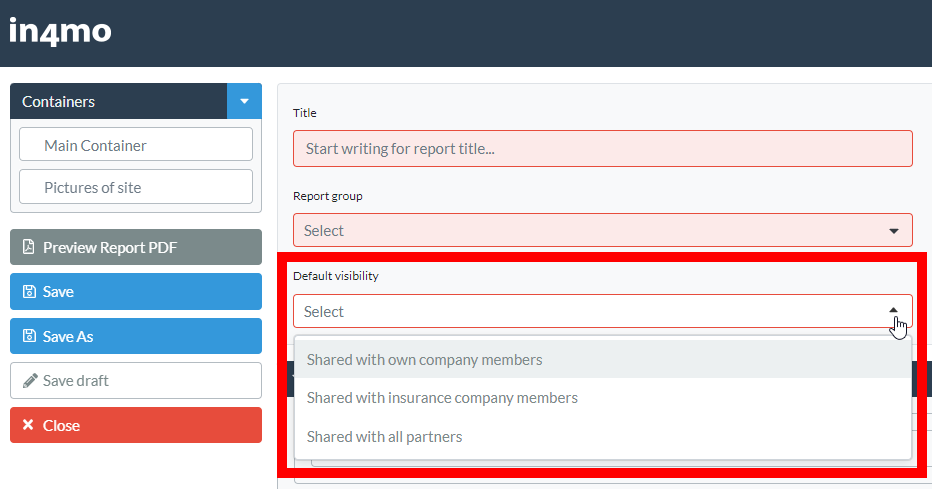
Just select the wanted option from the three alternatives:
- Shared with own company members means that only users from your own company having access to the case will be able to see the document.
- Shared with insurance company members means that in addition to your own company, also members from the insurance company that can access the case will have visibility to the document.
- Shared with all partners, means that in an insurance company case all users from all assigned companies that have access to the case will see the document. This option will enable project managers and inspectors to get access to the relevant documents.
For custom report templates created before Release 14.1 (early April 2023) the visibility is set to “Shared with own members” by default but can easily be changed by editing the report template.
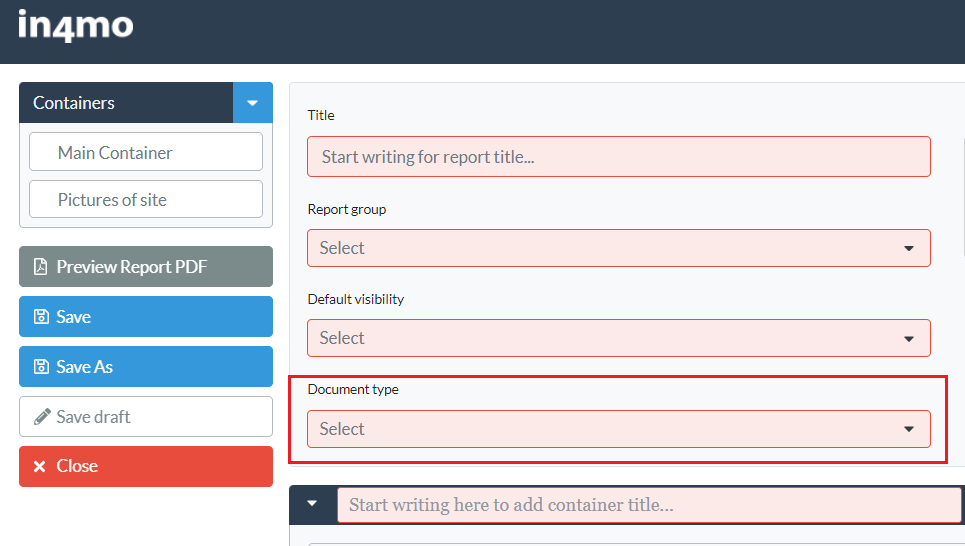
Document Type
When creating a report template in in4mo Report Builder one can also define what document type or category it should be classified as when generated. Note that the document type may also affect the default visibility of the document. The options are the same as for standard report types and include for example the following:
- Inspection report
- Inspection summary
- Project cost calculation
- Humidity report
- Project completion report
- Customer document
- Other (Default)
For custom report templates created before Release 14.3 (August 2023) the document type is set as Other by default, and the document type of already generated reports does not change.
Content
After the initial information about the template has been filled out, the actual content can be defined. The first section is the container with the site visit picture. The container can be deleted from the template by clicking the trash can in the top right corner. Please note that this container cannot be added to the template again once removed, in that case the whole template must be created again from scratch.
Container title (4) – First thing to do with all the containers is to give a title for the container, for example “Case information”, “Project details”, or “Customer information”. On the left side of the container (5) it is possible to add elements as wanted. See further down for more information on how to add elements. In this first container the Token element is very useful to list case information. On the right side of the container the placeholder for the site visit picture is visible (6). This element can’t be added anywhere else and if it isn’t wanted the whole container can be removed.

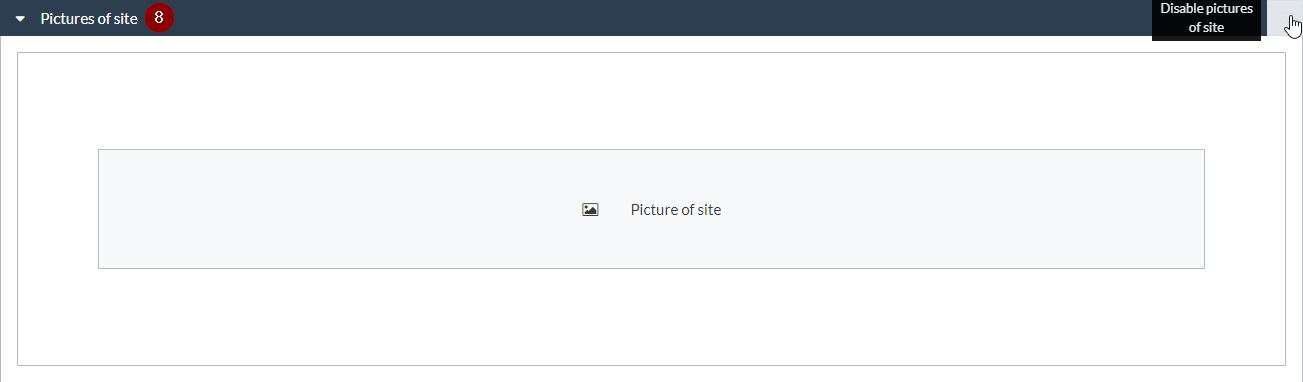
Under the first container there is a button called “+ Add Container” (7). When you click this button, a new container is added to the report. It is possible to add as many containers as you want. This button will always be available below the last container. At the end of the in4mo Report Builder you will find the section “Pictures of site” (8). When this is activated, it is possible to add pictures freely at the end of the report. It is, however, possible to disable the section if you do not wish to include pictures at the end of the report.
By clicking “Save” or “Save As” (9) on the left side of the Report Builder, the report template will be available to take into use in tasks or with specific customers as described later on. It is also possible to save the report template as a draft by clicking “Save draft” (10). A draft template cannot be taken into use, but saving a template as a draft allows you to continue working on it later.


Adding elements to the report template
As described earlier, elements are the building blocks that are used to build the report in a structured way, with the right options for the information.
![]()
When clicking the + Add Element button, the supported elements will be visible. It is possible to add elements in the two main container types as well as within the Box and Table elements. Note that the list of the available elements might be different in different places.

It is possible to have several elements in one container, but it is recommended to not have too many elements in each container. Utilizing containers for separating different types of information will give a more readable and better-looking report.
When clicking the wanted element type in the list, it will be added to the report template in the container the Add Element button was clicked in.
The mandatory information needed in the element, such as title and type of information in the field, will be marked in red. This makes it easy to know what to do and how to continue to build the report template.
Please note that it is not possible to save a report template until all mandatory fields are filled.
Removing containers, elements, and other information
It is possible to change the content while editing a report template. By clicking the bin icon, the information in the frame will be removed. The bin icon is located in different places depending on the functionality in the object used. There is e.g. a separate bin to remove a complete container, and another one to remove an element or a column in a table.
Please note that if a container is removed, all the content defined in the container will also be removed. The same also applies when removing an element; the content defined within the element will also be removed.
Marking elements as mandatory
It is possible to mark an element as mandatory. This means that it is not possible to mark the task as complete before all these mandatory report items have been filled out. By checking the checkbox, the element will be mandatory when filling out the report in a case.

Editing a saved report template
A report template created using Report Builder can be edited at any time by going to Company Admin -> Report Templates and then clicking the cog wheel and choosing Edit for the wanted report template.

If the report template is assigned to a task already and is in use in a case, the changes will only affect new tasks assigned after the changes were made.
How to utilize the different elements in a report template
By utilizing all functionality in the in4mo Report Builder tool it is possible to generate several different report types for all kind of needs. Below are some good examples and tricks that can help to build the perfect report for you.
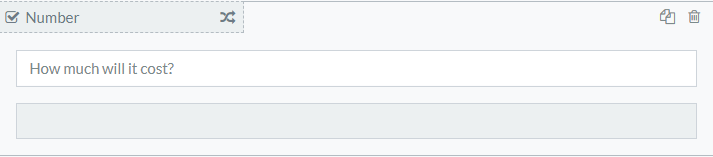
Define fields for only numerical values
If you want to make sure that the information that is filled out in the report is a number, you can define fields to only support numbers. This can be used for different purposes like measurements, estimated costs etc. The element Number can be defined both in containers on their own, as well as in Tables and Boxes.
In the mobile application the keyboard will change to numeric when selecting the field. In the web portal the field will be checked and marked green when only numbers are given.
How it looks in Report Builder
How it looks in the report template

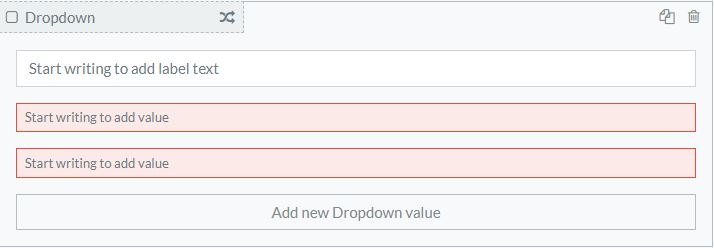
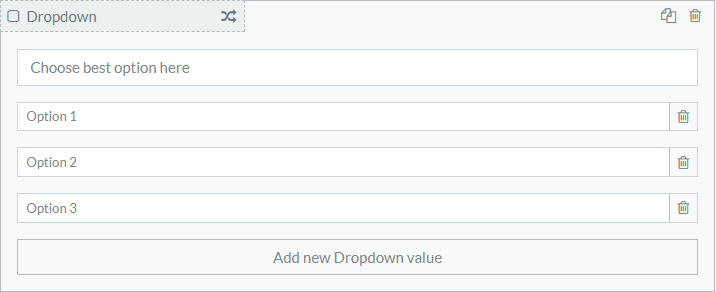
Use Dropdown for pre-defined texts
If you want a specific answer in the report and only that option visible the element Dropdown is perfect. This can for example be used for what type of project it is or what the cause of the damage is. The dropdown must have at least two items and more can be added by using the “Add new Dropdown value” -button at the end of the list. Dropdowns can also be used in tables and boxes.
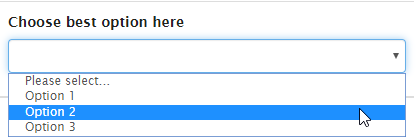
How it looks in Report Builder
How it looks in the report template
Use Checkbox Group for marking several pre-defined options
With a Checkbox Group it is possible to choose several options, and users can select one or more option when reporting. Checkboxes can be included in a Table or Box element.
How it looks in Report Builder

How it looks in the report template

Allow only one option with Radiobutton Group
If the user only should be able to give one option of a pre-defined list of items, then the Radiobutton Group is the right element. It is very similar to the checklist, except only one option can be selected. This element can be used separately or in a Table or a Box and requires at least two options.
How it looks in Report Builder
How it looks in the report template
Use Static Text to define text that always should be in the report
If there is text that should always be included in a report, such as a disclaimer or an explanation as to what should be filled out in a field, the Static Text element is a useful tool. Static text cannot be edited when filling out the report, and reporters don’t have to fill out the same text every time.
How it looks in Report Builder

How it looks in the report template

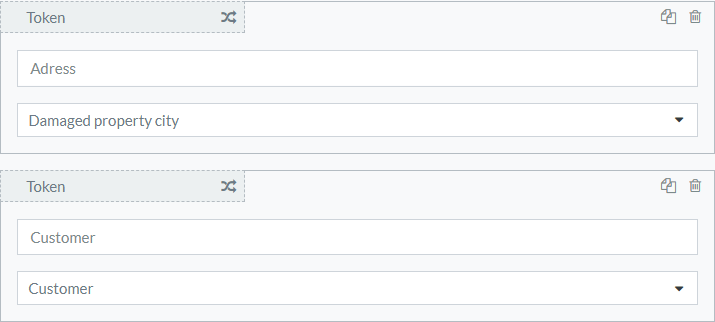
Use case information with Tokens
A case already includes case information when it is created. This information can be used in the report template, meaning that when opening the report, this information is already filled out. Information filled out through Tokens cannot be edited in the report.
How it looks in Report Builder
How it looks in the report template

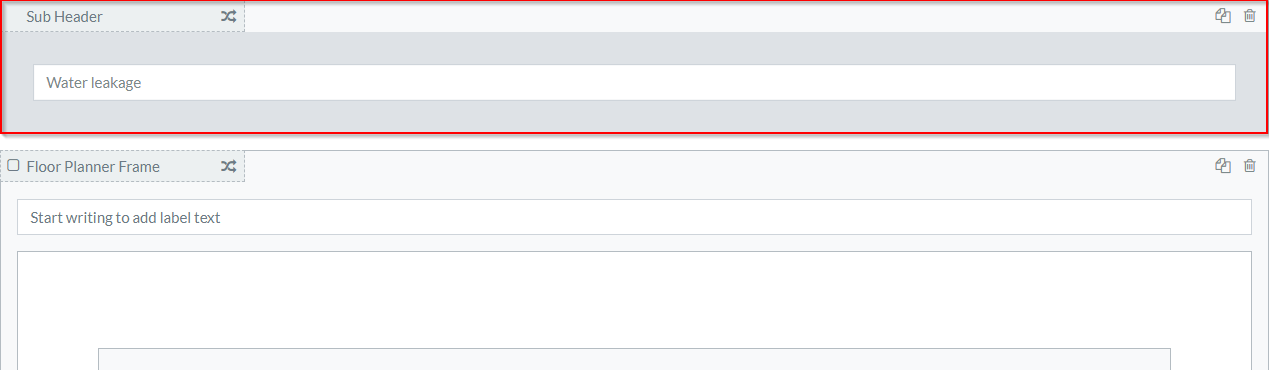
Divide the report with a Sub header
The Sub Header element is used for creating headers within a container. This can be utilized to make the report look more structured and reader friendly.
How it looks in Report Builder
How it looks in the report template
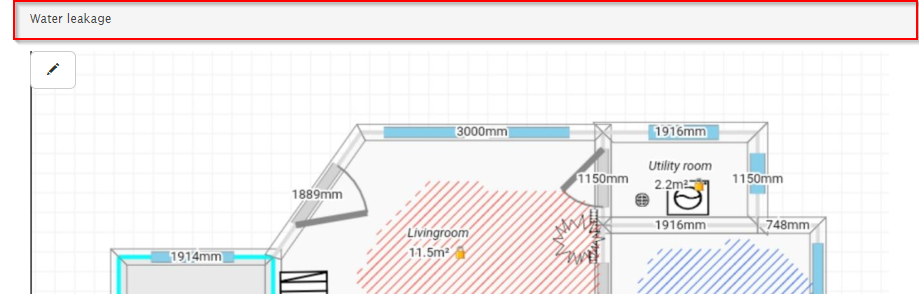
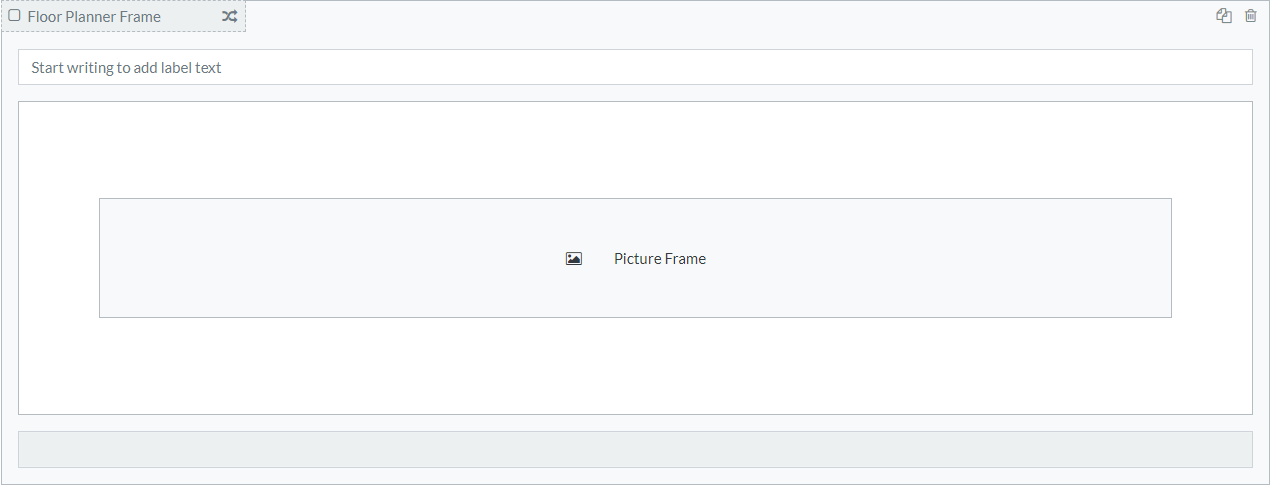
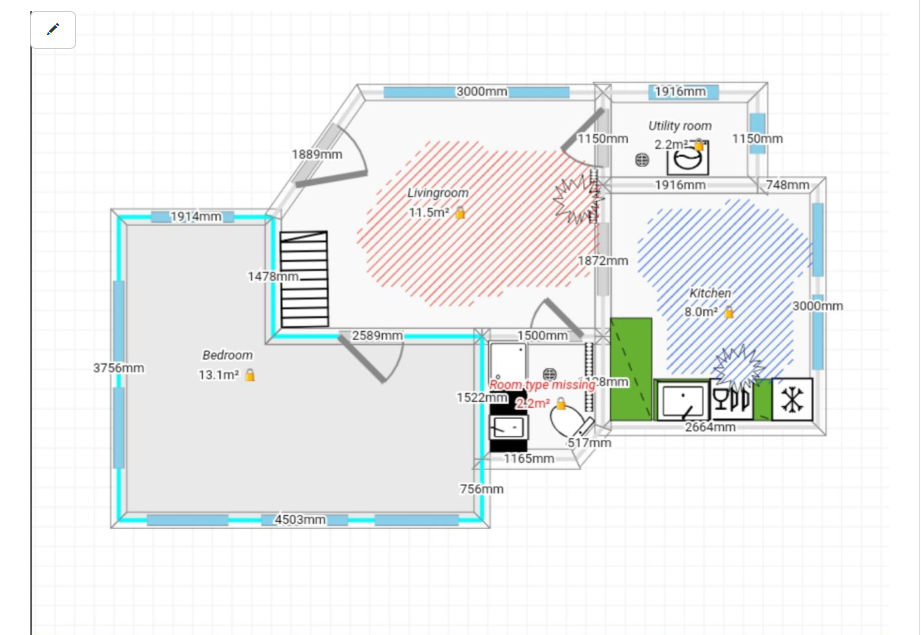
Make it possible to create floorplans with in4mo FloorPlanner
For many reports a good floorplan will add a lot of valuable information. in4mo FloorPlanner is a tool that makes it possible to create own floor plans from the Task Reporter app on a tablet. Measurements from the floor plan can also be used in iCC calculations, if in use. If the report is filled out from the web portal, the FloorPlanner tool is not available, however it is possible to upload a picture to be used instead.
How it looks in Report Builder
How it looks in the report template
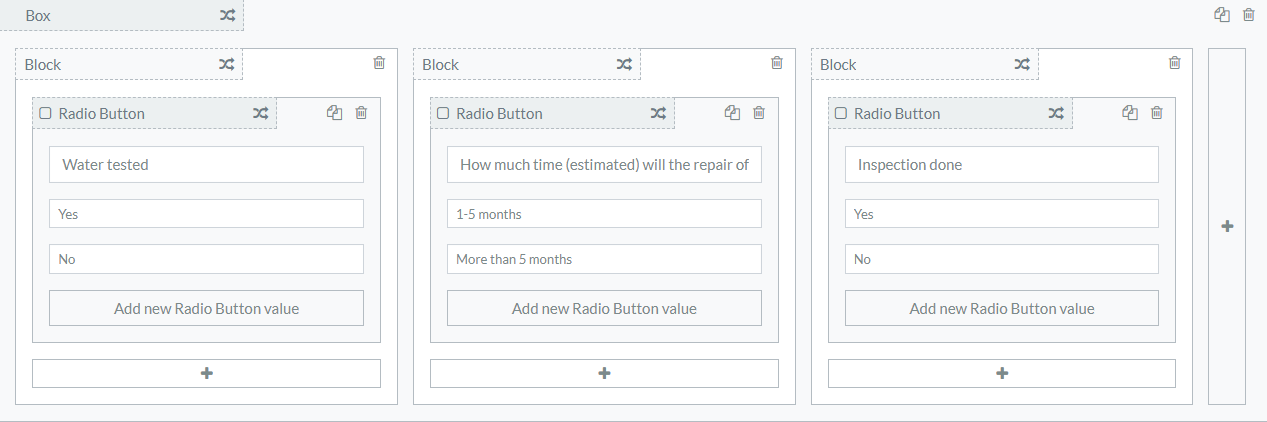
Structure the report with the Box element
Many elements don’t require the full width of the report. Boxes can be used to make the report look more structured and reader friendly. The Box element will split the container width in several columns (boxes). In each column, a new element can be defined, for example a Checkbox Group or a Text field. You choose yourself how many boxes you want to add, the report supports up to four columns.
How it looks in Report Builder
How it looks in the report template

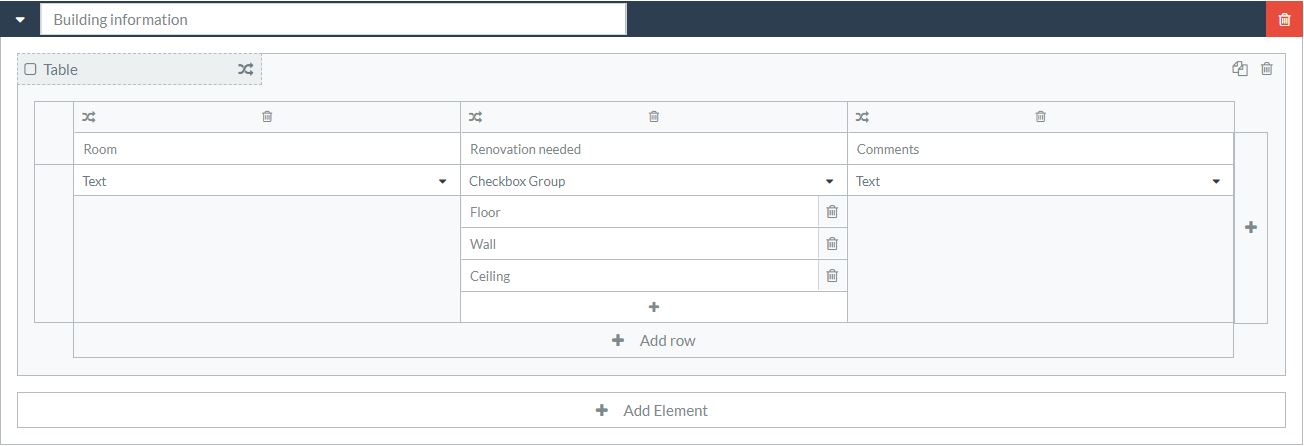
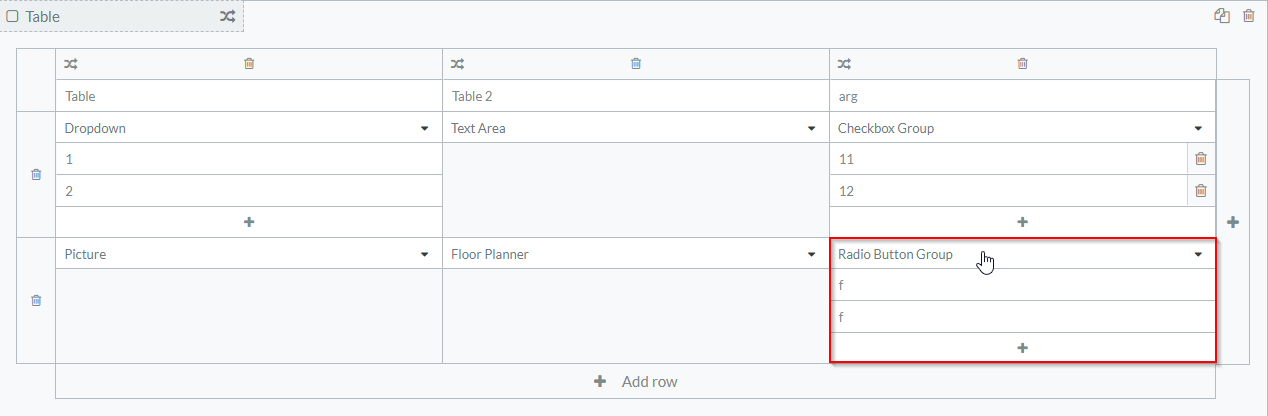
Use Tables for unknown amounts
The Table element will create a dynamic table in the report template, meaning the user reporting can add as many rows in the table as needed. When adding the Table element, it is possible to define how many columns you want by clicking the plus icon. The table can have up to eight columns. A title is needed for every column and then the wanted element is defined for the specific row.
How it looks in Report Builder
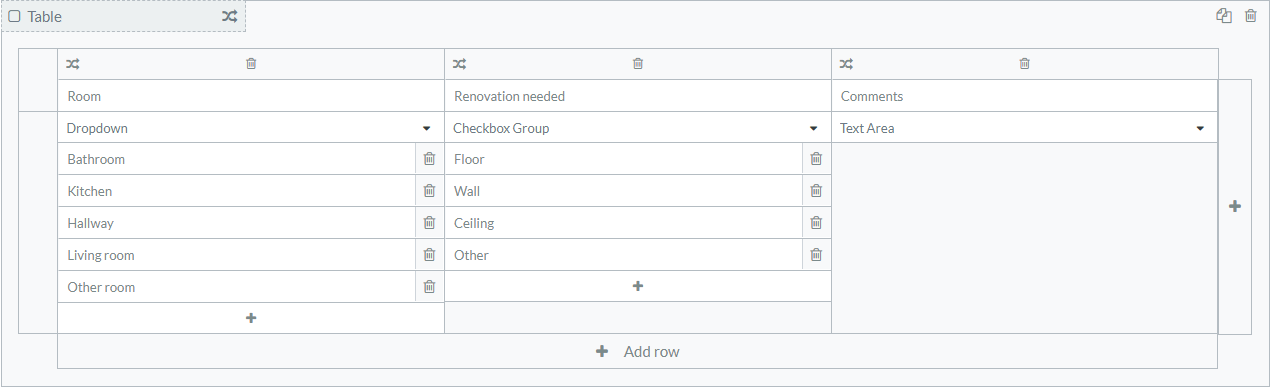
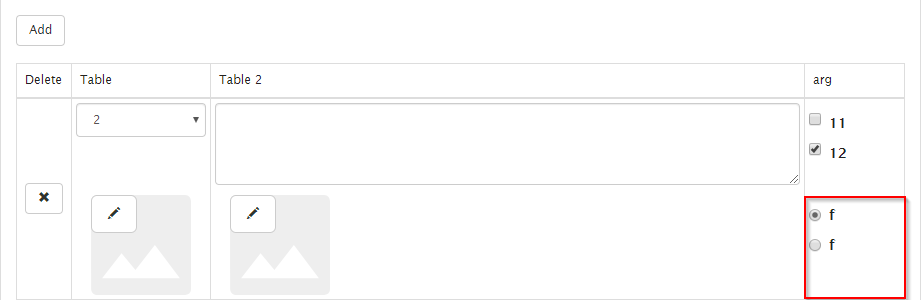
How it looks in the report template

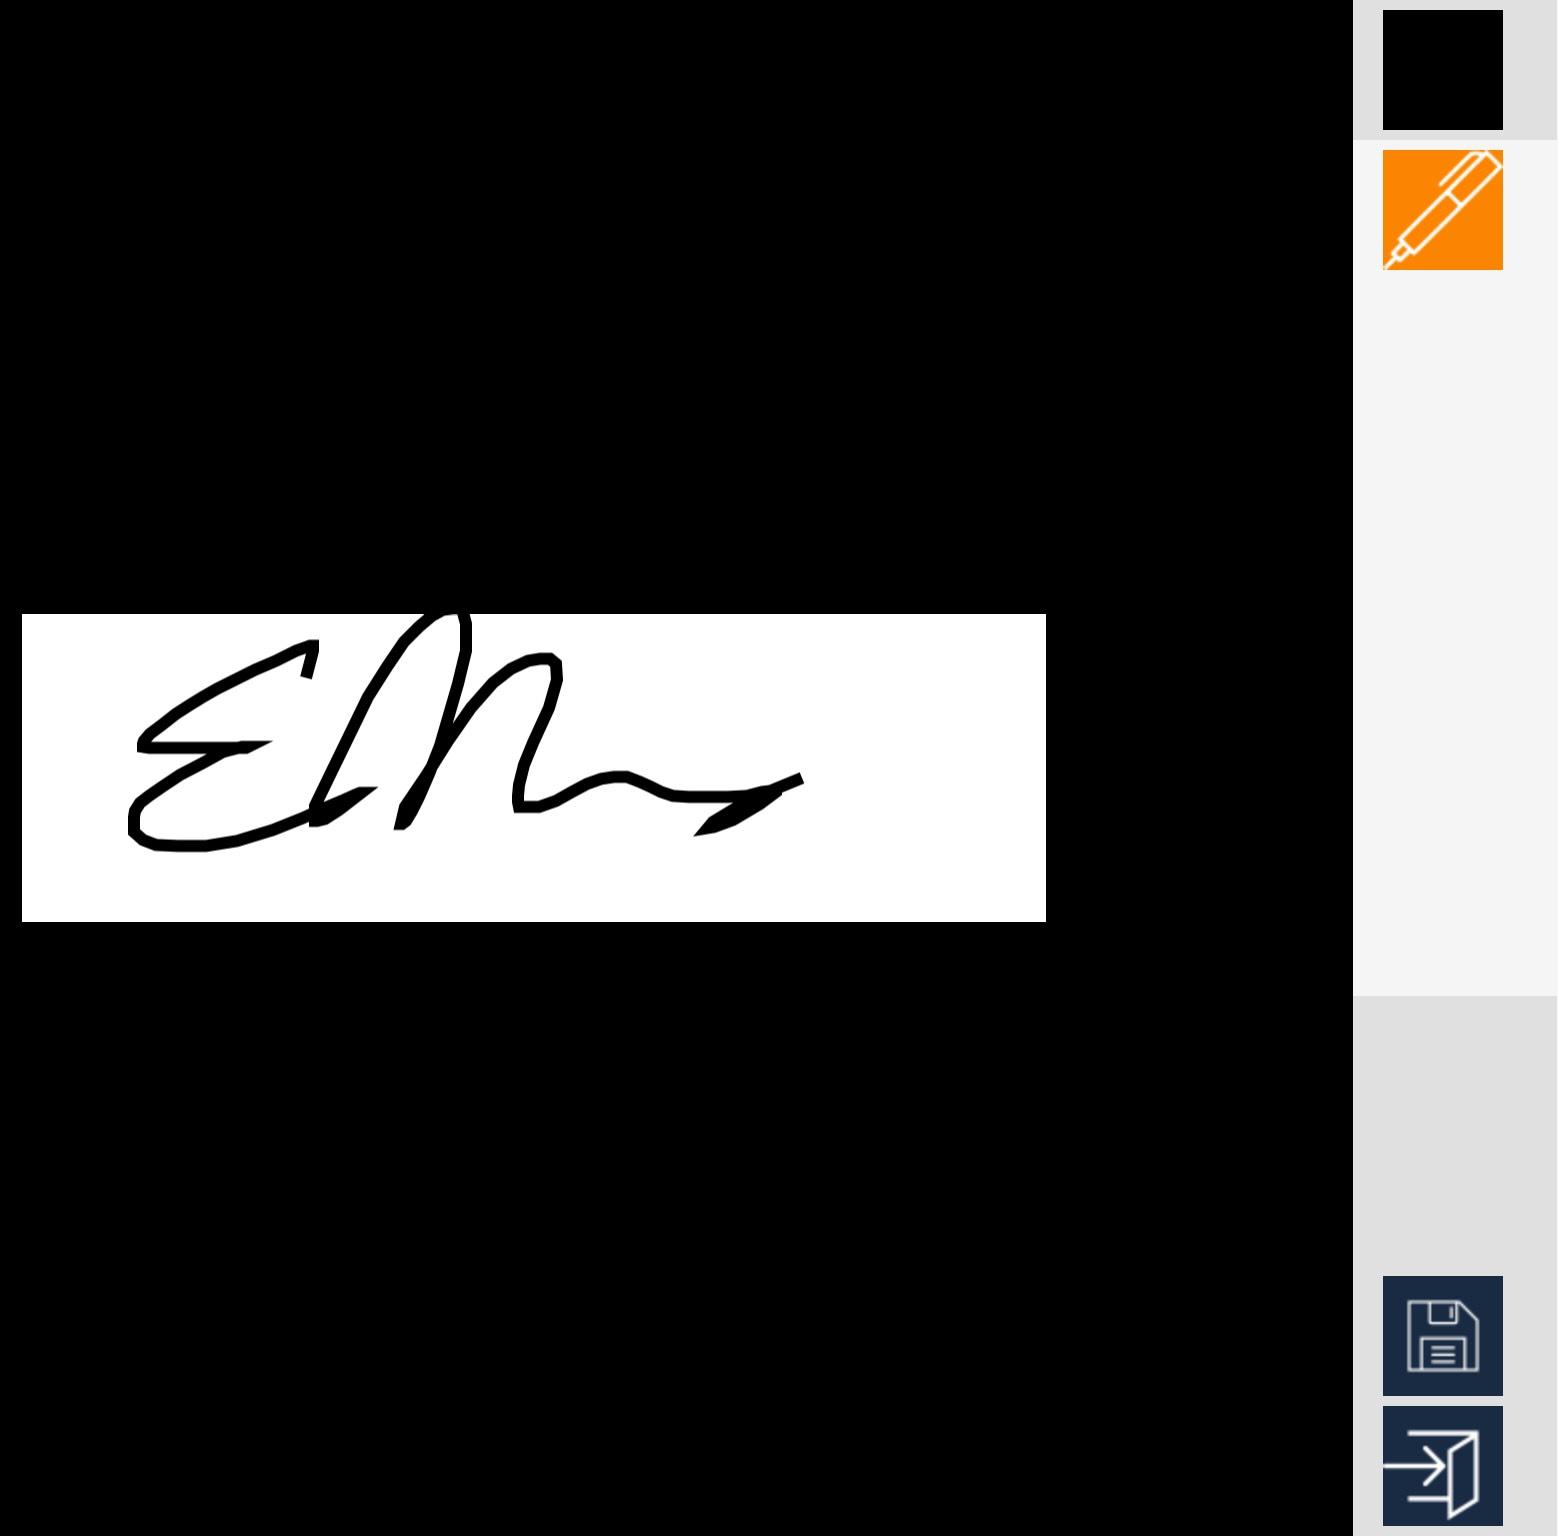
Use signatures to give the report a more professional look
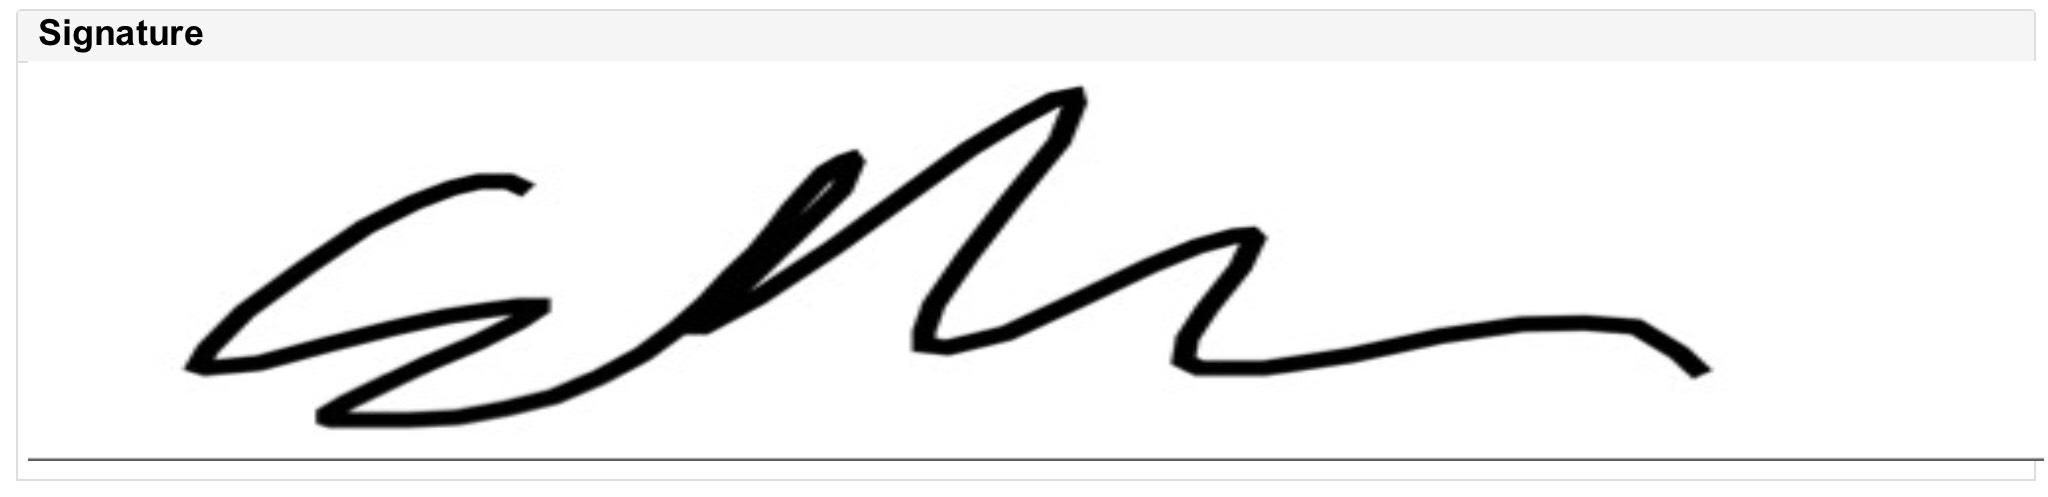
The Signature element can be utilized to give the report a more professional look, or perhaps even to fulfil reporting requirements. When adding a signature in a report, a drawing tool will open, where the reporter can draw their signature. Note that it is only possible to add signatures in the Task Reporter app, not when filling out the report from the web portal.
How it looks in Report Builder

How it looks in the report template

How to add report templates to tasks
When a report template has been created in Report Builder, it can be assigned to tasks. The report templates can be used in both standard and custom tasks (Contractor Pro). The report template will then be available when reporting in these tasks, either from the mobile application or the web portal.
To assign the report to a task, go to Company Admin -> Company -> Tasks:
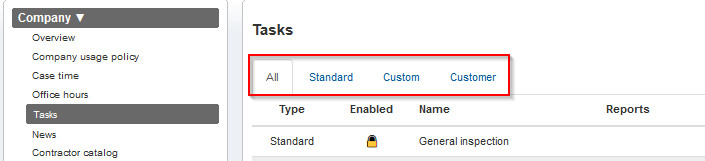
Depending on the wanted availability of the report in different tasks, the task list can be filtered for the different task types.
To add the report template to a task simply click Edit for the wanted task:
![]()
Select the template or templates that should be available for the task. The added templates will be shown in green. Don’t forget to save by clicking Update.

Assigning a report template to a specific customer (Contractor Pro)
In Contractor Pro it is also possible to assign specific reports for specific customers. This means that the report template will only be available for tasks in cases created with the specific customer profile. If the Customer filter is selected under Company Admin -> Company -> Tasks, the available customer profiles will be shown.
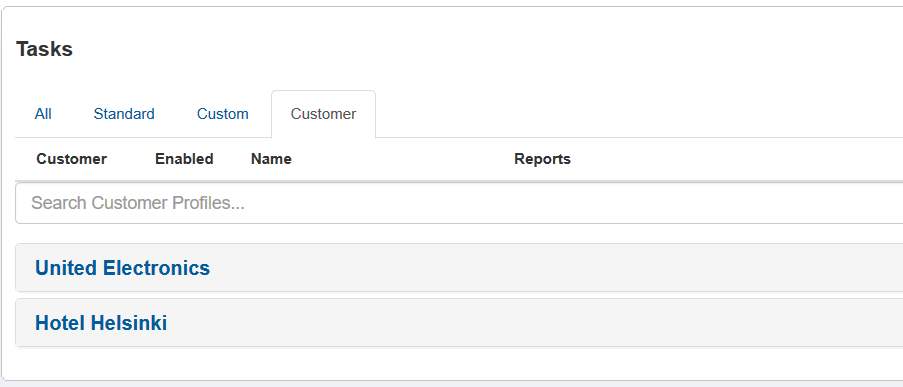
When clicking on the customer name the tasks will be visible and the report templates can be added in the same way as described earlier. This way it is possible to define different report templates to be available for tasks depending on the customer.