Partner Admin
The first thing to do when getting an invite to in4mo Building Claims by an insurance company is to set up your company, offices and add users. The needed steps are explained here.
Get started with in4mo
The insurance companies that the user works with, creates an account for the user as the Company Admin of their own company and the user will receive a username and a password from them.
Admin role means that the user has the highest possible authority level (4) in the portal. The user can edit and add members and offices in their company.
When the user has logged in to the correct portal, a tab called Company Admin on top of the first page can be seen.
 By clicking on the Company Admin tab, the user will be navigated to the page of the company settings.
The insurance company has created user’s own company as their partner. Via the Company admin page, the user can edit the company profile and fill in information on the company level.
NOTE! If working as a subcontractor for some other company using in4mo, it is necessary to activate the Become subcontractor -box by clicking on it.
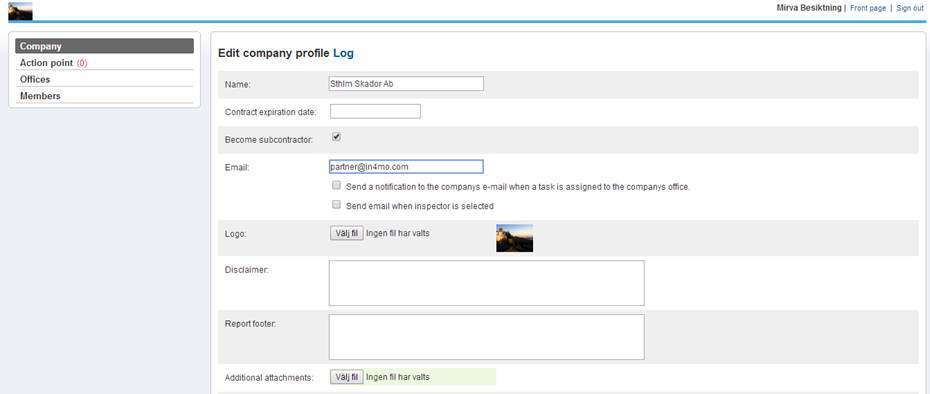
It is important to click on Save changes at the end of the page when settings are ready.
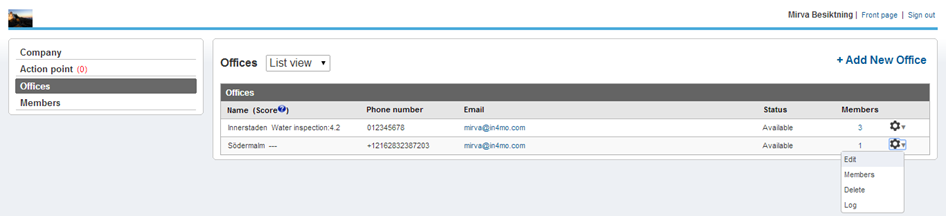
Editing and adding Office information
By clicking Offices in the menu on the left side, it is possible to add and edit offices in own company. By clicking on the cogwheel on the right side, it is possible to edit information for a specific office.
 To add a new office, it can be done by clicking on +Add New Office in the right corner of the page. Next step is to fill in the needed information for the new office. The general services and expertise which the office(s) offers, should be carefully chosen, as that information will be synchronized to the insurance companies as well.
There is a possibility to mark the office as available or unavailable which means that the office either can be assigned for a task or not. If Unavailable for new tasks is chosen, the office will not be assigned new tasks from the insurance company, but the office is still available for old cases, where they already have been assigned a role.
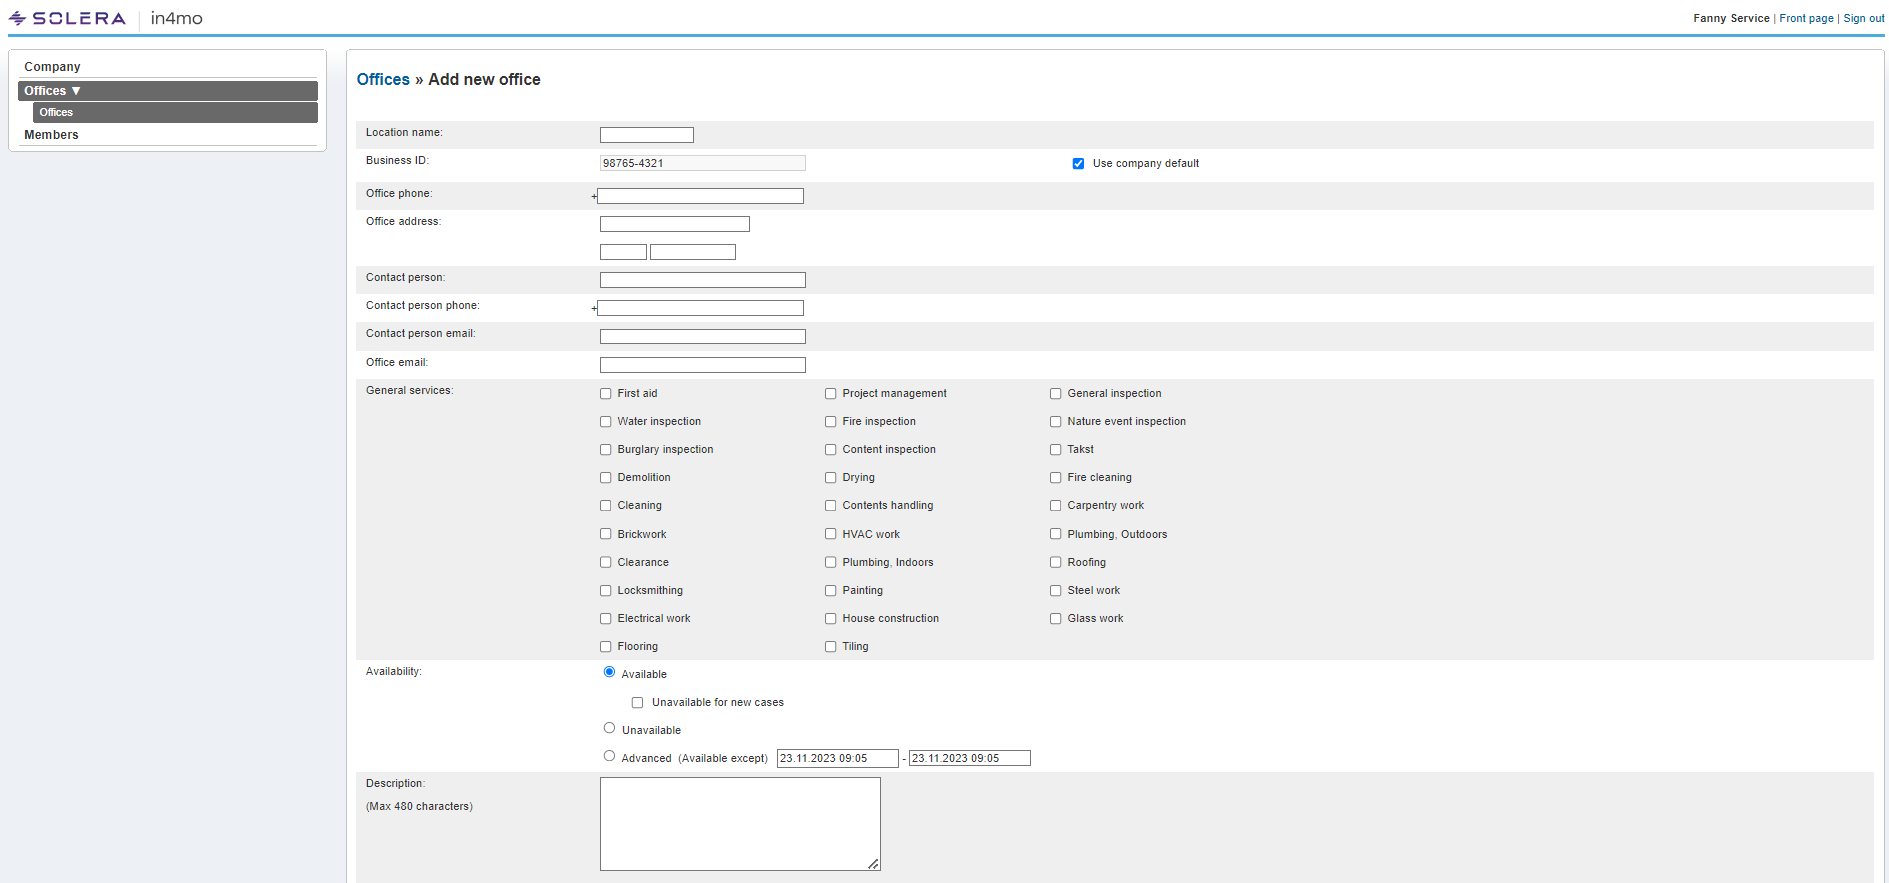 When satisfied with all the settings, the Add button needs to be clicked, which can be found by scrolling down the page, so the settings will be saved.
NOTE: These settings need to be done in all the insurance company portals the company uses and for all the offices separately.
Add and edit members
To add and modify members, it can be done by clicking Members on the left side menu. By clicking on the cogwheel on the right side, it is possible to edit member information. To add a new member, it can be done by clicking on the + Add new member button.

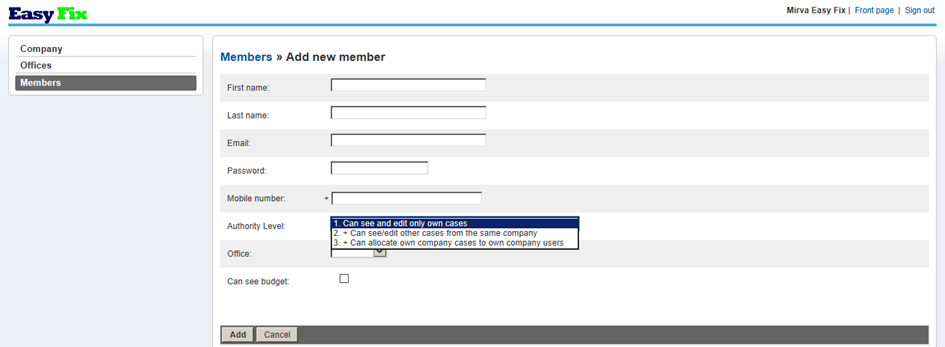
Next step is to fill in the needed information for the new member.
The authority level will determine which rights this member will have in the portal.
If the company has several offices, it is necessary to pick the applicable office that the member belongs to. NOTE! One member can belong only to one office.
The box Can see budget should be selected if this member needs to be able to add/view/modify budgets in cases.
When all the needed information has been filled out, last step is to click Add.

How to register members to in4mo training courses and remote evaluations
All the members in a company, must be certified for the different types of tasks to use the in4mo tool in insurance cases. However, for the Contractor’s own cases, the certification is not needed.
By logging in to the in4mo portal of an insurance company and by clicking Certification at the top of the page, upcoming remote evaluations and courses for certification can be found. Here, it is possible to sign up members of own company. A user can also sign up themselves for a course/remote evaluation.
There are 2 different kinds of certificates:
- For inspectors and project managers, that includes the craftsman certificate.
- Certified members can carry out inspection, project management and craftsman tasks in in4mo.
- For craftsmen
- Certified members can carry out craftsman tasks in in4mo.
Admin users in own company who do not carry out tasks on the damage sites, but who assigns and coordinates tasks to other users, do not need to be certified.
The course/remote evaluation for which users is going to be sign up for, it is important to make sure, that the participant(s) reads the information, that is provided in the course description and notes fields.
NOTE! When registering to a remote evaluation, it is expected from the participant(s) to learn how to successfully use the in4mo solution on their own. No assistance will be given to complete the assignments; it is an evaluation and not a course.
![]()
To sign up for a course/remote evaluation, it can be done by clicking the Sign up for this course button on the upper left corner, in the course/remote evaluation page.
IMPORTANT!
The registered participant(s) will get two e-mails with information about how to prepare for the course/remote evaluation. It is important to make sure that the participant(s) have done the needed preparations before the assessment day arrives.
Request for Quotation (RFQ)
In in4mo it is possible to send a Request for Quotation (RFQ) for any task, except for inspection tasks and project management.
Once an insurance company decides to ask a company for an offer regarding one or more tasks, they will receive the request through e-mail.
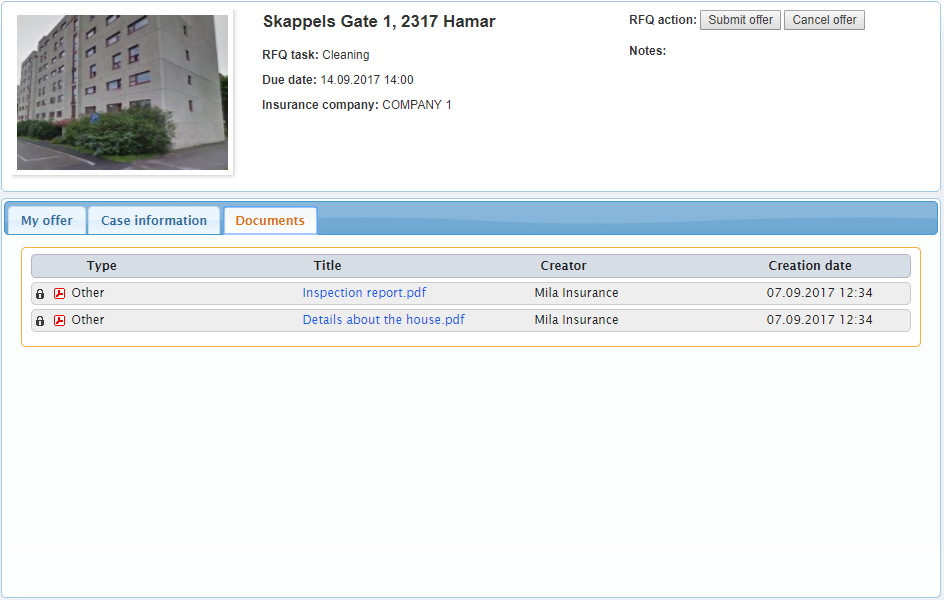
The e-mail contains a link to a page where users can submit their offer and review case related information. Logging in can be done with the same details as users have in the portal.

The available documents can be looked through, by clicking the Documents tab and a cost calculation can also be created here.
When the cost calculation has been created and the budget has been established, next step is to click the Submit offer button.
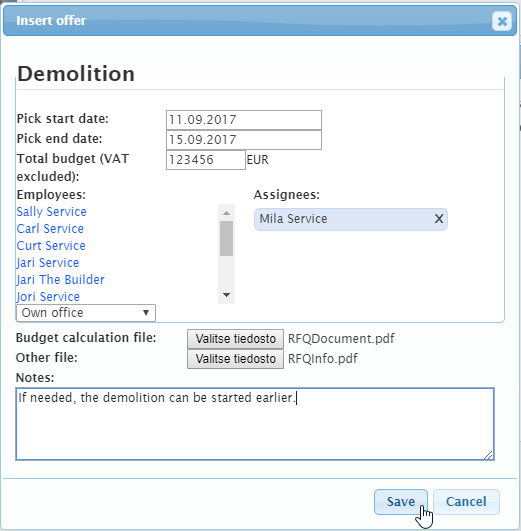
In this view, the task budget needs to be inserted as well as the cost calculation needs also to be attached.
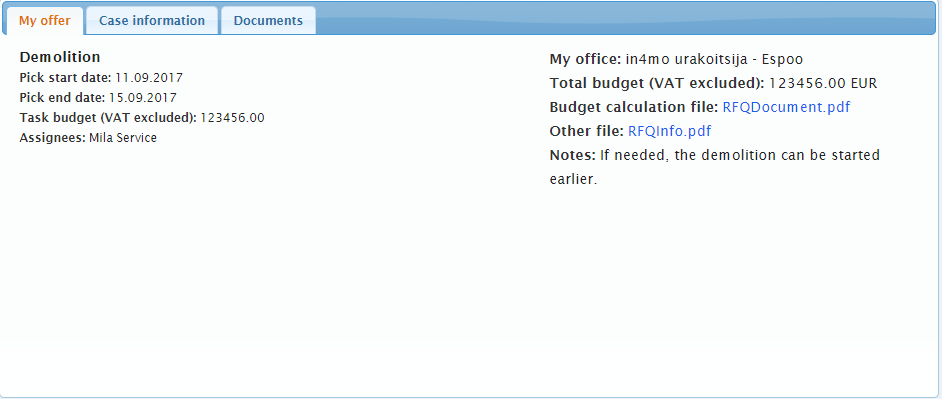
To know if the offer has been sent further, the information that has been inserted before, will be shown on the front page.
If own offer is chosen once the due date has come, an e-mail will be sent with the information to the office e-mail. The created budget and cost calculation when submitting the offer, will be automatically attached to the task(s) in question.
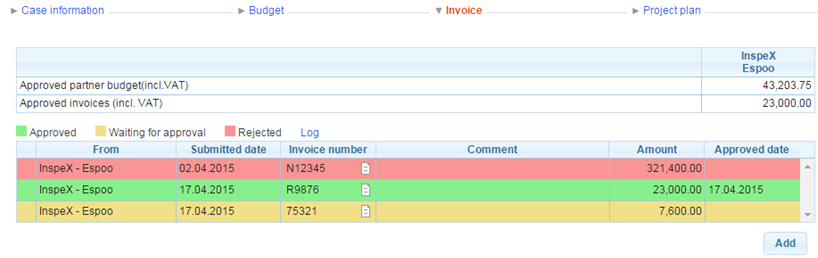
Add and send invoice for approval
To add invoice(s) to task(s), it can be done by going to the Invoice tab and by clicking on the Add button on the right side.
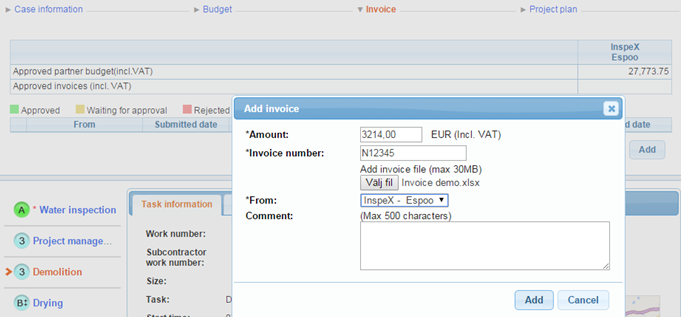
In the pop-up window that appears, the information needs to be filled out and after that, the Add button needs to be clicked, so the invoice will be added.
Only those users in own company, who have been given the rights to see the budget, can view and attach invoices for own company offices. It is important to make sure, that ‘Can see budget’ is activated for those users who need to see budgets and add invoices. This is done in member settings in the Company admin page.
Invoices will be saved both under the Invoice tab and in the Documents library. An invoice icon will also be visible on the case in the case list view.
The invoices will be sent for approval to the case handler, who can either accept or reject the invoice. Once an invoice is approved, it can still be rejected afterwards.
It is also possible for insurance company users to attach invoices on the behalf of a company. In that case users will still be able to see the invoices regarding own company’s tasks.