


iCC Price Management
To estimate the repair cost in iCC, hourly rates and other cost elements must be defined, in these instructions we tell you how.
Overview
Here we explain how price management in iCC (in4mo Cost Control) works, both for insurance companies and for companies in their partner network. You will find an own section for insurance companies and one for other parties, so that you can go straight to the section that’s relevant for you.
What do Price Sets Consist of?
A price set consists of three types of prices:
- General prices
- Hourly prices
- Block prices
General prices are a set of prices that are not task specific, such as for example compensation for travelling, prices for handling of material, project management, regular inspection fees etc.
Hourly prices are the rates charged for each specific task type. Block prices are the prices for each individual work item under each task type.
Travel Costs and Automatic Trips
Travel costs are calculated based on the travel cost defined under the general prices and the distance from the assigned office to the damage site. One trip is a return trip from the assigned office to the damage site and back again.
Further there are two ways of defining how many trips will be added automatically to cases. Travel costs can be defined as a specific number of return trips per task, for example the partner will be compensated for one return trip for an inspection and two trips for a drying task. This is done by adding trips as Fixed, where the defined number automatically will be added to the case when the relevant task is assigned.
The other option is to base the number of trips compensated based on the time the work will take to perform. This means that the number of work hours that will generate one trip is defined and then the system will calculate the number of trips based on the work defined in the work plan. This is done using the Auto function. In the example below, for every 7.5 hours of working time for carpentry work, another trip will be added automatically.

Note that with the Auto function, the system will combine the working time for different tasks assigned to the same office. If for example an office has been assigned a carpentry work task only, and the system automatically has calculated that the working time for the task requires 2.5 trips, this will be rounded up to 3 trips, as you for obvious reasons cannot make parts of a trip, you will go to the damage site and back again. However, if the office is assigned to both carpentry work and demolition, and the number of trips for the carpentry work is 2.5, and for demolition 1.5, the total amount of trips added automatically will be 4, rather than 5. The reason for this is that it might be that the same workers will perform more than one task during the same visit to the damage site. That might not always be the case, as it might be that you need specialists for some tasks, and it will be other workers from the same company doing different tasks. In such cases, this can be adjusted in the individual cases by adding more trips manually if necessary.
Note also that the possibility to define automatic trips as Fixed or Auto depends on portal settings, if this functionality is not activated in a portal, the number of trips defined for the tasks follows the same logic as described above for Fixed trips.
iCC Price Management for Insurance Companies
iCC Price Management for insurance companies is available to users with authority level 6 and users with role: Supplier network manager. It is found under Company admin -> Fixed price structure. This section explains how insurance companies go about price management and is thus only relevant for insurance company users. For others, please refer to iCC Price Management for Service Companies/Suppliers.
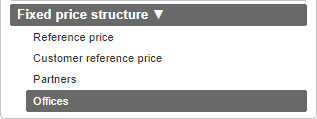
Depending on portal configurations, you will find three or four categories here:
- Reference price
- Customer reference price (depending on portal settings)
- Partners
- Offices
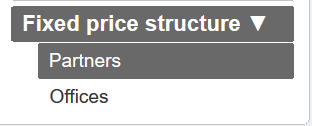
For the most part it’s the partner and office sections that require your attention, as it is from these sections that the partner network prices are set and approved. There are two ways in which prices can be added for a partner; at partner level, and/or at office level. When prices are set at partner level, it’s possible to use the same configuration for this partner’s offices. It is also possible to use partner level prices for some offices, whereas other offices from the same partner use separate prices set on office level. Prices set on company level are set under ‘Partners’, whereas prices on office level are set under ‘Offices’.
Reference Price
The reference price determines the price shown under the column ‘Customer’s craftsman’. When setting or editing the reference prices, the new prices will be taken into use immediately, there’s no need for approval of the new prices or to set an activation date.
Customer Reference Price
The customer reference price determines the prices shown under the column “Customer’s own work”. In other words, when you assign work items to the customer, i.e. giving a cash offer, the prices are calculated from the customer reference price. When setting or editing the reference prices, the new prices will be taken into use immediately, there’s no need for approval of the new prices or to set an activation date.
Note that the availability of the customer reference price section depends on settings in the portal. If this section is not available, prices in the column ‘Customer’s own work’ are based on partner prices. If no partner has been assigned to a task, then the customer’s own work prices are based on the prices that would have been if the work items had been assigned to the main inspection company. If the inspection company does not have prices defined for the work items, the prices will be based on reference prices. If a partner other than the inspection company has been assigned to a task, work items for this task will follow the prices from the assigned partner for the customer’s own work.
Partners
When you go to the Partners section, you will see a list of all partners in the portal. There are different ways of filtering this list; by company name, by company email address, or you can choose to only see companies with or without a price set defined, or both.
Companies that requires action are marked with a red arrow on the left side. This can be if there is no price set defined yet, or it can be that a price set has previously been defined, and that these prices have been updated. The column ‘Priceset’ on the right side shows whether a price set has been defined for the partner or not.
When you have found the partner you are looking for, click on the name of the partner under the column ‘Name’ to open the price set configuration for this partner.

The price configuration for the selected partner will open. From here there are several options:
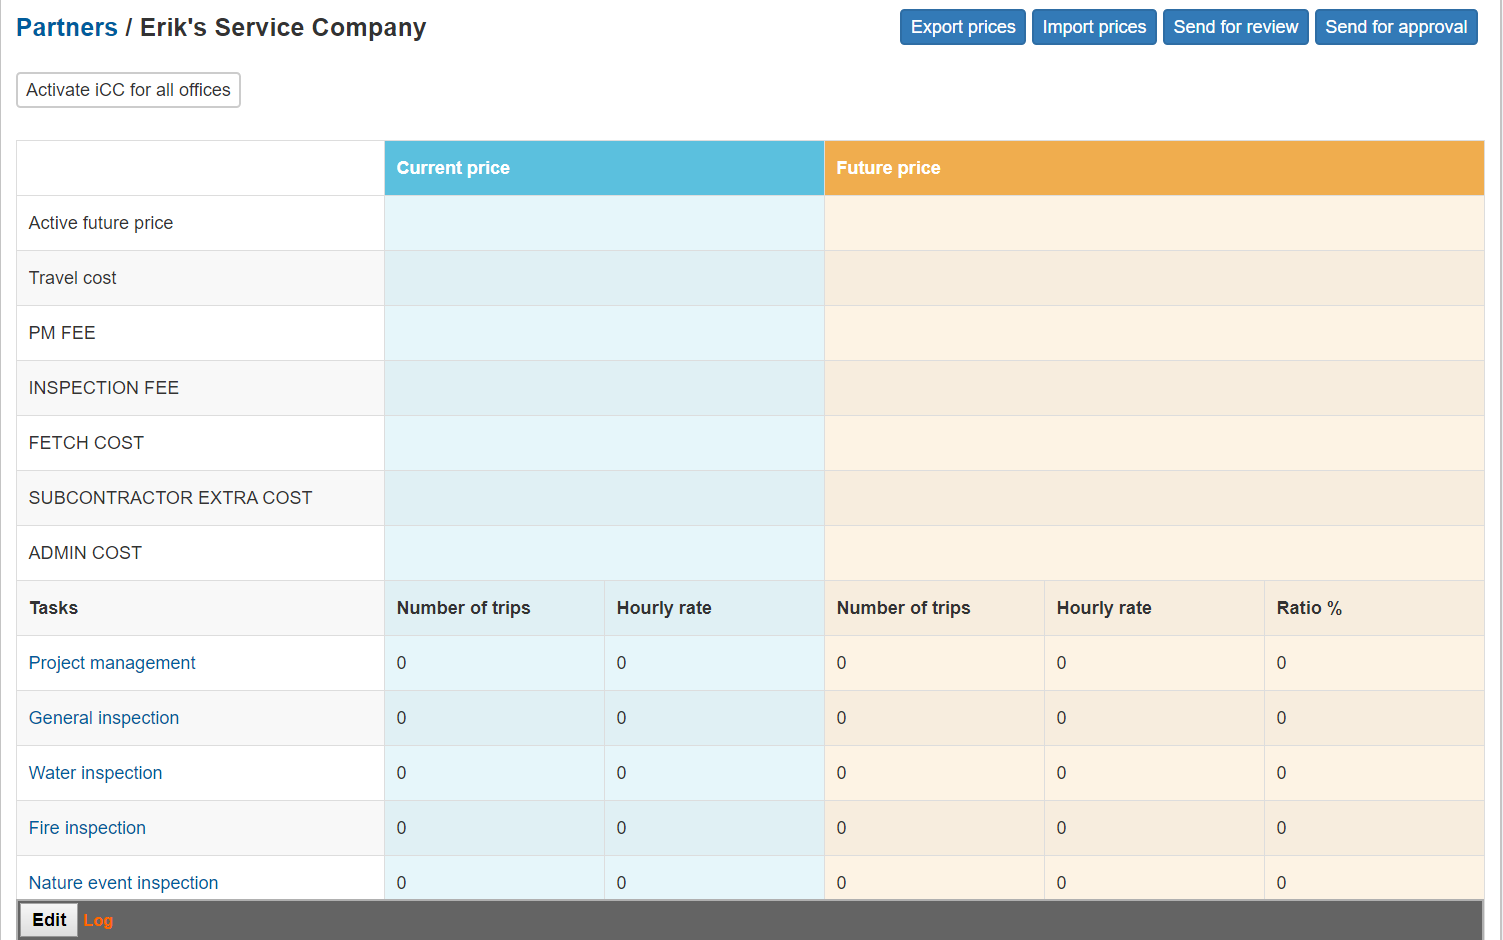
On the top right you have four buttons:
Export prices – Generates an excel file containing the current prices of the partner
Import prices – Lets you import prices from a previously exported price file (see ‘Export prices’ above)
Send for review – Sends the prices for review from the partner
Send for approval – Sends the prices for approval from the partner
These four buttons are explained in more detail later on.
The price structure contains three main columns; to the left you find the different general prices on top, then the different tasks below. In the middle, in blue, you have the current price set, i.e. the prices that are currently in use. To the right, in orange, you find a future price set, i.e. prices that will be taken into use at the selected date.
To the bottom left you will find an Edit button and a log. The log records changes made in the price set for the partner by either the insurance company or the partner.

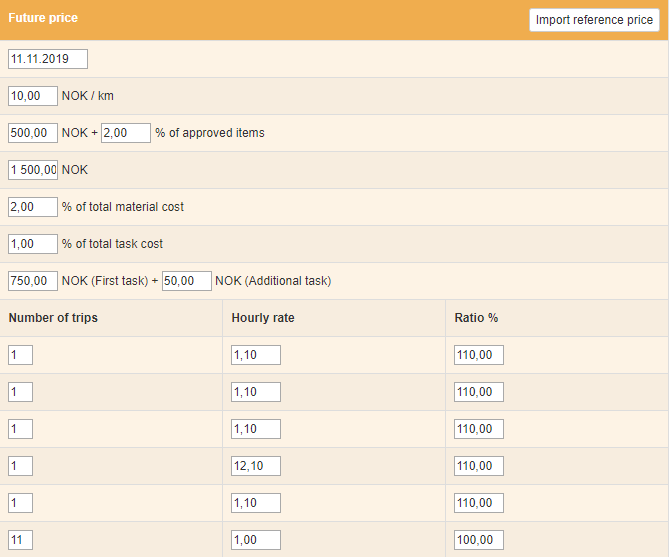
By clicking Edit, you can set an activation date for the new prices, as well as making changes to the general prices, the number of trips and the hourly rate for each task. To the right there’s a column called Ratio %. This can be used instead of the hourly rate column to make changes, e.g. if the hourly rate for Carpentry work increased by 5 %, you can put 105 % in the ratio column on the row for carpentry work, which will then automatically lead to the hourly rate for the task to be updated accordingly. Note that the ratio column can only be used when there’s an hourly rate to begin with, so this function is most useful when making changes to prices. By clicking Import reference price to the top right, the general reference prices as set under Fixed price structure -> Reference price will be imported for the partner.

On the bottom left side, where you clicked Edit earlier, there’s now a Save and a Cancel button. Remember to save changes before leaving the page.
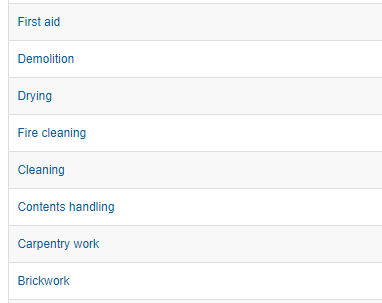
Block prices, i.e. the work items that are not based on amount of hours, are edited separately for each task. This is done by clicking on the task you wish to add prices for, for example under Contents handling. Here the fixed prices for several work items are not based on work hours but are defined manually. For example, storage in off-site storage room, that is a fixed price agreed between insurance company and supplier, that needs to be input manually.
A new window will open where you can view the work items for the task, with the current prices.


Click Edit on the bottom right to make changes to the prices. Remember to press Save when you’re done making changes. The block prices follow the same activation date as the rest of the price list.
Offices
The office level list looks similar to the partner list. It lists all offices added to the portal and shows whether an office has been activated for iCC (meaning that at least one task has been activated for iCC), and whether the office uses partner level prices or not. It is possible to filter after specific companies or cities, for offices that do or do not use partner level prices, or for offices that have been or have not been activated for iCC.
Click on an office to open the price set for this office.

iCC on office level works the same way as on partner level, so the description from Partners applies also to offices.
The main difference between partner and office level is seen on the top left side of the office view. You find two extra functions here:
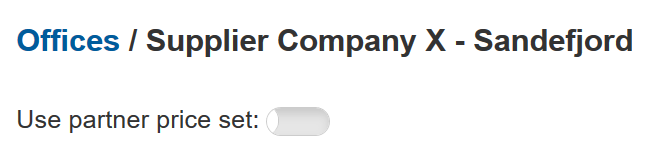
- Use partner price set
- Edit tasks that the office can do in iCC
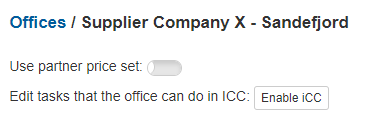
By activating the Use partner price set, the office will start using the same prices as set on partner level. Note that the partner price manager has the same function available. Note also that when this function is activated, only the Export prices button will remain to the top right.
By clicking Enable iCC next to Edit tasks that the office can do in iCC, you can choose which tasks that iCC should be activated for in iCC. Tasks that are activated for iCC will require the partner to use iCC for creating a budget and sending for approval, whereas tasks not approved for iCC will follow the general budget process where a single budget is uploaded under the Budget tab in a case.
iCC Price Management for Service Companies/Suppliers
iCC Price Management for companies in the partner network is available to the company’s price manager and is found under Company admin -> Fixed price structure. This section explains how supplier companies and other partners go about price management and is thus only relevant for users from such companies. For insurance company users, please refer to iCC Price Management for Insurance Companies.
It is possible to set prices on company level, office level, or use a combination of both. Which option(s) you should use might depend on your contract or other agreements with an insurance company.
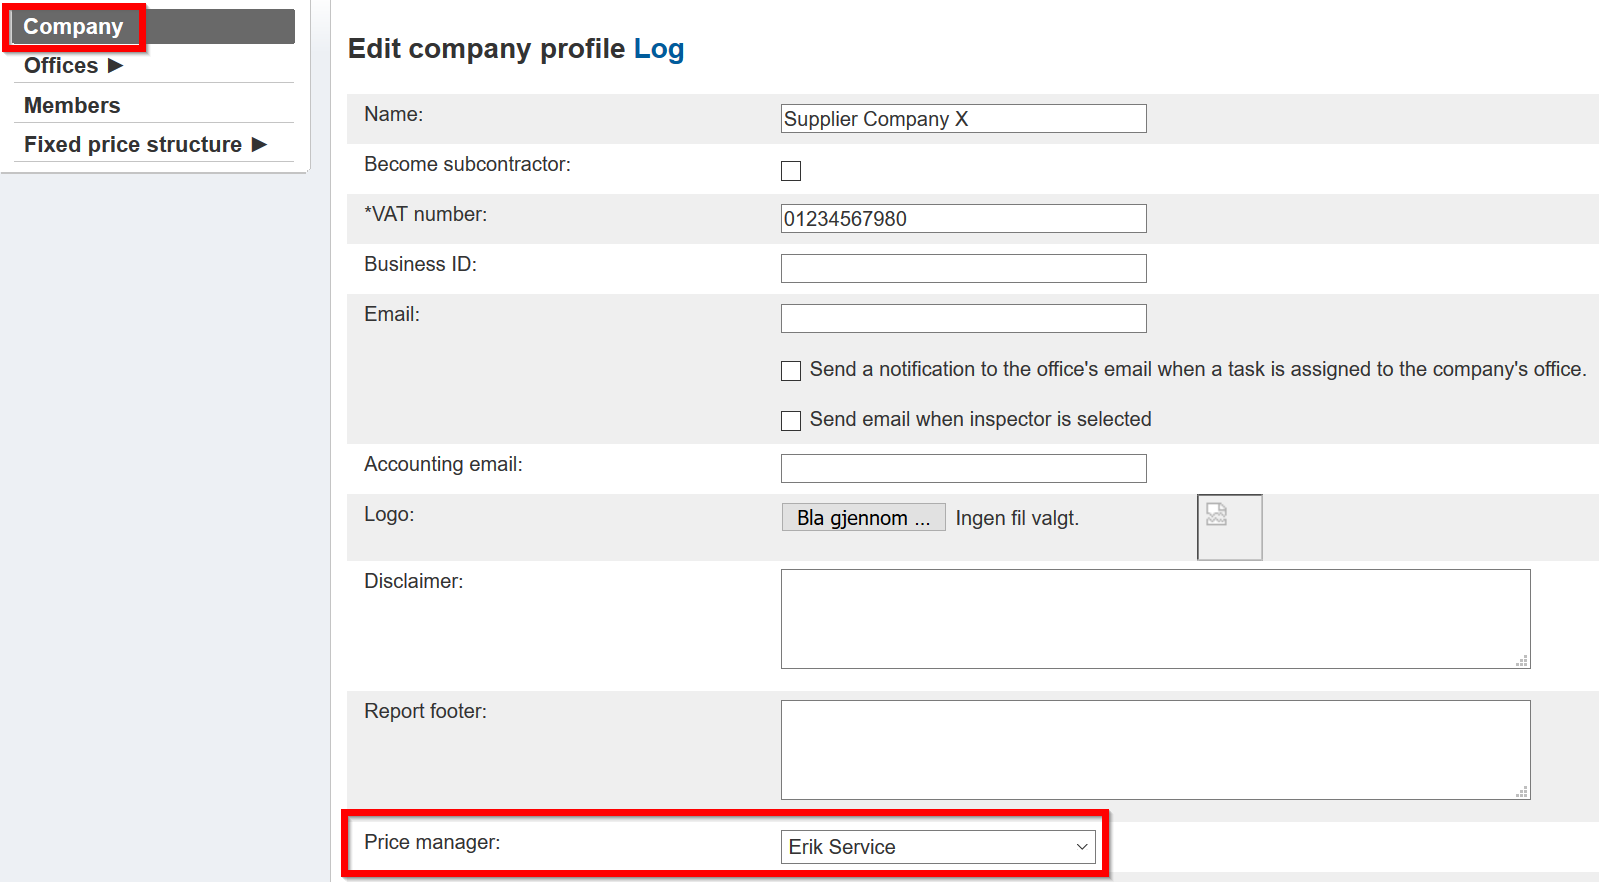
Setting a Price Manager
Before a supplier can view, set and approve prices, they must set a price manager. Only the price manager has access to the price structure section of the company admin pages. To set a price manager, go to Company admin -> Company, scroll down to Price manager, and select the user who should be set as price manager.
For Contractor customers this is done from Partners -> Edit own company.
If a price manager is set as unavailable, the price manager’s deputy will gain access to the price structure section until the price manager is set as available again. The deputy will also receive emails that would normally go to the price manager.
Partners
Here you can view and set prices on partner level. Prices that are set on partner level can be used for all or some of your offices.

Note that for Contractor customers, you can toggle between different insurance companies through tabs above the partner or office list:

By clicking the name of your company, the prices on partner level will open.

On the top right you have four buttons:
Export prices – Generates an excel file containing the current prices of the partner
Import prices – Lets you import prices from a previously exported price file (see ‘Export prices’ above)
Send for review – Sends the prices for review from the insurance company
Send for approval – Sends the prices for approval from the insurance company
These four buttons are explained in more detail later on.
The price structure contains three main columns; to the left you find the different general prices on top, then the different tasks below. In the middle, in blue, you have the current price set, i.e. the prices that are currently in use. To the right, in orange, you find a future price set, i.e. prices that will be taken into use at the selected date.
To the bottom left you will find an Edit button and a log. The log records changes made in the price set for the partner by either the insurance company or the partner.

By clicking Edit, you can set an activation date for the new prices, as well as making changes to the general prices, the number of trips and the hourly rate for each task. To the right there’s a column called Ratio %. This can be used instead of the hourly rate column to make changes, e.g. if the hourly rate for Carpentry work increased by 5 %, you can put 105 % in the ratio column on the row for carpentry work, which will then automatically lead to the hourly rate for the task to be updated accordingly. Note that the ratio column can only be used when there’s an hourly rate to begin with, so this function is most useful when making changes to prices.

On the bottom left side, where you clicked Edit earlier, there’s now a Save and a Cancel button. Remember to save changes before leaving the page.


Block prices are edited separately for each task. This is done by clicking on the task you wish to add prices for, for example Carpentry work.
A new window will open where you can view the work items for the task, with the current prices.
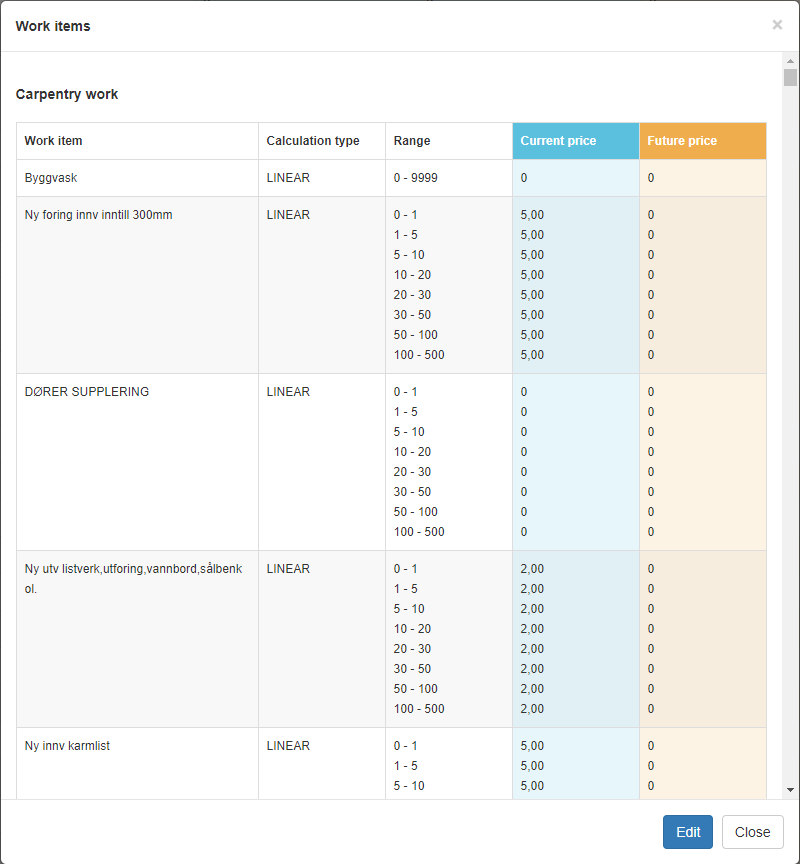

Click Edit on the bottom right to make changes to the prices. Remember to press Save when you’re done making changes. The block prices follow the same activation date as the rest of the price list.
Offices
The office level list looks similar to the partner list. It lists all offices added to the portal and shows whether an office has been activated for iCC (meaning that at least one task has been activated for iCC), and whether the office uses partner level prices or not. It is possible to filter after specific cities (where the office addresses are), for offices that do or do not use partner level prices, or for offices that have been or have not been activated for iCC.
Click on an office to open the price set for this office.

iCC on office level works the same way as on partner level, so the description from Partners applies also to offices.
The main difference between partner and office level is seen on the top left side of the office view, where you find the following extra setting:
- Use partner price set
By activating the Use partner price set, the office will start using the same prices as set on partner level. Note that the insurance company has the same function available. Note that when this function is available, only the Export prices button will remain to the top right.
Importing and Exporting Prices
It is possible to import and export prices, both to/from partner level and to/from offices. This can be useful to make it easier and faster to set the prices for many offices. It is also possible to import prices to an office even if not all the prices are the same as for the office or partner where the price file was exported from, in which case you can make any necessary adjustments to the prices after importing the file, in contrast to setting all the prices manually from scratch for every office. In other words, the import/export feature, much like the feature for using partner level prices for an office, reduces the amount of manual labour and time spent on setting up prices among different partners and offices. Both insurance company users and partner price managers have the import/export feature available.
When you export prices either from an office, or from partner level, an excel document will be generated. This file contains three sheets, one for each of the price types, and contains the prices defined for the office or partner from where it was exported.


When the price file has been exported, you can save it on your computer. Then you go to the office or partner where you want to import the prices to and click Import prices. A small pop-up appears, where you select an activation date for the prices, and attach the price file you saved on your computer. Confirm by clicking Import, and the prices from the file will be imported, and the new prices will be taken into use on the select activation date.

Reviewing and Approving Prices
Whenever prices are sent for review or approval, an email is sent to the receiving party. If the insurance company sends prices for review or approval, the partner’s price manager is the receiver of this email, whereas when a partner sends prices for review or approval, the email is sent to the address defined under Company admin -> Company -> Overview:

The process of sending prices for review or approval is the same for the insurance company and the partner price manager; both have the same functionality for sending and approving prices, and the same notification framework, so the instructions below apply for both parties.
Review
When a party sends prices for review, the receiver will receive an email which contains a PDF for each task type. By opening these attachments, the partner price negotiator or person from insurance company can view the prices set. The email also contains a direct link to the Fixed Price Structure section in the portal, where it’s also possible to view the prices. If needed, changes can be made to the prices before they are sent for approval.
Note that sending prices for review is optional, it’s also possible to send prices straight for approval, without first having sent for review.

Approval
When sending prices for approval, an email similar to the one sent when sending prices for approval is sent, containing the same attachments and a direct link to the portal, although with slightly different text, reflecting that prices have been sent for approval, rather than for review.

When opening the partner or office for which the prices have been sent for approval, the buttons for sending for approval or review have been replaced with a button called Back to draft. By clicking this button, the prices go back to a draft status, as they were before they were sent for approval. Changes can then be made to the prices, before being sent for approval again.
If everything is ready, then there’s a button called Approve prices on the top right corner of the future price column.

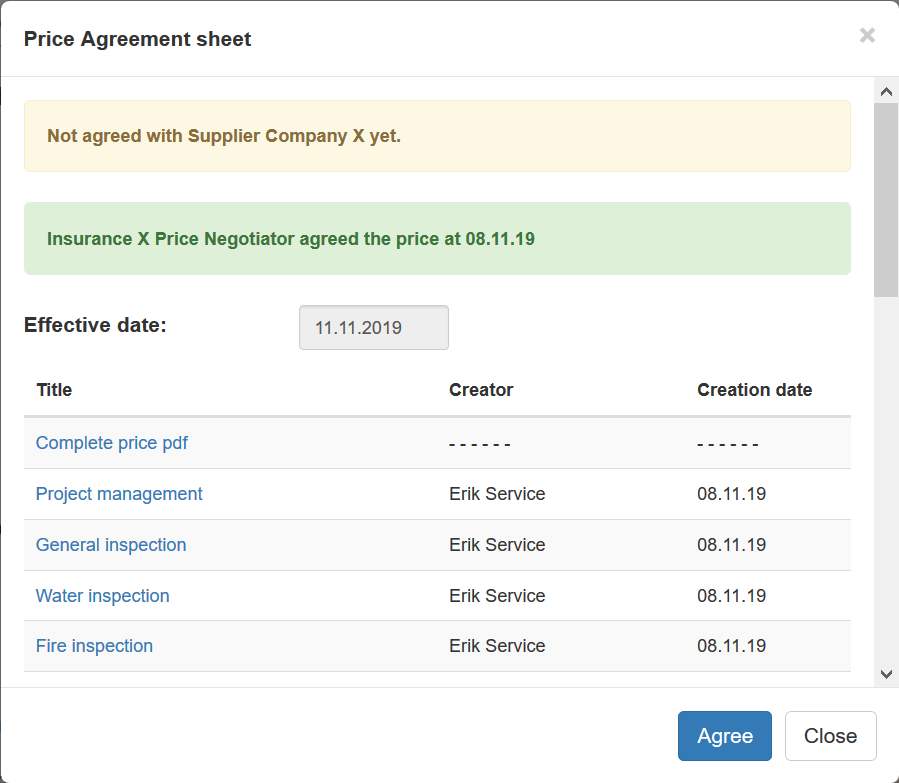
When clicking the approval button, a new window (price agreement sheet) will open where you can find the prices for each task as a PDF which can be opened by clicking the tasks. When you are ready to approve the prices, click Agree to the bottom right. Both parties have to do this step before the prices will be taken into use.
When opening the price agreement sheet, it will show who has approved (in green) and who has not yet approved the prices (in yellow). When both parties have approved the prices, both parties will be shown in green in the price agreement sheet. It is still possible to move the prices back to a draft state before the activation date of the new prices. If this is done, prices will have to be sent for approval again and approved by both parties once more before the prices will be taken into use.
New prices that have been approved by both parties, will be activated on the activation date at 0:00. New work item prices will be applied to all new cases, but also on existing cases. In existing cases, the new prices will be applied for any work item that is edited. Work items that are not edited will keep old prices.
For travel compensation, new prices or settings will only be activated for tasks that are created after price activation, not for tasks that were already existing when the prices were activated.