in4mo Task Reporter 16.0 Introduces Improved Security, and Ways to Use LiDAR for Creating Floorplans
Mobile release 16.0 will introduce several improvements to the mobile application. These improvements are described below. Depending on the platform, the look of the mobile application may differ slightly from the screenshots shown here.
Possibility to Change Password in Task Reporter
In recent updates we have increased password security and have worked on aligning the password handling processes to be similar in both the Task Reporter app and the portal. In this release we are finally enabling the possibility to change the password in the app. This means that when you wish to change the password or get a password expiration reminder informing you that you will soon need to change the password, you can now do it in the app and no longer need to access the web portal for it.
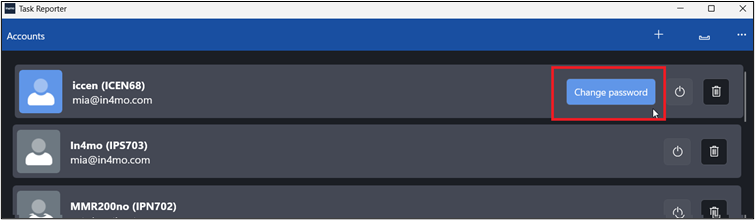
For the account that is currently being used, the password can be changed in the account list, where you will see ‘Change password’ by the account (only on iOS and Windows devices):
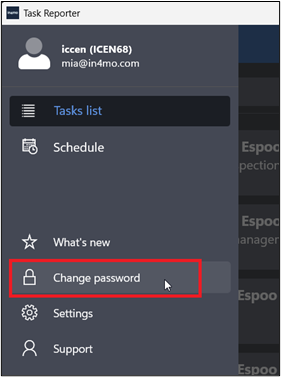
Or from the app’s menu by pressing ‘Change password‘ (all devices, including Android):
PIN-code or Biometric Authentication Required Upon Startup and After Inactivity
As a security measure to prevent unauthorized users from accessing data in the in4mo TaskReporter mobile application, users of the app will now need to enter a 4-digit PIN code or use biometric authentication like fingerprint scanning or face recognition when taking the app into use again after closing it and/or after ≥20 minutes of inactivity.
On devices that do not support biometric authentication the only option is to use a PIN code.
Closing the app or leaving it unused for ≥20 minutes does not log the user out of the app, nor does any data get lost, it only means that the session expires and becomes protected against unauthorized access.
NOTE 1: Biometric authentication is implemented on iOS (Apple) and Android (Samsung etc) devices only, while Windows devices will have PIN-code authentication only.
NOTE 2: The PIN code and Biometric Authentication are device specific and not synchronized between devices. This means that if you use the in4mo app on more than one mobile device, an authentication method needs to be defined for each device. One authentication method/device is enough, even if you might have several accounts in the app.
PIN code
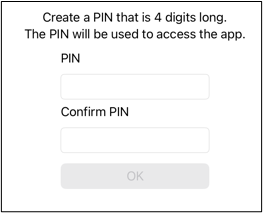
When TaskReporter version 16.0 is opened for the first time, the first thing that will be shown is the PIN view where you will be asked to create a PIN. This step cannot be bypassed. The PIN-code needs to be 4 digits. If your device supports biometric authentication and you have set that up as an authentication method in your device’s settings, you will be able to choose to use biometric authentication on TaskReporter after having set the PIN.
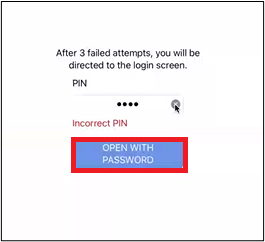
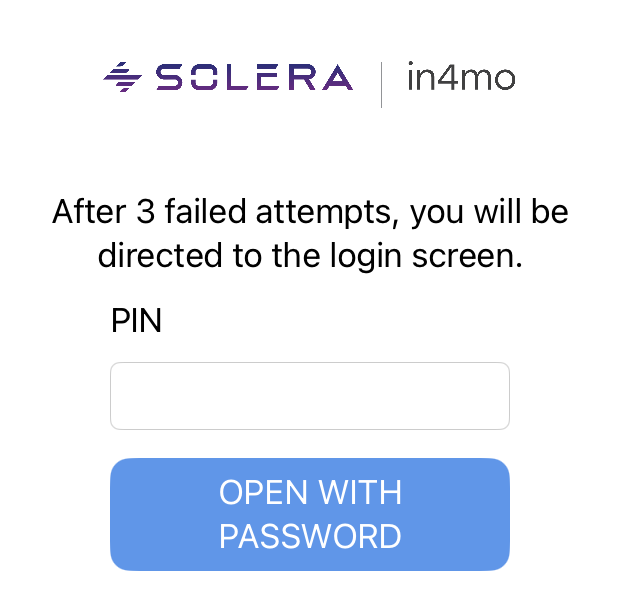
If the PIN code is forgotten, or a faulty PIN is entered 3 times, the usual account credentials i.e. the email address and password, can be used to access the app, after which the user will be asked to define a new PIN code.
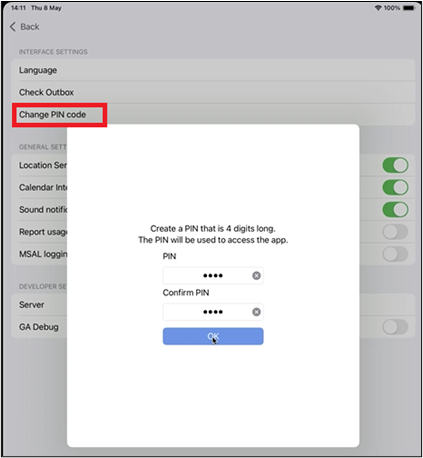
The PIN code can be changed, if needed, in the app’s settings, by pressing ‘Change PIN code’.
Biometric Authentication
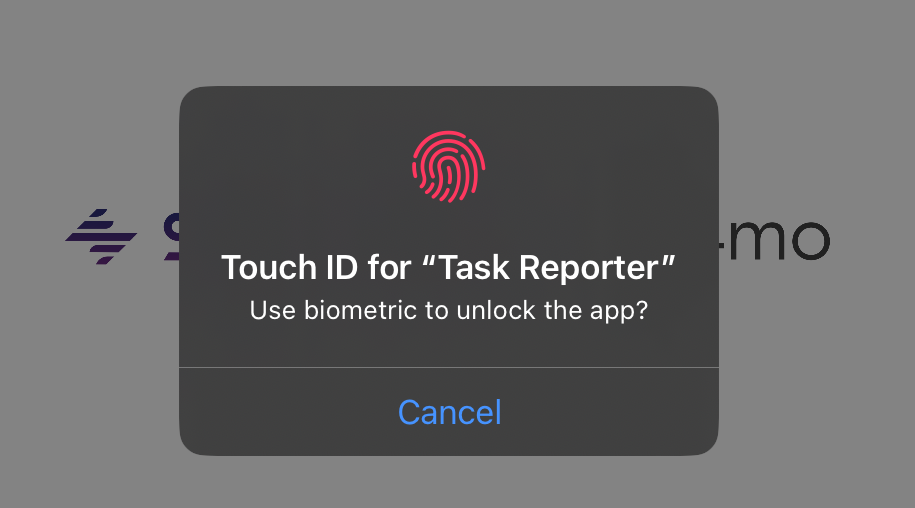
Using biometric authentication in the Task Reporter app requires the device to support such authentication methods, and for the chosen alternative (facial recognition or fingerprint scanning) to have been set on device level. Only then can biometric authentication be used in the Task Reporter app. Changing the biometric authentication on the device automatically applies the change to Task Reporter also.
If your device supports biometric authentication and you have set that up as an authentication method in your device’s settings, you will be able to choose to use biometric authentication on TaskReporter after having set the PIN. When the biometric method is enabled, it is used as priority option while the authentication PIN is used as backup.

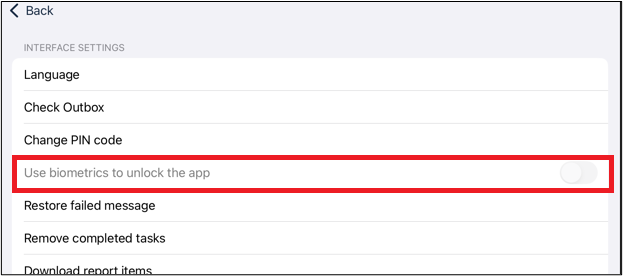
Biometric authentication can also be enabled afterwards in the app’s settings, by activating the setting ‘Use biometrics to unlock the app’ (given that biometric authentication has been set up on the device).
In case Biometric authentication fails (after the number of allowed attempts defined in the device settings) the PIN view is shown to the user instead. The usual account credentials i.e. the email address and password, can also be used to access the app if needed.
WINDOWS: Changed Build Platform
To ensure smooth usability of the Task Reporter app, we have upgraded the platform on which the Windows version of Task Reporter is built to the newest version. Windows devices that may not yet have the compatible Microsoft package to support this, will notify users of the need to install some additional Microsoft software after the Task Reporter app has been updated. After installing the needed software, the 16.0 Windows Task Reporter version can be opened and used as normal.

Floor Planner Improvements
In this mobile version we are introducing several improvements related to the FloorPlanner drawing tool. These improvements are presented below.
iOS: Create Floorplans in FloorPlanner With the Help of LiDAR
NOTE: This functionality is currently supported only by iPad Pro tablets with OS 17.0 or newer. 3D scanning is not yet supported by other platforms.
We are proud to introduce a new functionality which will make creating floorplans easier than ever before. LiDAR is a light scanning technique for scanning spaces in 3D, that can now be used on the in4mo TaskReporter app on iOS devices to scan rooms and create floorplans faster than before. With the tool it is possible to get the shapes and positions of walls, corners, ceilings, split walls, windows doors and other openings in the walls into your floorplan by doing a simple scan.
Scanning a room with LiDAR does not guarantee a perfect room is automatically created, but using LiDAR will make the creation of floorplans significantly faster than creating them manually from scratch.
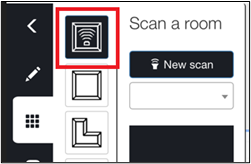
To use LiDAR to create floorplans, go to the FloorPlanner tool. Here you will see a new icon in the menu on the left.
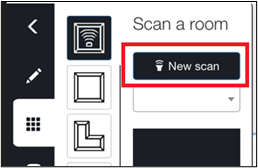
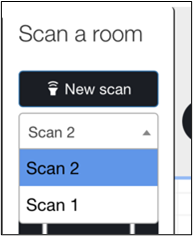
Pressing the icon will open the LiDAR functionality. To do a scan of the space, press New Scan. The Task Reporter app needs to have permission to use the device’s camera for scans to be possible.
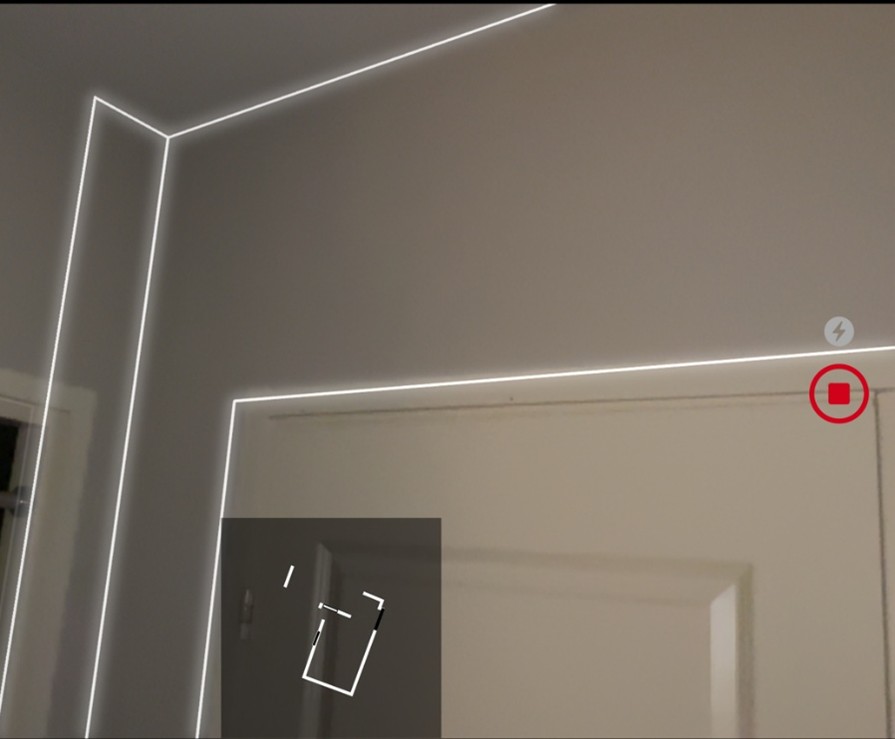
In the view that opens you can see the space you are in and can initiate the scan when you are ready, by pressing the red circle. For optimal results, you are recommended to clear the area of excess furniture and other objects, and ensure good lighting in the space. The scanning view will also provide instructions on how to start the scan and how to move the device for optimal results (e.g. Move device to start, Point camera at top edge of wall, Slow down, More light required, Move farther away).
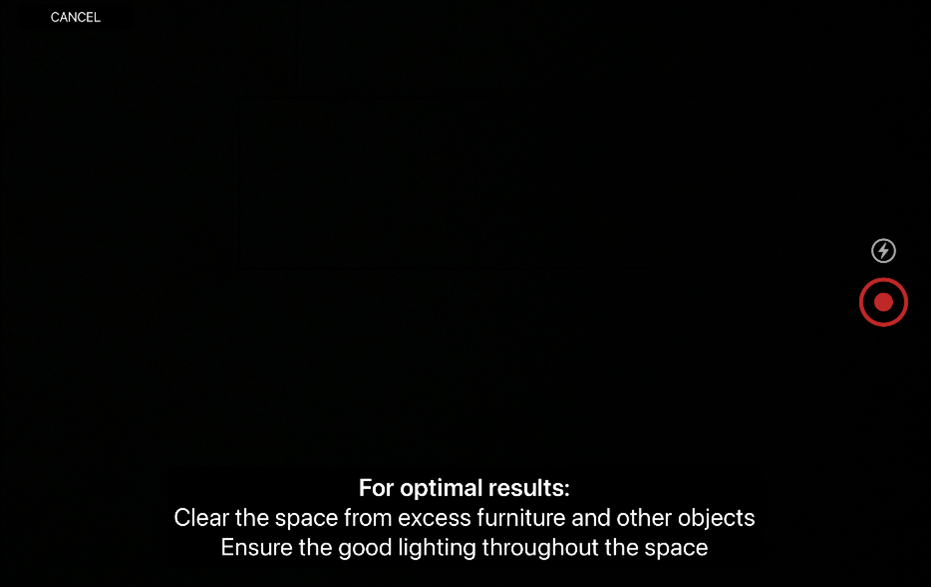
The lightning icon can be used to turn on/off the device’s flashlight if more light is needed during the scan. The LiDAR window is closed by pressing Cancel; doing so will bring you back to FloorPlanner.
When the scan has started, the space you are scanning will be shown with white lines marking the edges of the scanned surfaces, and a 2D -rendering of the scanned surface and space will develop in the bottom part of the screen as the scan progresses. The stop button (red square) will stop the scanning.
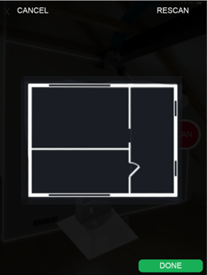
After the scan has ended, a preview of the rendition will be shown, with options to discard the scan (Cancel), do another scan (Rescan) or save the scan and return to FloorPlanner (Done).
Once back in the FloorPlanner view, all the scans will now show in a drop-down menu and can be used for creating the actual floor plan.
NOTE: The scans are only stored for as long as FloorPlanner is in use. Once FloorPlanner is exited, the scans will also disappear.
Choosing a scan from the drop down menu will show a small preview of the rendering in the box below. To use the rendering in the actual floorplan, press it in the preview and drag it to the floorplan area, the same way you would when choosing different shaped rooms during manual floor plan creation. After that you can adjust the walls and details as needed.

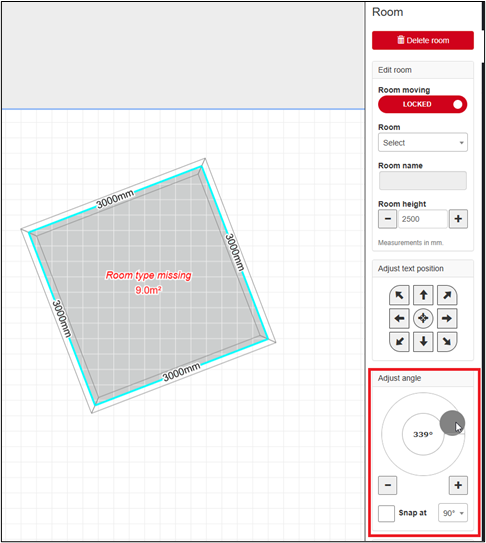
Possibility to Rotate Rooms
The possibility of rotating objects is familiar from before, but now we are extending this functionality to rooms, making it possible to adjust the angles of rooms using a wheel in the right-hand-side room menu.
Automatically Calculated Wall Heights When Splitting/Combining Sloping Walls
When splitting a sloped wall, the wall heights at the ends of the newly created walls are now automatically calculated and set so that the slope of the wall stays the same even after the split. Similarly, when combining sloping walls, the app now automatically calculates the correct heights on the new wall, so the start/end heights of the new wall remain the same as before combining. This eliminates the need to adjust the heights manually.
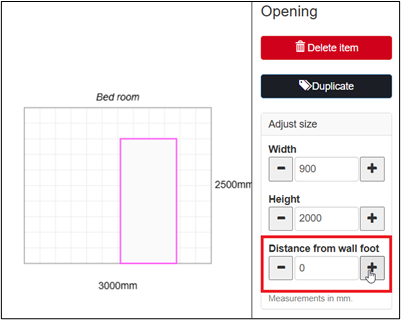
Passageways Are Now Openings
The LiDAR functionality (available on certain iOS devices) handles passageways and openings as one and the same, so to make FloorPlanner compatible with this we have now adjusted the concept of passageways slightly and have renamed them as openings instead.

The icon and the default size of the item stays the same, but we have added the possibility to define the distance from the base of the wall, same as for windows, allowing for openings to be used in versatile ways.
When an opening is added in the room view, the distance will by default be 0 (zero), i.e. the opening starts from the floor. When an opening is added in the wall view, the opening can be placed anywhere on the wall, just like when adding a window. The distance from the floor can be adjusted whenever needed.