RFQ – Request For Quotation
The RFQ feature is a great complement to iCC for bigger repairs or if you have a limited partner network. Here we go through the process of running an RFQ in in4mo.
Overview
In in4mo it is possible to send a request for quotation (abbreviated as ‘RFQ’ both in these instructions and in the system) when assigning tasks. These instructions explain how RFQs are initiated, kept track of and updated, how an outcome decision for the RFQ is made, as well as who can set up RFQs and what kind of permissions the different roles can have.
Who Can Initiate an RFQ?
There are different roles in in4mo that can grant access to initiating RFQs, as well as what kind of other permissions the roles have regarding RFQs. What roles have access to initiate RFQs as well as what kind of permissions these roles have depends on settings in each web portal. The roles which can have access to RFQs are:
- Insurance company members
- External case handlers
- Inspectors with extra authorities
- Project managers
In addition, each of these roles (with the exception of insurance company members, who have all permissions) can be given the following authorities related to RFQ:
- Initiate and edit RFQ
- Make decision on RFQ
- Add new non-in4mo partners to RFQ
If you want to know more about which roles have access to RFQ, and what permissions they have, please refer to the insurance company.
Initiating an RFQ
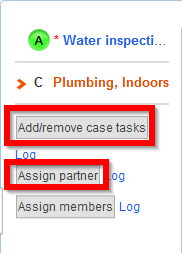
To initiate an RFQ, the task(s) which you want to include in the RFQ must first be added. This can either be done manually through the Add/remove case tasks button (provided your role has access to add and remove tasks), or they might have been added automatically through iCC or the main inspection report, depending on portal settings.
When the tasks have been added, click on Assign partner (requires role access to add and remove tasks). The usual window for assigning tasks to companies will open.
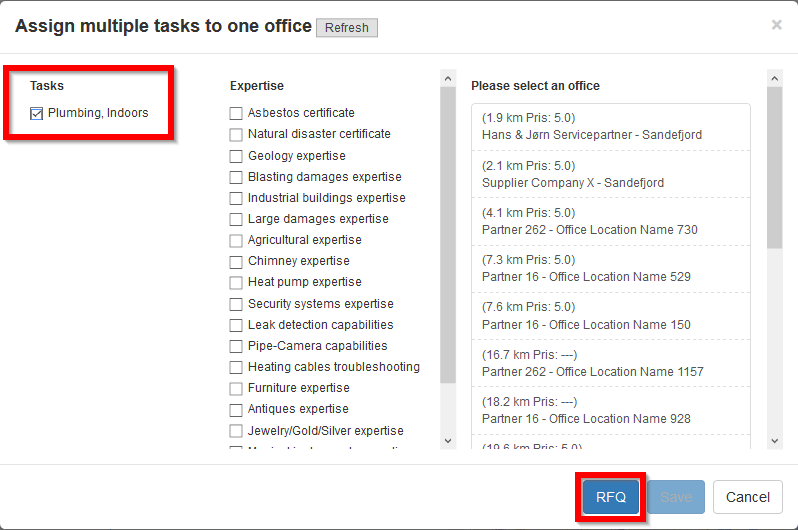
Mark the task(s) to be included in the RFQ, then click on RFQ to the bottom right. Here we are following an example in which one task has been selected, however it is also possible to initiate an RFQ for multiple tasks together.
The window that opens next is where the RFQ is created.
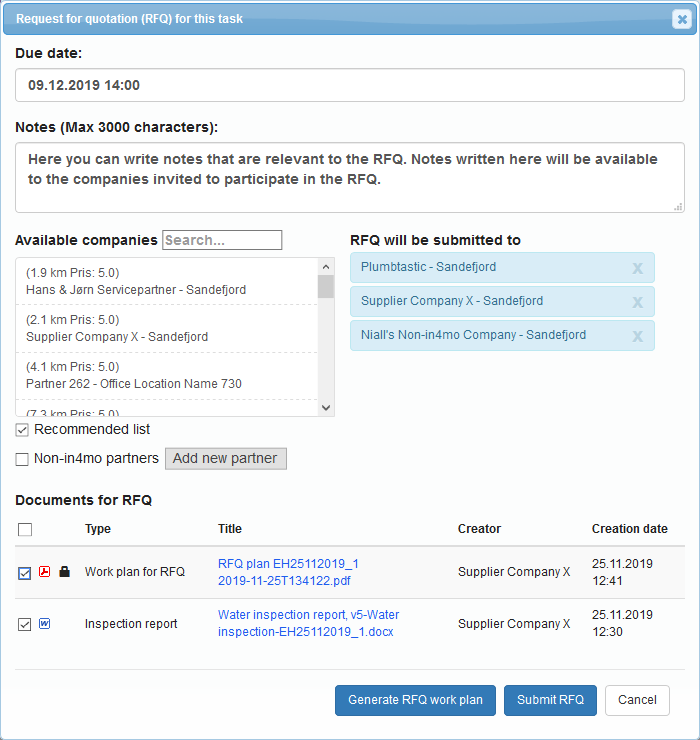
You select the Due date for the RFQ, meaning the deadline for the invited companies to send their quotes. The Notes field can be used for writing down any information relevant to the RFQ. These notes will be available to the invited companies.
The list Available companies lists offices you can send the RFQ to. By default, the list shows the recommended list. You can show the entire office list by removing the marking from the checkbox Recommended list below the list. By checking the box Non-in4mo partners the list will show any non-in4mo partner added to the portal which are available for the task type(s) included in the RFQ. By clicking the button Add new partner, it is possible to add a new non-in4mo partner, which will be included in the RFQ. You can define whether this company should be available through RFQs only, or if it should be available also through normal task assignment in the same way as other non-in4mo partners. Companies that will receive the RFQ are listed on the right side. If you wish to remove a company from the list, you can do so by clicking the X next to the office you wish to remove.
At the bottom you can select what documents should be added to the RFQ under Documents for RFQ. Documents added here will be available to the companies invited to the RFQ. The list shows the documents available in the document library in the case. If iCC is in use in the portal, it is also possible to create a work plan for the RFQ directly from this window by clicking the Generate RFQ work plan.
When everything is ready, click the Submit RFQ button. An email will be sent to all parties invited to the RFQ, who will have access to the RFQ page through this email.

You will be returned to the case, where the selected task(s) will now be marked with the status RFQ.
Editing or Cancelling RFQs
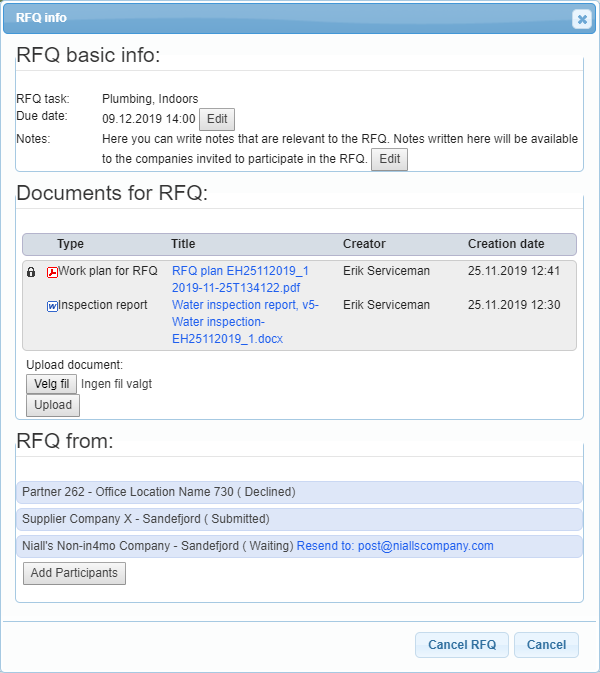
While an RFQ is still ongoing, it is possible to change the due date for submitting a quotation (e.g., prolong the deadline to get more quotations), to edit the notes field, to add documents, to resend the RFQ invitation to participants who have not yet submitted an offer or declined to do so, and it is also possible to add more participants to the RFQ.
Finally, it is also possible to cancel the RFQ altogether, by clicking Cancel RFQ. When an RFQ is edited or cancelled, the invited companies will receive a notification about the change(s) made.
Deciding the Outcome of a Finished RFQ
When the deadline for an RFQ has expired, it is time to decide the outcome for the RFQ. It is possible to select a winning offer or to choose that there is no winning offer, as well as to extend the deadline, giving participants more time for submitting offers if some are missing, and send the invitation to the RFQ to more companies.
Users who can decide on the outcome of the RFQ will see a red arrow in the case list for the case. When opening the case, there will be red arrow next to the task(s) for which a decision must be made. There is also a yellow box above the case information telling what kind of action is required in the case.

For insurance company users, the dashboard includes a row for RFQ tasks, which indicates when the deadline for an RFQ is.

To see the result of the RFQ, you must first select the task in question. Under Task information it will now say Check RFQ result. Click on the blue text to open the result of the RFQ.
![]()
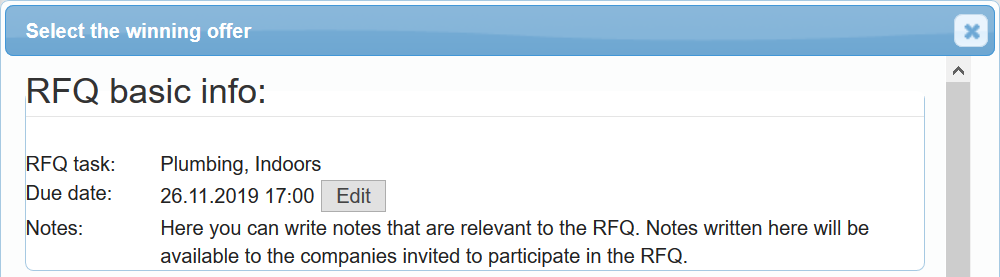
When you click Check RFQ result a new window will pop up, where you will find some basic information about the RFQ on top, and the result of the RFQ below. You may have to scroll down to see all results, depending on how many participants were involved. Under the RFQ basic info you find an Edit button next to the due date. If you wish to extend the deadline for the RFQ, you can click on this button to do so.
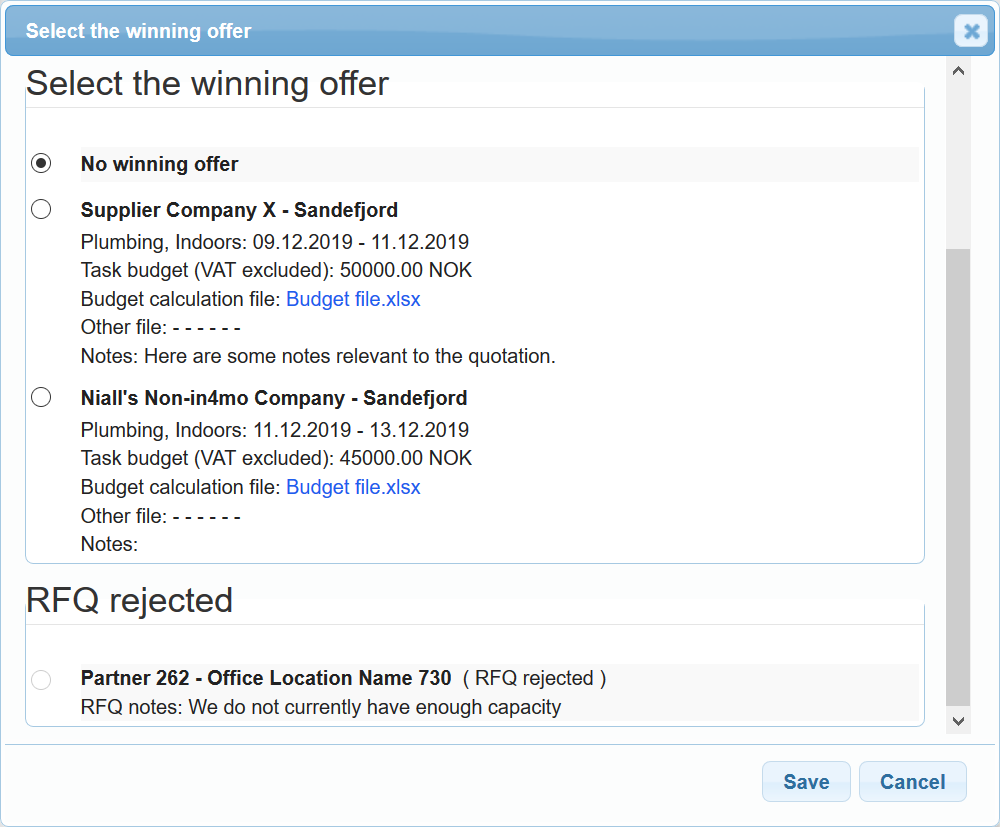
Under Select the winning offer you will see the submitted quotations. For each company you will see what time frame they have put, as well as their budgets for the job (excluding VAT), a budget file, any other file provided, and any notes provided.
At the bottom, under RFQ rejected, you will see a list of the participants who either decided not to send a quotation by rejecting the RFQ, or who have not responded to the request.
To select a winning offer, mark the winning offer and click Save at the bottom right. If you select No winning offer, the task will go back to status C. If you select a winning offer, the selected partner will be assigned to the task, and the budget will automatically be added to the Cost control tab of the case. If the winner is from the partner network in the portal, the selected responsible person will also automatically be assigned to the task.
For insurance company members, the result of the RFQ can also be seen in the grand log in the case at any time.

How to Proceed with Tasks Assigned to a non-in4mo Partner
If a task is assigned to a company from within the partner network in in4mo, the task will proceed just as any other task. However, if a task is assigned to a non-in4mo partner, this partner does not have access to in4mo. The company will receive an email stating that their quotation was selected as the winning offer, however, they do not have access to the portal, and cannot report in the case in the same way as a company from the partner network.
When an insurance company member opens the task assigned to a non-in4mo partner, they will see a button called Mark this task as completed under Task information. By clicking this button, the task will move from status B++ to 4 and can then be approved or rejected as completed in the same way as any other task. If the insurance company receives pictures from the partner, about the progress of the work, the insurance company can add these to the task’s Multimedia.


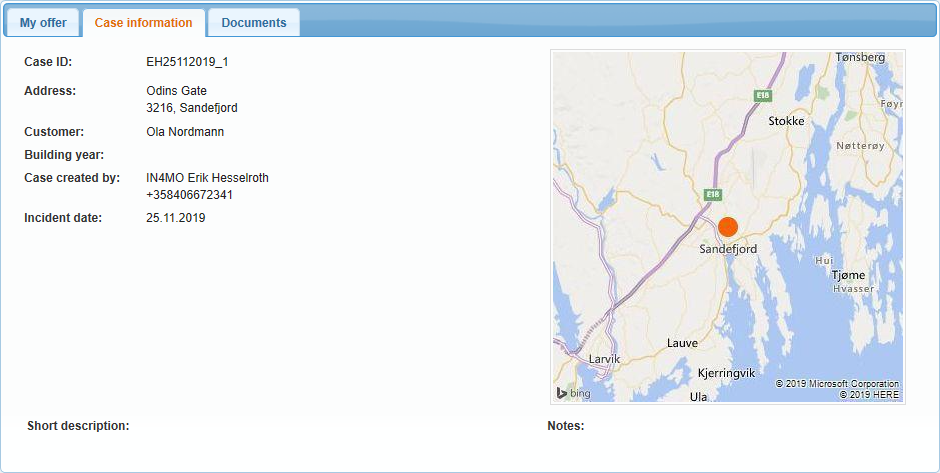
How to Open an RFQ and Send a Quotation
When an RFQ is initiated, the invited parties will receive an email which grants access to the RFQ through a link. When clicking this link, the RFQ page will open in a browser. Here you have access to see information about the case, as well as to submit an offer or decide to not submit an offer. You will find three tabs on the page: My offer, Case information and Documents.
Under My offer you can view information about your offer once you have submitted it.
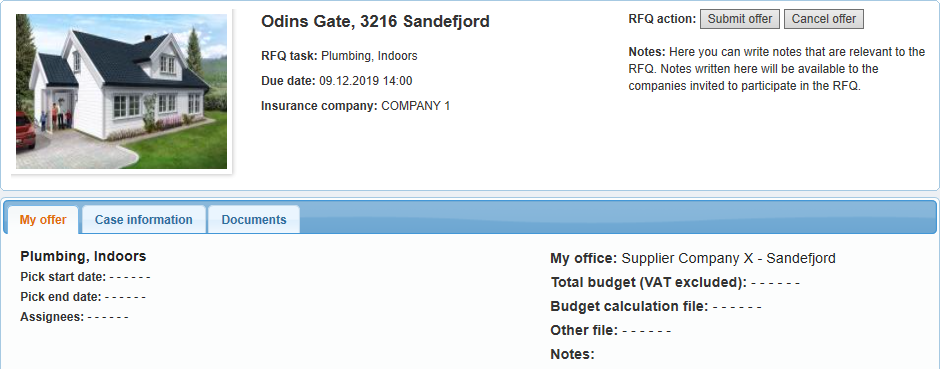
Under Case information you will find basic information about the case, such as the damage site address, as well as a short description and notes from the case.
Under Documents you will find any documents added to the RFQ.

Submitting a Quotation or Choosing not to Send a Quotation
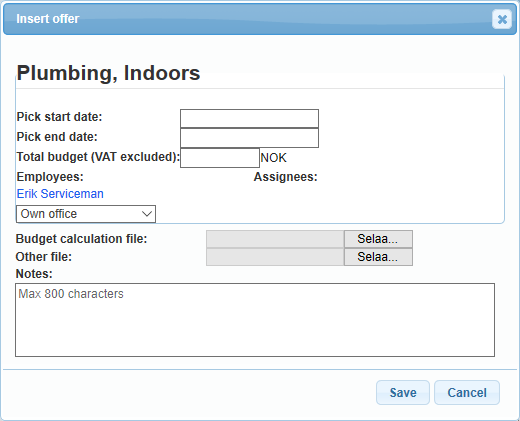
To submit a quotation, click on Submit offer. If you do not wish to send a quotation, click on Cancel offer. You will then be asked to provide a reason for not participating. It will still be possible to submit an offer until the deadline for the RFQ.

When you click Submit offer, a new window will pop up. It is from this window you make your offer. Pick a start and end date for the task, the total sum of your quotation (excluding VAT), select who will be set as the responsible person for the task, then attach a budget file. You may also attach another file if you have more documents relevant to the offer. At the bottom you can add notes to your quotation, which will be available to the person choosing the winning offer. When you are ready, click Save. Your offer has now been submitted and can be seen from the RFQ page under My offer for as long as the RFQ is open. It is also possible to make changes to your offer until the due date for the RFQ.